Raspberry Pi Motor Driver Board
Python Example Programs and Library Download: Motor-HAT-Python3-Library-V5
1. Overview
This is a perfect solution for making motion robots based on Raspberry Pi. This motor driver is powerful enough to drive 4 DC motors or 2 stepper motors, and additionally provides 4 full-speed PWM controls for 4 servos. It has a built-in voltage regulator that directly provides stable power to the Raspberry Pi.
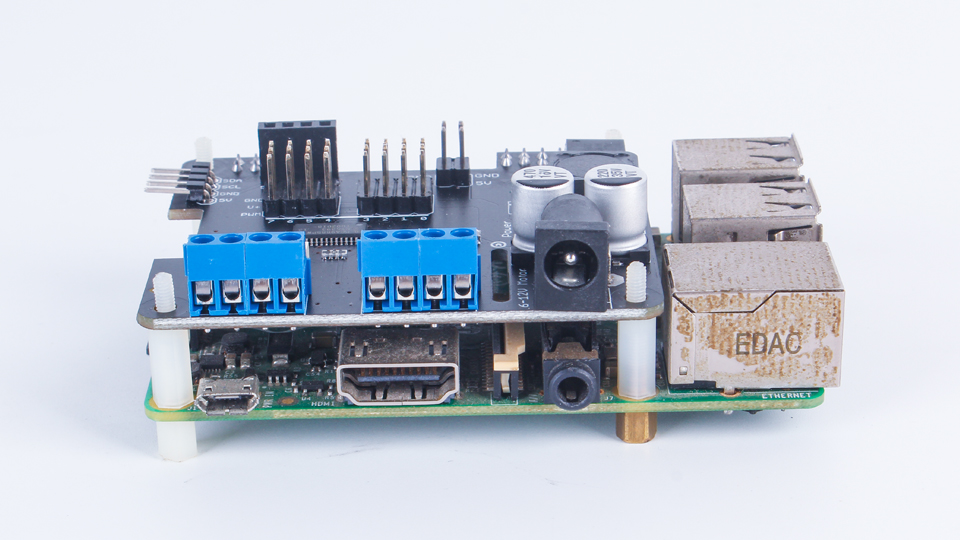
Raspberry Pi does not have enough PWM pins. Using a dedicated PWM driver chip (PCA9685) based on I2C communication to control motor speed and direction saves more Raspberry Pi resources. Only 2 GPIO pins (SDA&SCL) are needed to drive multiple motors, and multiple drivers can be stacked (cascadable) without interfering with other I2C devices.
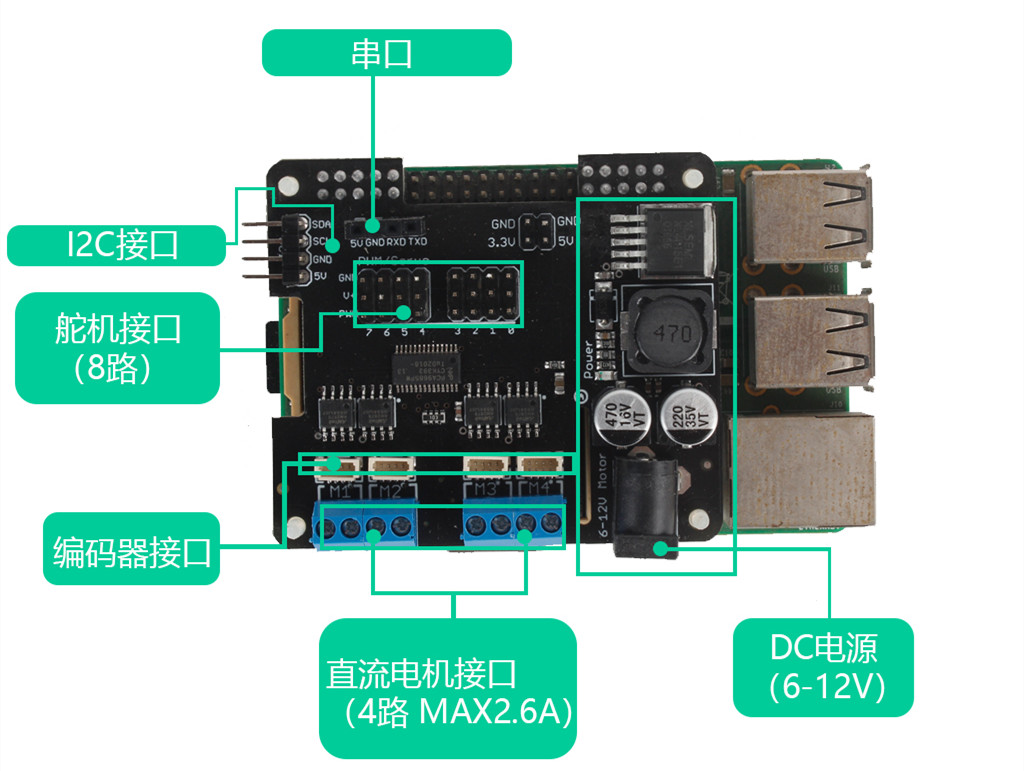
Raspberry Pi Driver V5.0 Interface Diagram
Specifications:
- 2.5A (3.6A peak) output per channel, supporting 4.5-13.5V DC motors;
- Can drive 4 DC motors or 2 stepper motors;
- Additional 8 PWM outputs for controlling 8 servos;
- Built-in voltage regulator providing stable 5V power to Raspberry Pi;
- Customizable I2C address, supporting multiple driver stacking;
- Complete code library and rich examples (Python), easy to use.
2. Power Supply
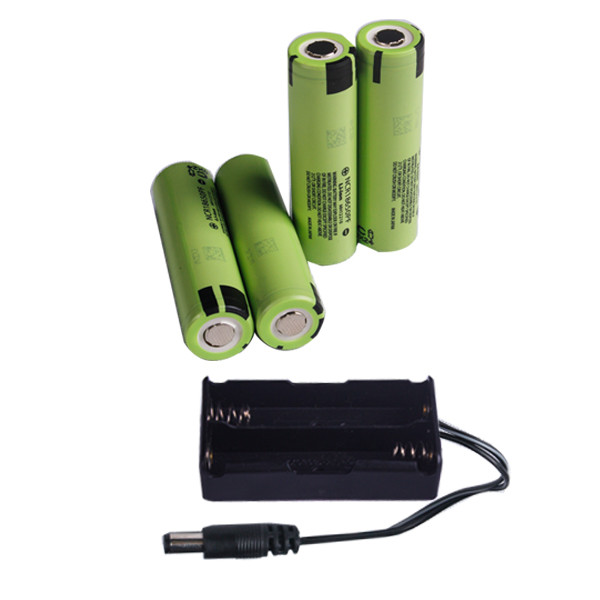
18650 Battery
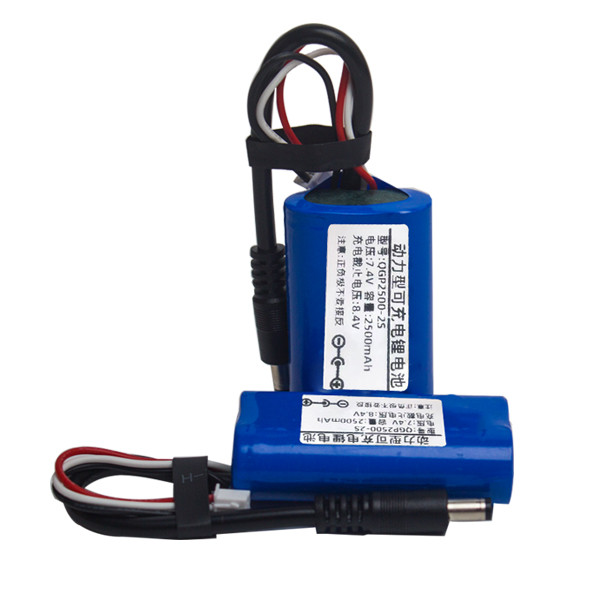
Power Battery Pack (2S)
- Since the driver needs to power both the motors and Raspberry Pi, it is recommended to use a power battery. Supply voltage is 6-12V;
- Motors are powered directly by the supply, so motor input voltage equals the external supply voltage;
- The driver has a built-in voltage regulator module outputting 5V2A for Raspberry Pi and 4 PWM (servo) channels;
- Different power supply methods can be selected via jumpers.
3. Software Installation and Setup
The driver runs on Raspberry Pi in a Linux environment. It provides a Python library and related example code.
First, enable I2C on your Raspberry Pi (refer to online resources for detailed configuration).
Run
apt-get install python-smbus gitto install the smbus library
Upload the code to the Raspberry Pi (e.g., "/home/pi"), then try running the examples in the examples directory.
If the library is not found, please configure the relevant library files or copy them directly to the current directory.
Configuration demo using Ubuntu system:
- Install raspi-config
sudo apt update
sudo apt install raspi-config
- Run configuration tool:
sudo raspi-config
- Navigate to I2C settings:
- Select "Interface Options"
- Select "I2C"
- Select "Yes" to enable
- Confirm and exit
1. DC Motor Control
a) Connecting Motors
The driver has 4 sets of motor terminals: M1, M2, M3, and M4. If running the DCTest.py example, connect the motor to the M3 port. Then run:
sudo python DCTest.py
The following code is for reference only. Please download the program to run examples.
#!/usr/bin/python
from Adafruit_MotorHAT import Adafruit_MotorHAT, Adafruit_DCMotor

import time
import atexit

mh = Adafruit_MotorHAT(addr=0x50)

def turnOffMotors():
  mh.getMotor(1).run(Adafruit_MotorHAT.RELEASE)
  mh.getMotor(2).run(Adafruit_MotorHAT.RELEASE)
  mh.getMotor(3).run(Adafruit_MotorHAT.RELEASE)
  mh.getMotor(4).run(Adafruit_MotorHAT.RELEASE)

atexit.register(turnOffMotors)

myMotor = mh.getMotor(3)

myMotor.setSpeed(150)
myMotor.run(Adafruit_MotorHAT.FORWARD);
myMotor.run(Adafruit_MotorHAT.RELEASE);

while (True):
  print "Forward! "
  myMotor.run(Adafruit_MotorHAT.FORWARD)

  print "\tSpeed up..."
  for i in range(255):
    myMotor.setSpeed(i)
    time.sleep(0.01)

  print "\tSlow down..."
  for i in reversed(range(255)):
    myMotor.setSpeed(i)
    time.sleep(0.01)

  print "Backward! "
  myMotor.run(Adafruit_MotorHAT.BACKWARD)

  print "\tSpeed up..."
  for i in range(255):
    myMotor.setSpeed(i)
    time.sleep(0.01)

  print "\tSlow down..."
  for i in reversed(range(255)):
    myMotor.setSpeed(i)
    time.sleep(0.01)

  print "Release"
  myMotor.run(Adafruit_MotorHAT.RELEASE)
  time.sleep(1.0)
b) DC Motor Example Details
Create a MotorHAT object and set the I2C address. Default address is 0x50.
mh = Adafruit_MotorHAT(addr=0x50)
Create a DC motor object using getMotor(num), where num is 1~4.
myMotor = mh.getMotor(3)
Set motor speed:
myMotor.setSpeed(150)
setSpeed(speed)
speed: 0 (off) ~ 255 (maximum).
Speed range is 0-255. Speed is a relative value, dependent on supply voltage.
Set DC Motor direction:
myMotor.run(Adafruit_MotorHAT.FORWARD)
run(direction)
direction definitions:
- Adafruit_MotorHAT.FORWARD – DC motor spins forward
- Adafruit_MotorHAT.BACKWARD – DC motor spins backward
- Adafruit_MotorHAT.RELEASE – DC motor is 'off', not spinning but will also not hold its position.
2. Stepper Motors (V5 version not yet updated, stepper motors not supported)
The driver can connect 2 stepper motors simultaneously, both unipolar and bipolar.

a) Connecting Stepper Motors
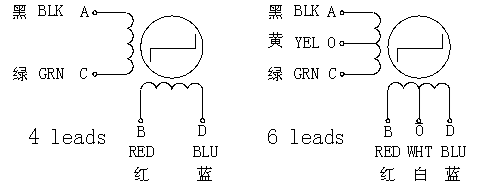
Left: Bipolar stepper motor (4-wire), Right: Unipolar stepper motor (6-wire)
- Unipolar Stepper Motor (6-wire): First identify the center wire, connect all center wires to GND terminals (white and yellow in the right image), then connect the remaining two wire pairs (black/green, red/blue) to M1/M2 or M3/M4.
- Bipolar Stepper Motor (4-wire): Similar to unipolar, leave GND unconnected.
StepperTest.py Example
Connect stepper motors to M1/M2, run in the examples directory:
#!/usr/bin/python
from Adafruit_MotorHAT import Adafruit_MotorHAT, Adafruit_DCMotor, Adafruit_StepperMotor

import time
import atexit

mh = Adafruit_MotorHAT()

def turnOffMotors():
  mh.getMotor(1).run(Adafruit_MotorHAT.RELEASE)
  mh.getMotor(2).run(Adafruit_MotorHAT.RELEASE)
  mh.getMotor(3).run(Adafruit_MotorHAT.RELEASE)
  mh.getMotor(4).run(Adafruit_MotorHAT.RELEASE)

atexit.register(turnOffMotors)

myStepper = mh.getStepper(200, 1)    # 200 steps/rev, motor port #1
myStepper.setSpeed(30)      # 30 RPM

while (True):
  print("Single coil steps")
  myStepper.step(100, Adafruit_MotorHAT.FORWARD,  Adafruit_MotorHAT.SINGLE)
  myStepper.step(100, Adafruit_MotorHAT.BACKWARD, Adafruit_MotorHAT.SINGLE)

  print("Double coil steps")
  myStepper.step(100, Adafruit_MotorHAT.FORWARD,  Adafruit_MotorHAT.DOUBLE)
  myStepper.step(100, Adafruit_MotorHAT.BACKWARD, Adafruit_MotorHAT.DOUBLE)

  print("Interleaved coil steps")
  myStepper.step(100, Adafruit_MotorHAT.FORWARD,  Adafruit_MotorHAT.INTERLEAVE)
  myStepper.step(100, Adafruit_MotorHAT.BACKWARD, Adafruit_MotorHAT.INTERLEAVE)

  print("Microsteps")
  myStepper.step(100, Adafruit_MotorHAT.FORWARD,  Adafruit_MotorHAT.MICROSTEP)
  myStepper.step(100, Adafruit_MotorHAT.BACKWARD, Adafruit_MotorHAT.MICROSTEP)
b) Example Details
Create MotorHAT object with default I2C address 0x50:
mh = Adafruit_MotorHAT(addr=0x50)
Create Stepper motor object:
myStepper = mh.getStepper(200, 1) # 200 steps/rev, motor port #1
getStepper(steps, portnum)
steps: Steps per revolution (usually 35-200)
portnum: 1~2, Port #1 is M1 and M2, port #2 is M3 and M4
Set speed in RPM:
myStepper.setSpeed(30) # 30 RPM
step() – blocking steps:
stepper1.step(100, Adafruit_MotorHAT.FORWARD, Adafruit_MotorHAT.SINGLE)
step(numberofsteps, direction, type)
numberofsteps: Number of steps
direction: FORWARD or BACKWARD
type: SINGLE, DOUBLE, INTERLEAVE or MICROSTEP
For stepper motor characteristics, please refer to online resources.
Using "Non-blocking" oneStep():
oneStep(direction, stepstyle) – single step execution
3. Servo Control
The driver's servo control is implemented through the dedicated PWM chip PCA9685, with corresponding ports 0-7. Since most standard servos support 50Hz signals, set pwm.setPWMFreq(50).
from Adafruit_PWM_Servo_Driver import PWM
import time

pwm = PWM(0x50, debug=False)

servoMin = 150  # Min pulse length out of 4096
servoMax = 600  # Max pulse length out of 4096

def setServoPulse(channel, pulse):
  pulseLength = 1000000.0                   # 1,000,000 us per second
  pulseLength /= 50.0                       # 50 Hz
  print "%d us per period" % pulseLength
  pulseLength /= 4096.0                     # 12 bits of resolution
  print "%d us per bit" % pulseLength
  pulse *= 1000.0
  pulse /= (pulseLength*1.0)
  print "pluse: %f  " % (pulse)
  pwm.setPWM(channel, 0, int(pulse))

def write(servonum, x):
  y = x/90.0+0.5
  y = max(y, 0.5)
  y = min(y, 2.5)
  setServoPulse(servonum, y)

pwm.setPWMFreq(50)

write(0, 90)
write(14, 120)
4. Cascading
When more motor ports are needed, multiple driver boards can be cascaded. Up to 4 drivers are supported.
Each cascaded driver needs a unique I2C address. Default address is 0x50. Address range is 0x50~0x53 (4 addresses total).
The driver board has 5 jumpers (A0~A4). Solder different jumpers to set different addresses:
| Board | Address | Offset |
|---|---|---|
| Board 0 | 0x50 | binary 0000 (default all empty) |
| Board 1 | 0x51 | binary 0001 (A0 only) |
| Board 2 | 0x52 | binary 0010 (A1 only) |
| Board 3 | 0x53 | binary 0011 (A0 & A1) |
StackingTest.py is the cascading example. Key part is creating 2 MotorHAT objects:
# bottom hat is default address 0x50
bottomhat = Adafruit_MotorHAT(addr=0x50)

# top hat has A0 jumper closed, so its address 0x61
tophat = Adafruit_MotorHAT(addr=0x61)
5. Schematic and Library Download
Python Example Programs and Library Download: Motor-HAT-Python3-Library-V5
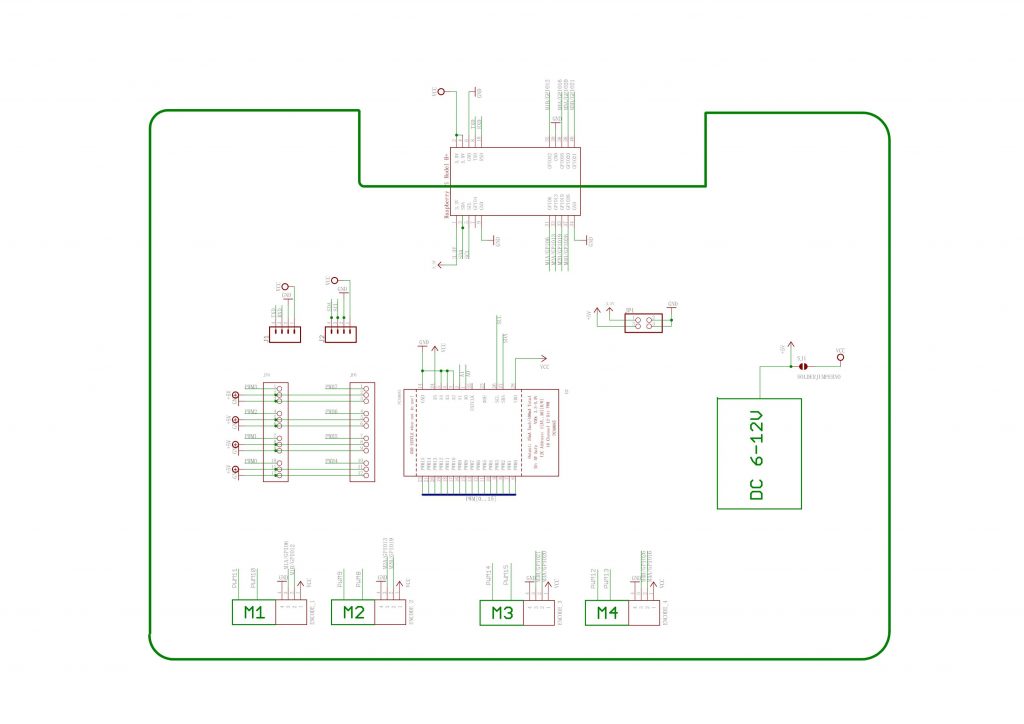
Raspberry Pi Driver V5.0 Schematic