Arduino Tutorial
Materials Download (Important)
Note: Please download all the code and library files for the Arduino course here first.
Click to download: Arduino Materials
Project 01 Hello World
1. Project Introduction:
For beginners to the ESP32, we will start with some simple things. In this project, you only need an ESP32 board, a USB cable, and a computer to complete the "Hello World!" project. It is not only a communication test between the ESP32 board and the computer, but also a beginner-level project for the ESP32.
2. Project Components:
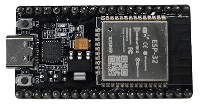 |
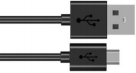 |
|---|---|
| ESP32*1 | USB Cable*1 |
3. Project Wiring:
In this project, we connect the ESP32 to the computer via a USB cable.
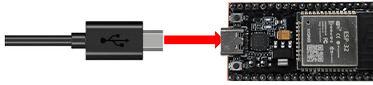
4. Project Code:
The code can also be found in the "Materials Download" section above. It is recommended to directly use the code in the downloaded materials.
//*************************************************************************************
/*
 * File Name : Hello World
 * Description : Enter the letter R, and the serial port displays "Hello World".
*/
char val;// Define the variable val
void setup()
{
Serial.begin(115200);// Set the baud rate to 115200
}
void loop()
{
  if (Serial.available() > 0) {
    val=Serial.read();// Read and assign to val
    if(val=='R')// Check the input letter "R"
    {  // If so,
     Serial.println("Hello World!");// Display "Hello World !".
    }
  }
}
//*************************************************************************************
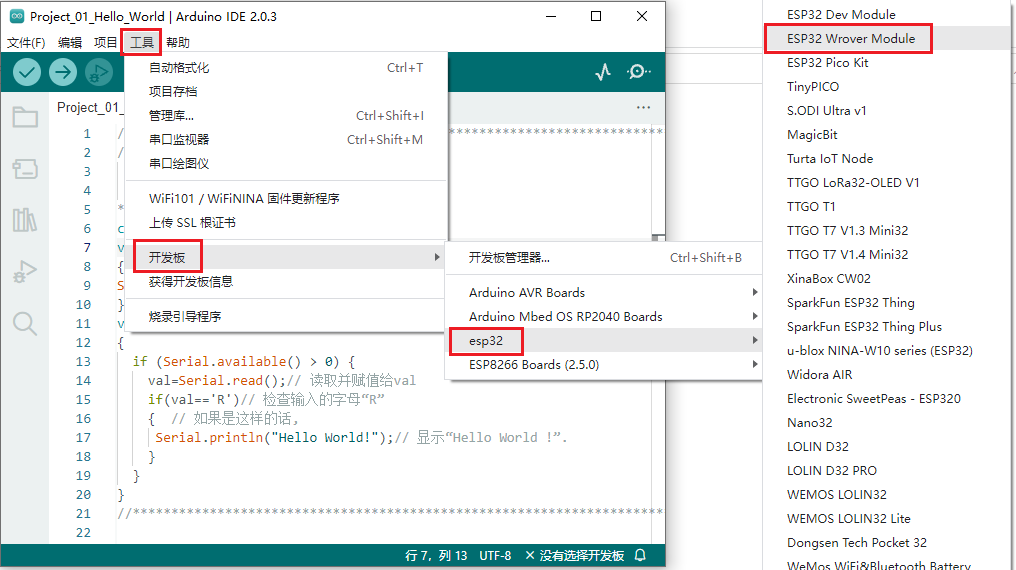
Select the correct port (COM). (Note: The corresponding port can only be seen after connecting the ESP32 board to the computer via a USB cable.)
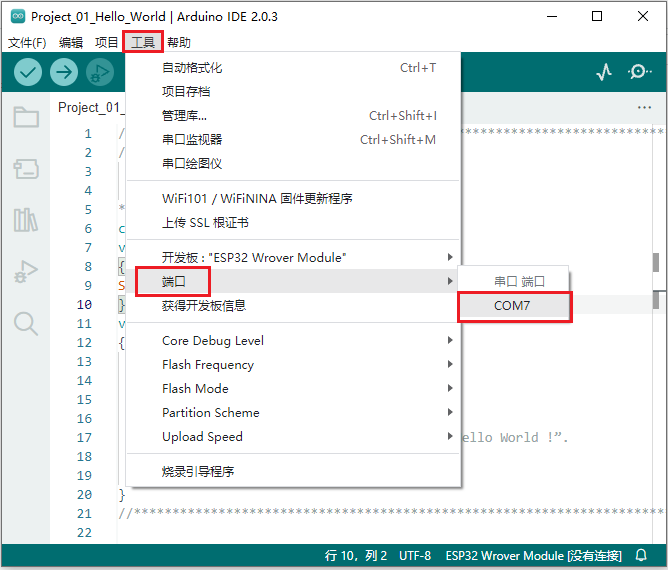
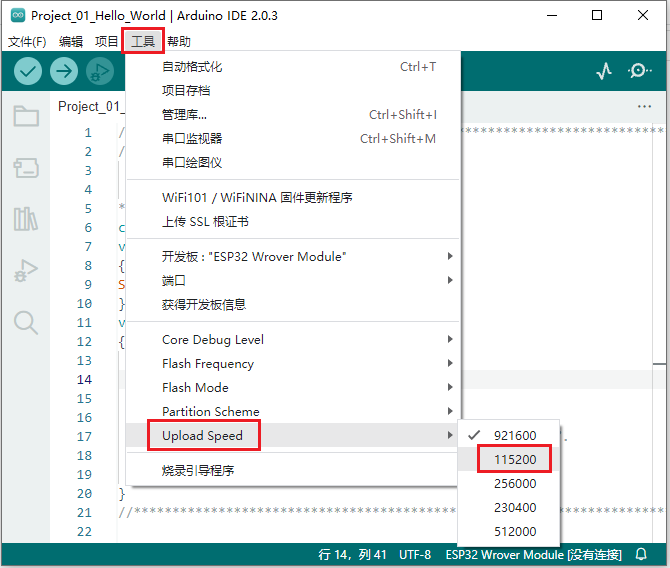
Note: For macOS users, if the upload fails, please set the baud rate to 115200 before clicking.
Click  to upload the project code to the ESP32 board.
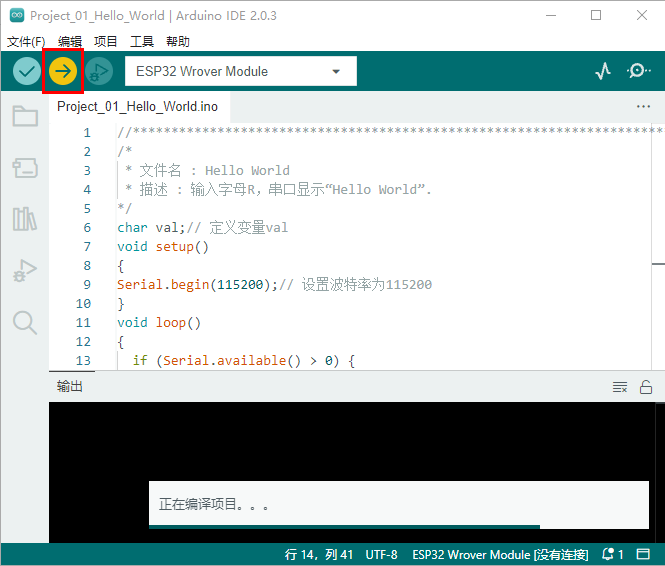
Note: If the code upload fails, you can click again, then press and hold the Boot button on the ESP32 board 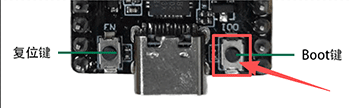 . After the upload progress percentage appears, release the Boot button, as shown below:
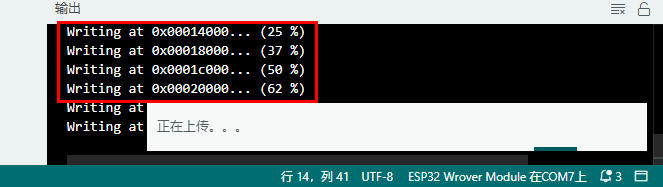
The project code has been uploaded successfully!
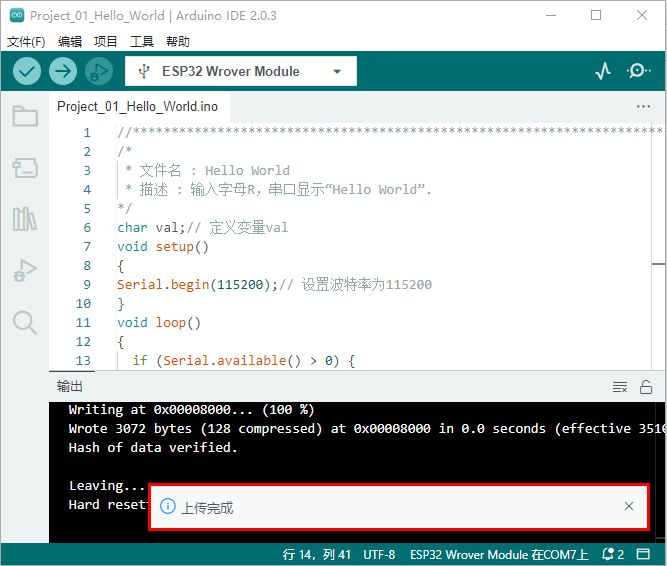
5. Project Result:
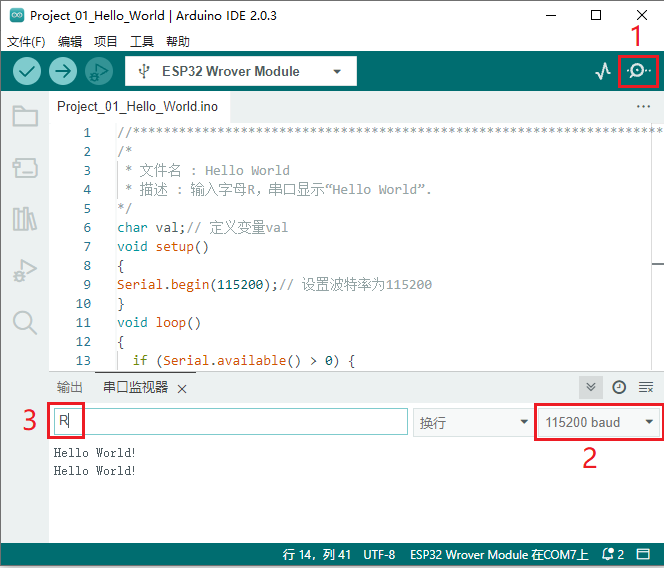
After the project code is uploaded successfully, click the icon  to enter the serial monitor, set the baud rate to 115200, enter the letter "R" in the text box, and press the Enter key, so that the serial monitor prints "Hello World!".
Project 02 Lighting Up an LED
1. Project Introduction:
In this project, we will show you how to light up an LED. We use a digital pin of the ESP32 to turn on the LED, so that the LED is lit.
2. Project Components:
|
 |
 |
|---|---|---|
| ESP32*1 | Breadboard*1 | Red LED*1 |
 |
 |
|
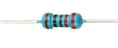
| 220Ω Resistor*1 | Jumper Wires*2 | USB Cable*1 |
3. Component Knowledge:
(1)LED
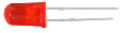
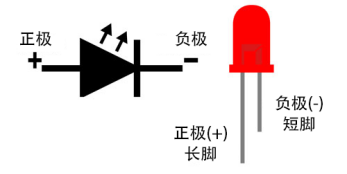
An LED is a semiconductor called a "light-emitting diode", an electronic device made of semiconductor materials (silicon, selenium, germanium, etc.). It has a positive and a negative terminal. The short leg is the negative terminal, connected to GND, and the long leg is the positive terminal, connected to 3.3V or 5V.
(2)Five-Color-Ring Resistor
A resistor is an electronic component that limits or regulates the flow of current in a circuit. On the left is the appearance of the resistor, and on the right is the symbol that represents a resistor in a circuit. The unit of resistance (R) is ohm (Ω), 1 mΩ = 1000 kΩ, 1 kΩ = 1000 Ω.
We can use resistors to protect sensitive components such as LEDs. The strength of a resistor (in Ω) is marked on the body of the resistor with small color rings. Each color represents a number, and you can look it up using a resistor reference card.
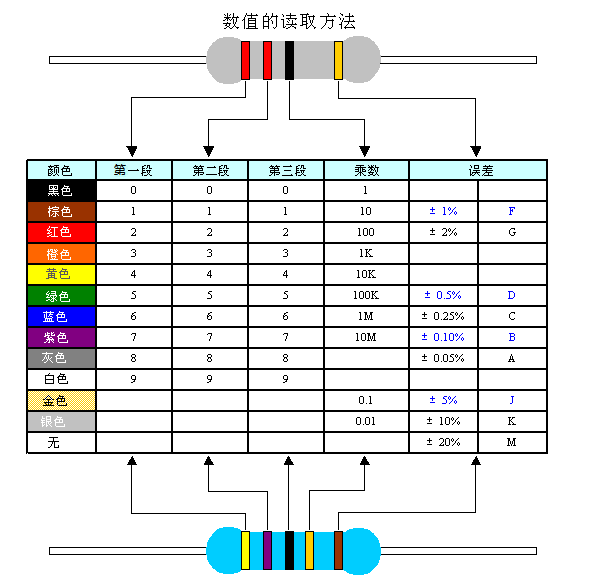
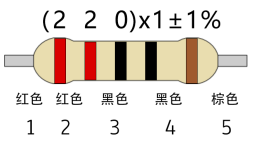
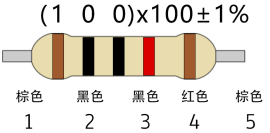
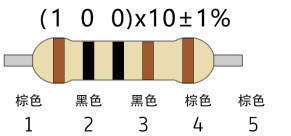
In this kit, we provide 3 five-color-ring resistors with different resistance values. Here we take 3 five-color-ring resistors as an example:
220Ω Resistor ×10
10KΩ Resistor ×10
1KΩ Resistor ×10
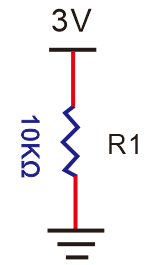
Under the same voltage, there will be a smaller current and a larger resistance. The relationship among current, voltage, and resistance can be expressed by the formula: I=U/R. In the figure below, the current currently flowing through R1: I = U / R = 3 V / 10 KΩ = 0.0003 A = 0.3 mA.
Do not connect a resistor with a very low resistance value directly to the two poles of a power supply, as this will make the current too high and damage the electronic components. Resistors have no positive or negative polarity.
(3)Breadboard
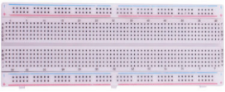
A breadboard is an important tool for building circuits in the laboratory. There are many holes on the breadboard, into which circuit components such as integrated circuits and resistors can be inserted. Being proficient in using a breadboard is one of the important foundations for improving experimental efficiency and reducing the probability of experimental failures. The following is a brief introduction to the structure and usage of the breadboard. A typical breadboard is shown below:
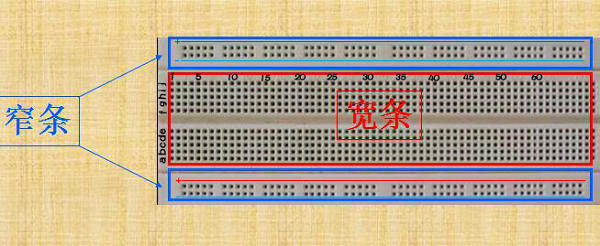
The appearance and internal structure of the breadboard are shown above. A common smallest-unit breadboard is divided into three parts: upper, middle, and lower. The upper and lower parts are generally narrow strips made up of one or two rows of jacks, and the middle part is a strip made up of a central isolation groove and 5 rows of jacks on the upper and lower sides.
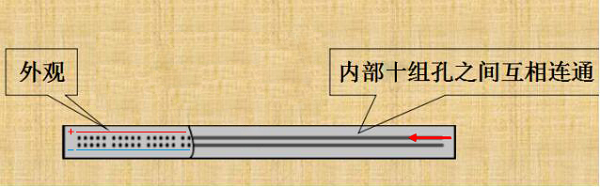
The two narrow strips of the breadboard each have two rows of jacks. The two rows are not connected, and are generally used as the path for introducing the power supply. The first row on the upper side, marked with "+", has 10 groups of jacks (all connected internally), all of which are positive; the second row on the upper side, marked with "-", has 10 groups of jacks (all connected internally), all of which are grounded. The first and second rows on the lower side of the breadboard have the same structure. If you need to use the whole breadboard, usually connect "+" to "+" with a wire, and "-" to "-" with a wire.
The wide strip in the middle is made up of a central isolation groove and 5 rows of jacks on each of the upper and lower sides. The 5 jacks in the same column are connected to each other, while columns and columns, as well as the parts above and below the groove, are not connected. The appearance and structure are shown below:
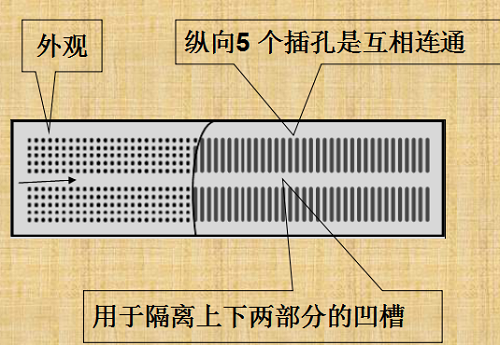
The connection holes of the wide strip in the middle are divided into upper and lower parts, which are the main working area of the breadboard, used to plug in components and jumper wires. The 5 jacks in the same column (i.e., a-b-c-d-e, f-g-h-i-j) are connected to each other; columns and columns, as well as the parts above and below the groove, are not connected. When doing experiments, a small unit made up of two narrow strips and one wide strip is usually used. The main part of the circuit is built on the wide strip, one row of the upper narrow strip is used for the power supply, and one row of the lower narrow strip is used for grounding. The middle wide strip is used to connect the circuit. Since the upper and lower parts of the groove are not connected, integrated chips are generally placed straddling the groove.
(4) Power Supply
The ESP32 requires a 3.3V-5V power supply. In this project, we connect the ESP32 to the computer with a USB cable.
4. Project Wiring Diagram:
First, cut off all power to the ESP32. Then build the circuit according to the wiring diagram. After the circuit is built and verified to be correct, connect the ESP32 to the computer with a USB cable.
Note: Avoid any possible short circuit (especially connecting 3.3V and GND)!
Warning: A short circuit may cause a large current in the circuit, causing components to overheat and permanently damage the hardware.
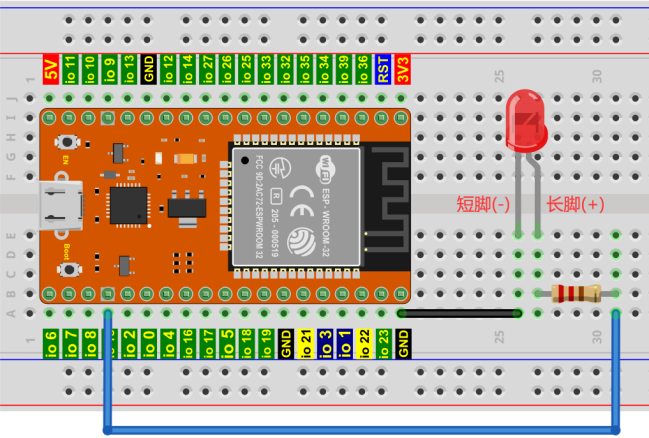
Note:
How to connect the LED
How to identify a five-color-ring 220Ω resistor
5. Project Code:
The code can also be found in the "Materials Download" section above. It is recommended to directly use the code in the downloaded materials.
//**********************************************************************
/*
 * File Name : Light up LED
 * Description : Light up a lamp.
*/
#define LED_BUILTIN 15

// The setup function runs only once when reset or when the board is powered on
void setup() {
  // Initialize the digital pin LED_BUILTIN as output.
  pinMode(LED_BUILTIN, OUTPUT);
}
void loop() {
  digitalWrite(LED_BUILTIN, HIGH);   // Turn on the LED (HIGH is high level)
}
//*************************************************************************************
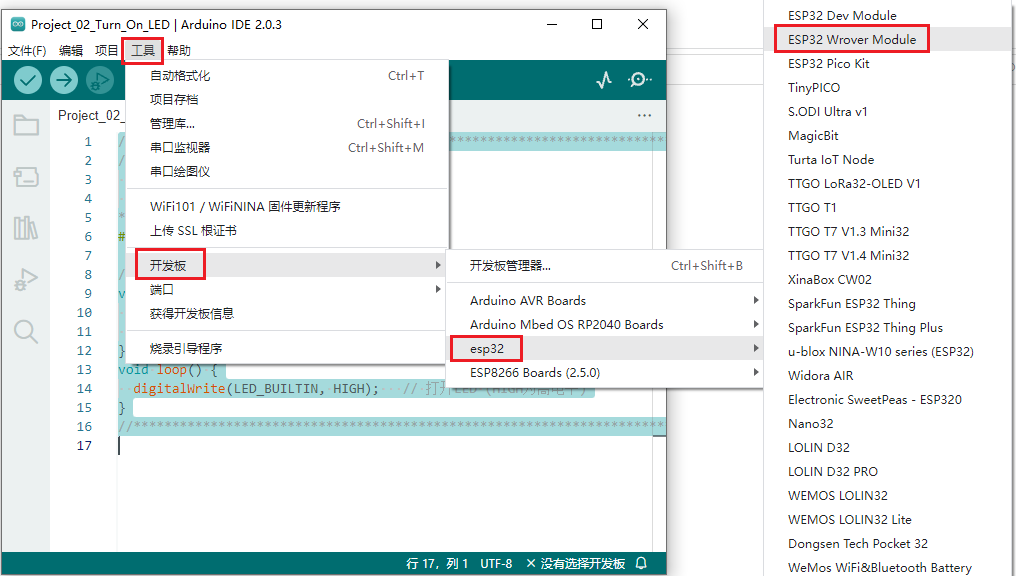
Select the correct port (COM). (Note: The corresponding port can only be seen after connecting the ESP32 board to the computer via a USB cable.)
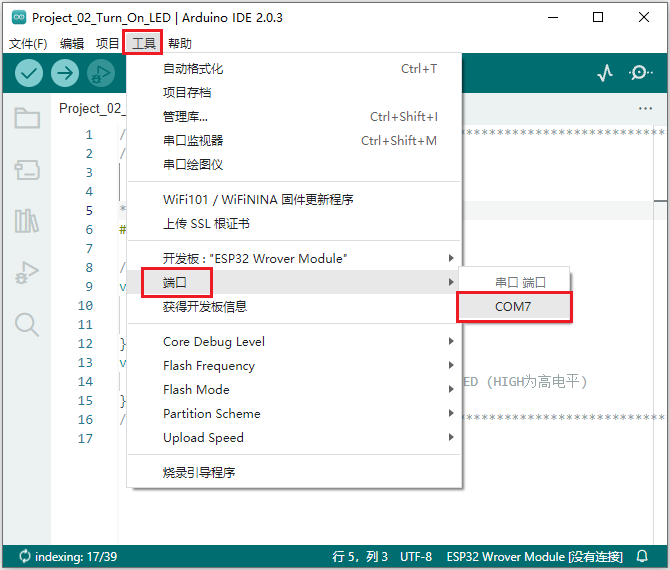
Note: For macOS users, if the upload fails, please set the baud rate to 115200 before clicking.
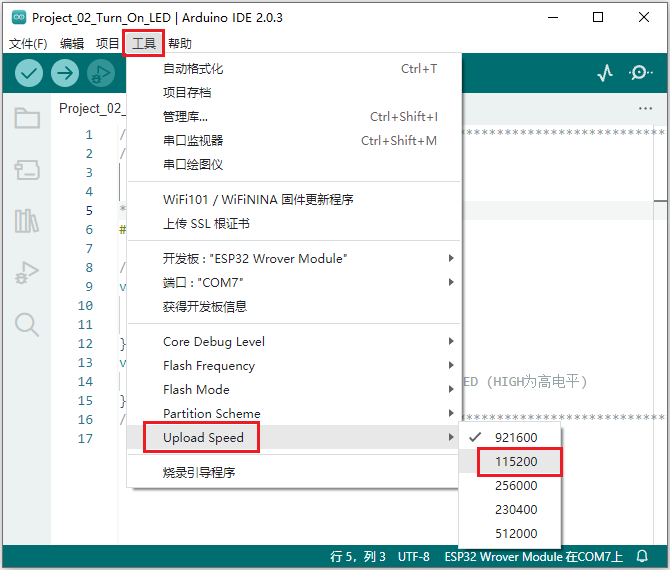
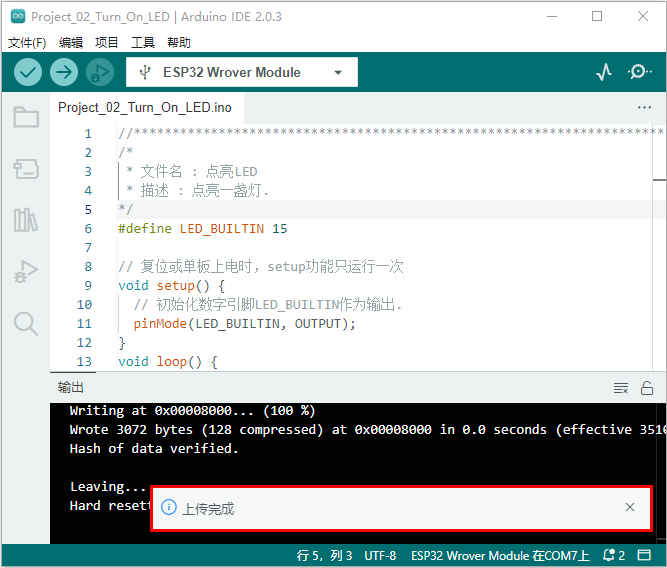
Click  to upload the project code to the ESP32 board.
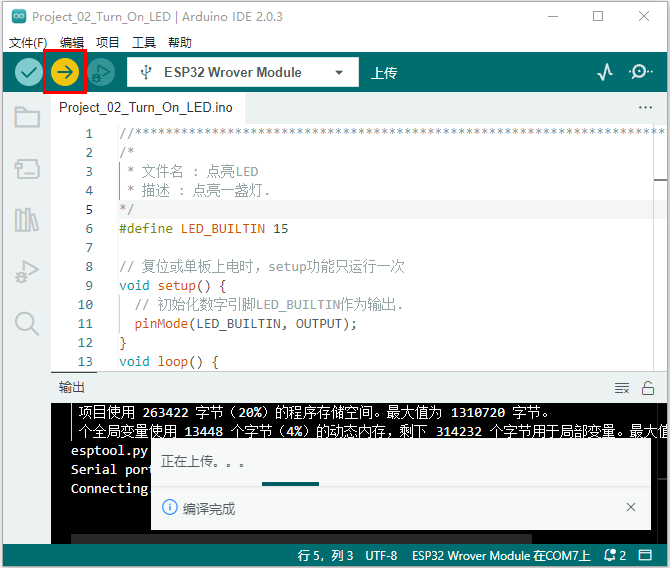
Note: If the code upload fails, you can click again, then press and hold the Boot button on the ESP32 board . After the upload progress percentage appears, release the Boot button, as shown below:
The project code has been uploaded successfully!
6. Project Observation:
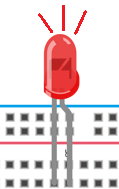
After the project code is uploaded successfully, power it via the USB cable, and the LED is lit.
Project 03 LED Blinking
1. Project Introduction:
In this project, we will show you the LED blinking effect. We use a digital pin of the ESP32 to turn on the LED and make it blink.
2. Project Components:
|
|
|
|---|---|---|
| ESP32*1 | Breadboard*1 | Red LED*1 |
|
|
|
| 220Ω Resistor*1 | Jumper Wires*2 | USB Cable*1 |
3. Project Wiring Diagram:
First, cut off all power to the ESP32. Then build the circuit according to the circuit diagram and the wiring diagram. After the circuit is built and verified to be correct, connect the ESP32 to the computer with a USB cable.
Note: Avoid any possible short circuit (especially connecting 3.3V and GND)!
Warning: A short circuit may cause a large current in the circuit, causing components to overheat and permanently damage the hardware.
Note:
How to connect the LED
How to identify a five-color-ring 220Ω resistor
4. Project Code:
The code can also be found in the "Materials Download" section above. It is recommended to directly use the code in the downloaded materials. (Note: From this lesson onward, this reminder will no longer be given in the subsequent lessons.)
//**********************************************************************
/*
 * File Name : LED Blinking
 * Description : Make the led blink.
*/
#define PIN_LED   15   //Define the led pin

// The setup function runs only once when reset or when the board is powered on
void setup() {
  // Initialize the digital pin LED as output.
  pinMode(PIN_LED, OUTPUT);
}

// The loop function runs repeatedly forever
void loop() {
  digitalWrite(PIN_LED, HIGH);   // Turn on the LED (HIGH is high level)
  delay(500);                       // Delay 0.5s
  digitalWrite(PIN_LED, LOW);    // Turn off the LED, making the voltage low
  delay(500);                       // Delay 0.5s
}
//*************************************************************************************
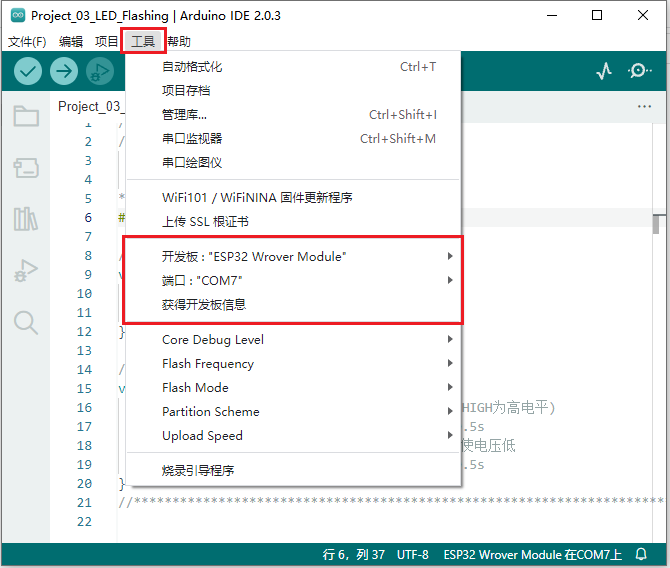
Click "Tools", and confirm the "Board" type and "Port (COM)", as shown below: (Note: The corresponding port can only be seen after connecting the ESP32 board to the computer via a USB cable.)
Click to upload the project code to the ESP32 board.
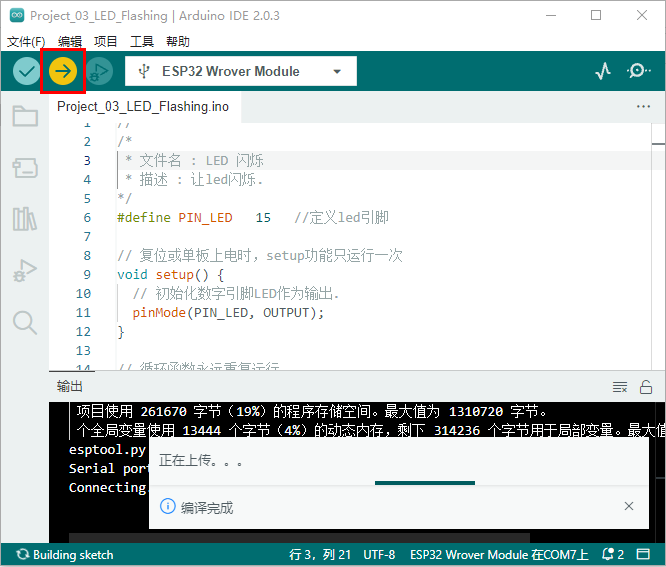
Note: If the code upload fails, you can click again, then press and hold the Boot button on the ESP32 board . After the upload progress percentage appears, release the Boot button, as shown below:
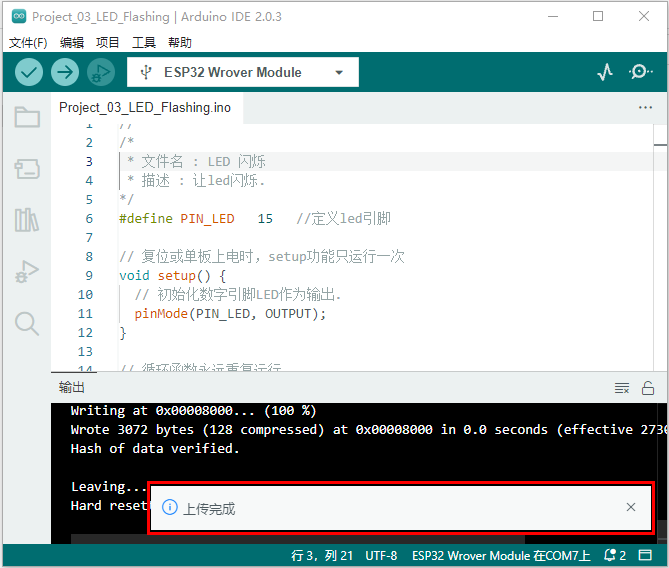
The project code has been uploaded successfully!
5. Project Observation:
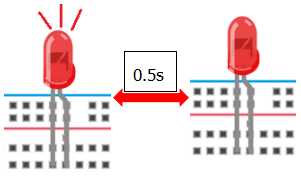
After the project code is uploaded successfully, power it via the USB cable. The observable phenomenon is: the LED in the circuit will blink repeatedly.
Project 04 Breathing Light
1. Project Introduction:
In our previous studies, we know that an LED has on/off states. So how do we enter an intermediate state? How do we output an intermediate state to make the LED "half bright"? This is what we are going to learn. A breathing light is an LED that goes from off to bright, then from bright to off, just like "breathing". So how do we control the brightness of an LED? We will use the ESP32's PWM to achieve this goal.
2. Project Components:
|
|
|
|---|---|---|
| ESP32*1 | Breadboard*1 | Red LED*1 |
|
|
|
| 220Ω Resistor*1 | Jumper Wires*2 | USB Cable*1 |
3. Component Knowledge:

Analog Signal & Digital Signal
An analog signal is a signal that is continuous in both time and value. In contrast, a digital signal or discrete-time signal is a time sequence made up of a series of numbers. Most signals in life are analog signals. A familiar example of an analog signal is: the temperature throughout the day changes continuously, rather than changing instantly from 0 to 10. However, the value of a digital signal can change instantly. This change is represented digitally as 1 and 0 (the basis of binary code). As shown in the figure below, we can more easily see their differences.
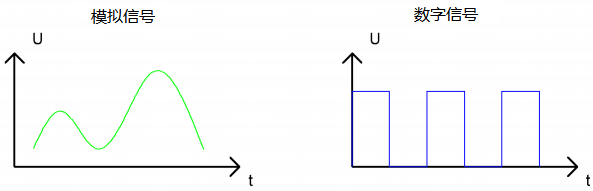
In practical applications, we often use binary as the digital signal, i.e., a series of 0s and 1s. Since the binary signal has only two values (0 or 1), it has great stability and reliability. Finally, analog signals and digital signals can be converted to each other.
PWM:
Pulse Width Modulation (PWM) is an effective method that uses digital signals to control analog circuits. An ordinary processor cannot directly output analog signals. PWM technology makes this conversion (converting digital signals to analog signals) very convenient. PWM technology uses a digital pin to send a square wave of a certain frequency, i.e., the output of high and low levels, alternating for a period of time. The total time of each group of high and low levels is generally fixed, called the period (note: the reciprocal of the period is the frequency). The time of the high-level output is usually called the pulse width, and the duty cycle is the percentage of the ratio of the pulse width (PW) to the total period (T) of the waveform. The longer the high-level output duration, the longer the duty cycle, and the higher the corresponding voltage in the analog signal. The figure below shows the analog signal voltage corresponding to a pulse width of 0%-100%, changing between 0V-3.3V (high level is 3.3V).
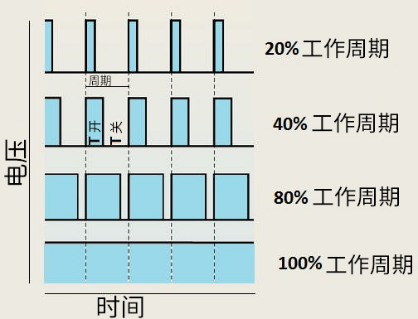
The longer the PWM duty cycle, the higher the output power. Since we understand this relationship, we can use PWM to control the brightness of an LED or the speed of a DC motor, etc. As can be seen from the above, PWM is not a real analog signal, and the effective value of the voltage is equal to the corresponding analog signal. Therefore, we can control the output power of LEDs and other output modules to achieve different effects.
ESP32 and PWM
On the ESP32, the LEDC (PWM) controller has 16 independent channels, and each channel can independently control frequency, duty cycle, and even precision. Unlike traditional PWM pins, the PWM output pins of the ESP32 are configurable, and each channel has one or more PWM output pins. The relationship between the maximum frequency and bit precision is shown by the following formula:
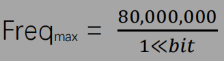
The maximum value of the bits is 31. For example: generating PWM with 8-bit precision (2ˆ8 = 256. The value range is 0 ~ 255), the maximum frequency is 80,000,000/255 = 312,500 Hz.)
4. Project Wiring Diagram:
5. Project Code:
Note: This project is designed to make GPIO15 output PWM, with the pulse width gradually increasing from 0% to 100%, and then gradually decreasing from 100% to 0%.
//**********************************************************************
/*
 * File Name : Breathing light
 * Description : Make the led light fade in and out like breathing.
*/
#define PIN_LED   15   //Define the led pin
#define CHN       0   //Define the PWM channel
#define FRQ       1000  //Define the PWM frequency
#define PWM_BIT   8     //Define the PWM precision
void setup() {
  //If the esp32 board you installed is 2.X, please use this code
  ledcSetup(CHN, FRQ, PWM_BIT); //Set up the PWM channel
  ledcAttachPin(PIN_LED, CHN);  //Attach the led pin to the PWM channel

  //If the esp32 board you installed is 3.X or newer, please use this code
  // ledcAttach(CHN, FRQ, PWM_BIT); //Set up the PWM channel
  // ledcWrite(PIN_LED, CHN);  //Attach the led pin to the PWM channel
}

void loop() {
  for (int i = 0; i < 255; i++) { //Make the LED gradually brighter
    ledcWrite(CHN, i);
    delay(10);
  }
  for (int i = 255; i > -1; i--) {  //Make the LED gradually dimmer
    ledcWrite(CHN, i);
    delay(10);
  }
}
//*************************************************************************************
Click "Tools", and confirm the "Board" type and "Port (COM)", as shown below: (Note: The corresponding port can only be seen after connecting the ESP32 board to the computer via a USB cable.)
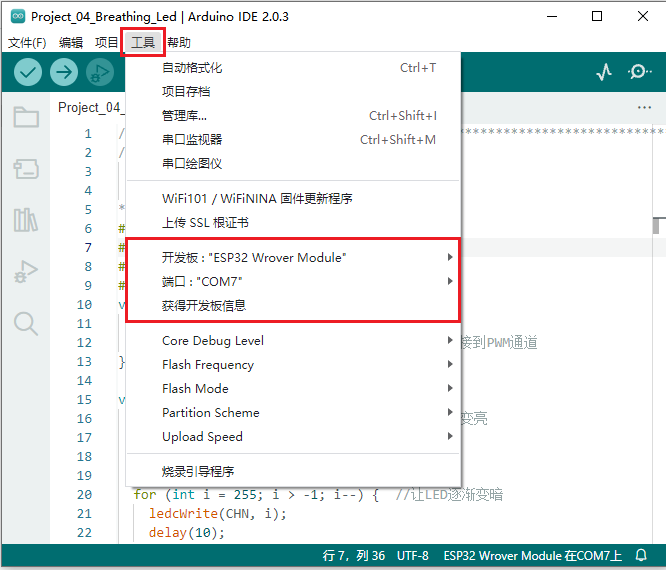
Click to upload the project code to the ESP32 board.
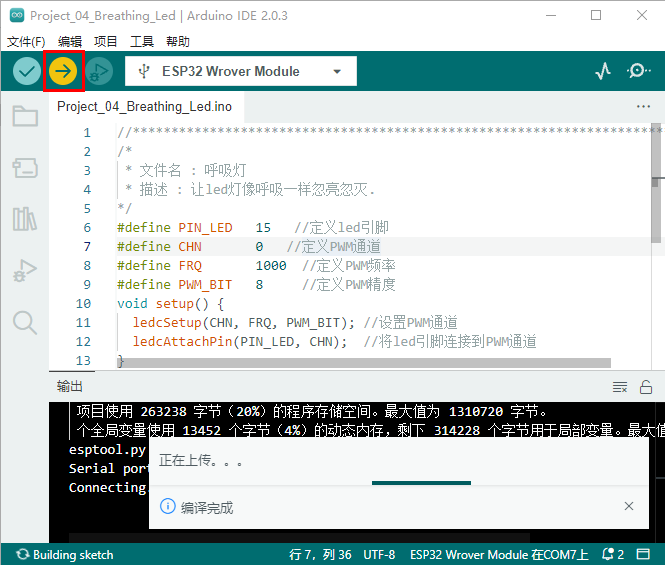
Note: If the code upload fails, you can click again, then press and hold the Boot button on the ESP32 board . After the upload progress percentage appears, release the Boot button, as shown below:
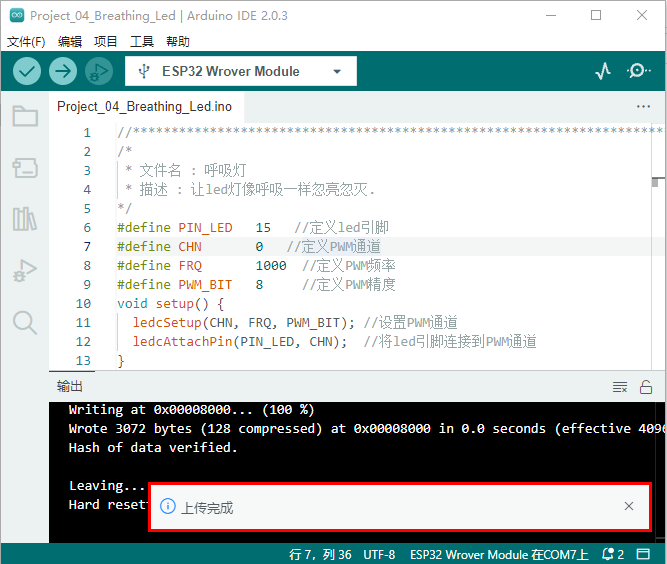
The project code has been uploaded successfully!
6. Project Observation:
After the project code is uploaded successfully, power it via the USB cable. The observable phenomenon is: the LED in the circuit gradually changes from dim to bright, and then from bright to dim, just like breathing.
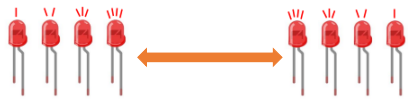
Project 05 Traffic Light
1. Project Introduction:
Traffic lights are very common in our daily life. According to a certain time rule, a traffic light is composed of three colors: red, yellow, and green. Everyone should obey the traffic rules, which can avoid many traffic accidents. In this project, we will use the ESP32 and some LEDs (red, yellow, green) to simulate a traffic light.
2. Project Components:
|
|
|
 |
|---|---|---|---|
| ESP32*1 | Breadboard*1 | Red LED*1 | Yellow LED*1 |
 |
|
|
|
| Green LED*1 | 220Ω Resistor*3 | Jumper Wires several | USB Cable*1 |
3. Project Wiring Diagram:
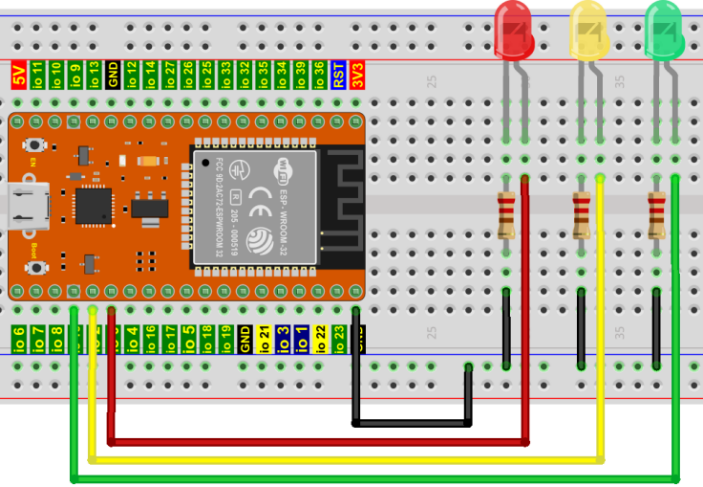
4. Project Code:
//**********************************************************************
/*
 * File Name  : Traffic light
 * Description : Simulate a traffic light.
*/
#define PIN_LED_RED   0   //Define the red pin
#define PIN_LED_YELLOW   2   //Define the yellow pin
#define PIN_LED_GREEN  15   //Define the green pin

void setup() {
  pinMode(PIN_LED_RED, OUTPUT);
  pinMode(PIN_LED_YELLOW, OUTPUT);
  pinMode(PIN_LED_GREEN, OUTPUT);
}

void loop() {
   digitalWrite(PIN_LED_RED, HIGH);// Light up the red lamp
   delay(5000);// Delay 5 s
   digitalWrite(PIN_LED_RED, LOW); // Turn off the red lamp
   delay(500);// Delay 0.5 s
   for(int i=0;i<3;i++)// Blink 3 times.
  {
   digitalWrite(PIN_LED_YELLOW, HIGH);// Light up the yellow lamp
   delay(500);// Delay 0.5 s
   digitalWrite(PIN_LED_YELLOW, LOW);// Turn off the yellow lamp
   delay(500);// Delay 0.5 s
   }
   digitalWrite(PIN_LED_GREEN, HIGH);// Light up the green lamp
   delay(5000);// Delay 5 s
   digitalWrite(PIN_LED_GREEN, LOW);//
  delay(500);// Delay 0.5 s
}
//*************************************************************************************
5. Project Observation:
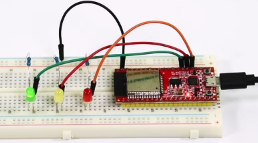
After the project code is uploaded successfully, power it via the USB cable. The phenomenon you will see is: 1. First, the red light stays on for 5 seconds, then turns off; 2. Second, the yellow light blinks 3 times, then turns off; 3. Then, the green light stays on for 5 seconds, then turns off; 4. Continue running the above steps 1-3.
Project 06 RGB LED
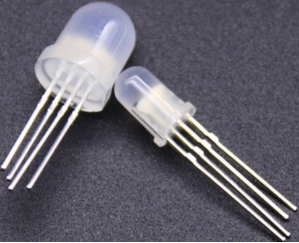
1. Project Introduction:
An RGB LED is composed of three colors (red, green, blue), and can emit different colors by mixing these three basic colors. In this project, we will introduce you to the RGB LED and show you how to use the ESP32 to control the RGB LED to emit light of different colors. Even though the RGB LED is very basic, this is also a great way to introduce yourself or others to the basics of electronics and coding.
2. Project Components:
|
|
 |
|---|---|---|
| ESP32*1 | Breadboard*1 | RGB LED*1 |
|
|
|
| 220Ω Resistor*3 | Jumper Wires several | USB Cable*1 |
3. Component Knowledge:
Most displays follow the RGB color standard, and all colors on a computer screen are produced by mixing red, green, and blue in different proportions.
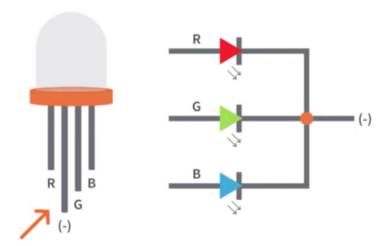
This RGB LED has 4 pins, one for each color (red, green, blue) and a common cathode. To change the brightness of the RGB LED, we can use the ESP's PWM pins. The PWM pins will give the RGB LED signals with different duty cycles to obtain different colors.
If we use 3 10-bit PWMs to control the RGB LED, theoretically we can create 2^10 × 2^10 × 2^10 = 1,073,741,824 (1 billion) colors through different combinations.
4. Project Wiring Diagram:
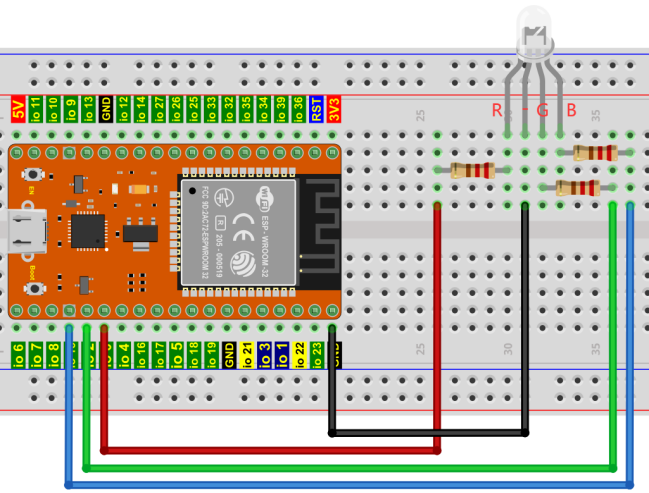
5. Project Code:
//**********************************************************************
/*
 * File Name  : RGB LED
 * Description : Use RGB to display random colors.
*/
int ledPins[] = {0, 2, 15};    //Define red, green, blue pins
const byte chns[] = {0, 1, 2};        //Define PWM channels
int red, green, blue;
void setup() {
  for (int i = 0; i < 3; i++) {   //Set up pwm channels, 1KHz, 8bit
    ledcSetup(chns[i], 1000, 8);
    ledcAttachPin(ledPins[i], chns[i]);
  }
}

void loop() {
  red = random(0, 256);
  green = random(0, 256);
  blue = random(0, 256);
  setColor(red, green, blue);
  delay(200);
}

void setColor(byte r, byte g, byte b) {
  ledcWrite(chns[0], 255 - r); //Common cathode LED, high level turns on the LED.
  ledcWrite(chns[1], 255 - g);
  ledcWrite(chns[2], 255 - b);
}
//*************************************************************************************
6. Project Observation:
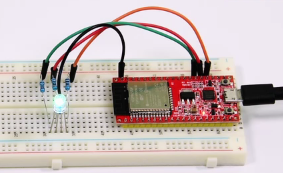
After the code is uploaded successfully, power it via the USB cable. The phenomenon you will see is: the RGB LED starts to display random colors.
Project 07 Flowing Light
1. Project Introduction:
In daily life, we can see many billboards made up of LEDs of different colors. They constantly change the lights (like flowing water) to attract customers' attention. In this project, we will use the ESP32 to control 10 LEDs to achieve a flowing effect.
2. Project Components:
|
|
|
|---|---|---|
| ESP32*1 | Breadboard*1 | Red LED*10 |
|
|
|
| 220Ω Resistor*10 | Jumper Wires several | USB Cable*1 |
3. Project Wiring Diagram:
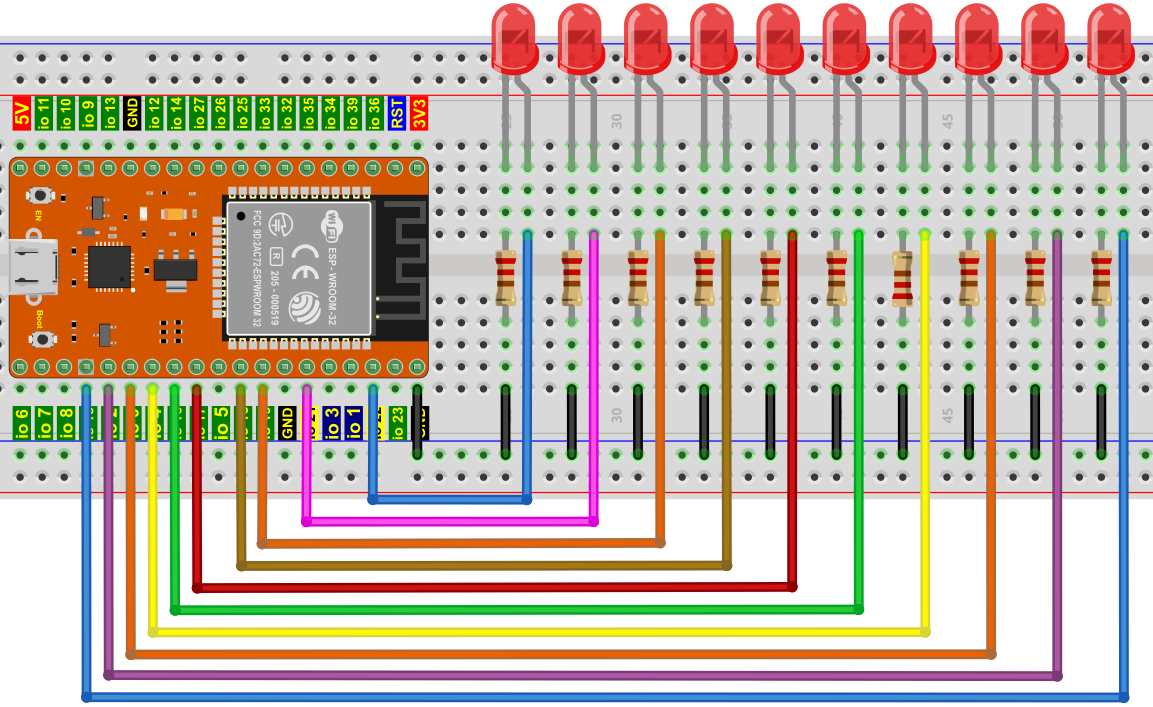
4. Project Code:
This project is designed to make a flowing light. These are the actions: first turn on LED 1, then turn it off. Then turn on LED 2, then turn it off... and repeat the same operation for all 10 LEDs until the last LED turns off. This process repeats, achieving the "movement" of flowing water.
//**********************************************************************
/*
 * File Name : Flowing light
 * Description : Use ten LEDs to demonstrate the flowing light
*/
byte ledPins[] = {22, 21, 19, 18, 17, 16, 4, 0, 2, 15};
int ledCounts;

void setup() {
  ledCounts = sizeof(ledPins);
  for (int i = 0; i < ledCounts; i++) {
    pinMode(ledPins[i], OUTPUT);
  }
}

void loop() {
  for (int i = 0; i < ledCounts; i++) {
    digitalWrite(ledPins[i], HIGH);
    delay(100);
    digitalWrite(ledPins[i], LOW);
  }
  for (int i = ledCounts - 1; i > -1; i--) {
    digitalWrite(ledPins[i], HIGH);
    delay(100);
    digitalWrite(ledPins[i], LOW);
  }
}
//**********************************************************************
Click "Tools" → "Board", and you can view various models of ESP32 development boards, and select the corresponding ESP32 development board model.
Click "Tools" → "Port", and select the corresponding port (COM).
Note: The corresponding port (COM) can only be seen after connecting the ESP32 board to the computer via a USB cable.
Click to upload the code to the ESP32 main control board.
Note: If the code upload fails, you can click again, then press and hold the Boot button on the ESP32 board . After the upload progress percentage appears, release the Boot button, as shown below:
5. Project Observation:
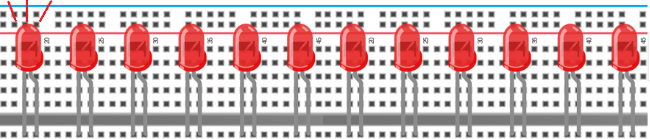
After the code is uploaded successfully, power it via the USB cable. The phenomenon you will see is: the 10 LEDs will light up from left to right, and then return from right to left.
Project 08 One-Digit Display
1. Project Introduction:
A seven-segment display is an electronic display device used to display decimal digits, and is widely used in digital clocks, electronic instruments, basic calculators, and other electronic devices that display digital information. Even the bombs we see in movies have seven-segment displays. Maybe the seven-segment display does not look modern enough, but it is an alternative to more complex dot-matrix displays, and it is easy to use in limited light conditions and strong sunlight. In this project, we will use the ESP32 to control a one-digit display to show digits.
2. Project Components:
|
|
 |
|---|---|---|
| ESP32*1 | Breadboard*1 | One-digit display*1 |
|
|
|
| 220Ω Resistor*8 | Jumper Wires several | USB Cable*1 |
3. Component Knowledge:
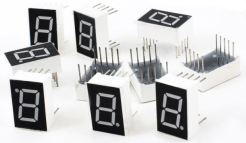
Working principle of the one-digit display: The digital display is a semiconductor light-emitting device. Its basic unit is a light-emitting diode (LED). Digital displays can be divided into 7-segment displays and 8-segment displays according to the number of segments. The 8-segment display has one more LED unit than the 7-segment display (used for the decimal point display). Each segment of the seven-segment LED display is a single LED. According to the way the LED units are wired, digital displays can be divided into common-anode displays and common-cathode displays.
In a common-cathode 7-segment display, all the cathodes (or negative terminals) of the segment LEDs are connected together. You should connect the common cathode to GND. To light up a segment LED, you can set its associated pin to HIGH.
In a common-anode 7-segment display, the anodes (positive terminals) of all segment LEDs are connected together. You should connect the common anode to +5V. To light up a segment LED, you can set its associated pin to LOW.
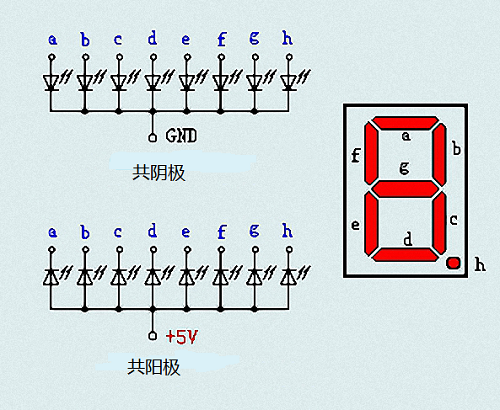
Each segment of the digital display is composed of an LED. So when you use it, you also need to use a current-limiting resistor. Otherwise, the LED will be burned out. In this experiment, we use an ordinary common-cathode one-digit display. As we mentioned above, you should connect the common cathode to GND. To light up a segment LED, you can set its associated pin to HIGH.
4. Project Wiring Diagram:
Note: The direction of the seven-segment display inserted into the breadboard should be consistent with the wiring diagram, with one extra dot at the bottom-right corner.
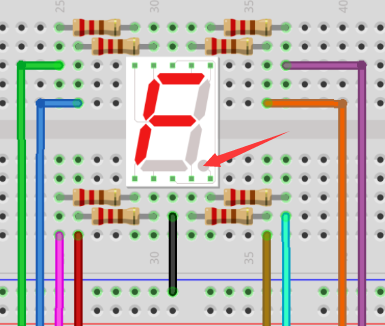
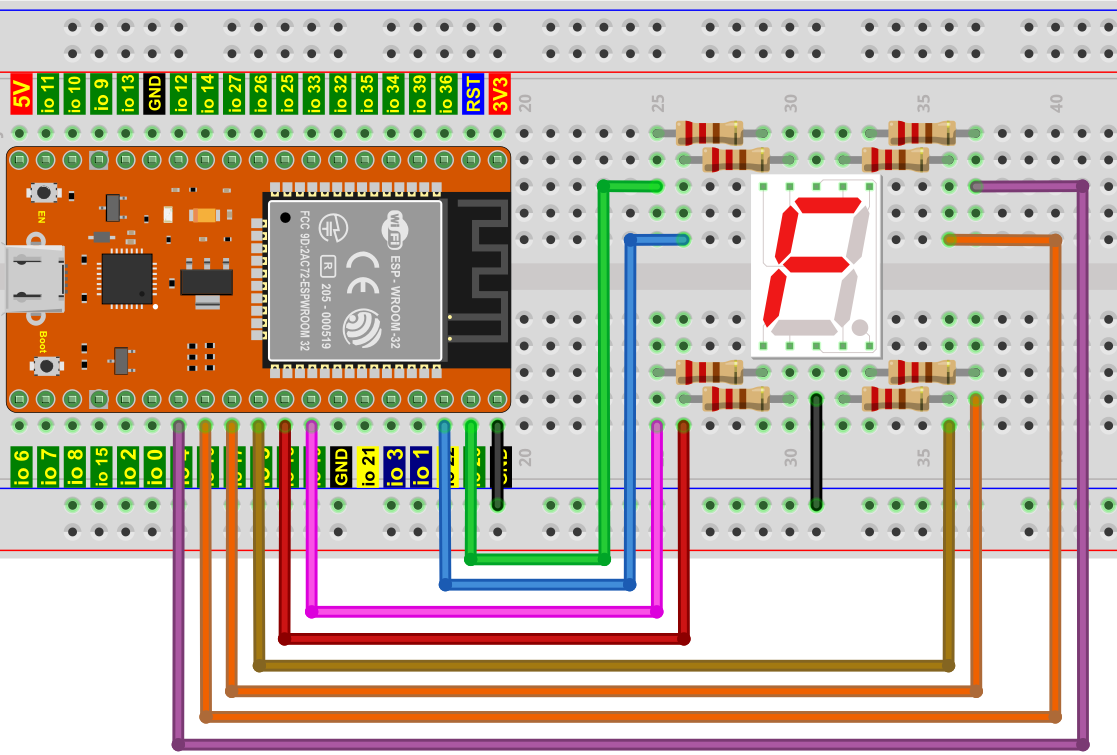
5. Project Code:
The digit display is divided into 7 segments, and the decimal point display is 1 segment. When displaying certain digits, the corresponding segments will be lit. For example, when displaying digit 1, segments b and c will be turned on.
//**********************************************************************
/*
 * File Name : One-digit display
 * Description : The one-digit display shows digits from 9 to 0.
*/
// Set the IO PIN of each segment
int a=16; // Digital PIN 16 of segment a
int b=4; // Digital PIN 4 of segment b
int c=5; // Digital PIN 5 of segment c
int d=18; // Digital PIN 18 of segment d
int e=19; // Digital PIN 19 of segment e
int f=22; // Digital PIN 22 of segment f
int g=23; // Digital PIN 23 of segment g
int dp=17; // Digital PIN 17 of segment dp
void digital_0(void) // Display digit 0
{
digitalWrite(a,HIGH);
digitalWrite(b,HIGH);
digitalWrite(c,HIGH);
digitalWrite(d,HIGH);
digitalWrite(e,HIGH);
digitalWrite(f,HIGH);
digitalWrite(g,LOW);
digitalWrite(dp,LOW);
}
void digital_1(void) // Display digit 1
{
digitalWrite(a,LOW);
digitalWrite(b,HIGH);
digitalWrite(c,HIGH);
digitalWrite(d,LOW);
digitalWrite(e,LOW);
digitalWrite(f,LOW);
digitalWrite(g,LOW);
digitalWrite(dp,LOW);
}
void digital_2(void) // Display digit 2
{
digitalWrite(a,HIGH);
digitalWrite(b,HIGH);
digitalWrite(c,LOW);
digitalWrite(d,HIGH);
digitalWrite(e,HIGH);
digitalWrite(f,LOW);
digitalWrite(g,HIGH);
digitalWrite(dp,LOW);
}
void digital_3(void) // Display digit 3
{
digitalWrite(a,HIGH);
digitalWrite(b,HIGH);
digitalWrite(c,HIGH);
digitalWrite(d,HIGH);
digitalWrite(f,LOW);
digitalWrite(e,LOW);
digitalWrite(dp,LOW);
digitalWrite(g,HIGH);
}
void digital_4(void) // Display digit 4
{
digitalWrite(a,LOW);
digitalWrite(b,HIGH);
digitalWrite(c,HIGH);
digitalWrite(d,LOW);
digitalWrite(e,LOW);
digitalWrite(f,HIGH);
digitalWrite(g,HIGH);
digitalWrite(dp,LOW);
}
void digital_5(void) // Display digit 5
{
digitalWrite(a,HIGH);
digitalWrite(b,LOW);
digitalWrite(c,HIGH);
digitalWrite(d,HIGH);
digitalWrite(e,LOW);
digitalWrite(f,HIGH);
digitalWrite(g,HIGH);
digitalWrite(dp,LOW);
}
void digital_6(void) // Display digit 6
{
digitalWrite(a,HIGH);
digitalWrite(b,LOW);
digitalWrite(c,HIGH);
digitalWrite(d,HIGH);
digitalWrite(e,HIGH);
digitalWrite(f,HIGH);
digitalWrite(g,HIGH);
digitalWrite(dp,LOW);
}
void digital_7(void) // Display digit 7
{
digitalWrite(a,HIGH);
digitalWrite(b,HIGH);
digitalWrite(c,HIGH);
digitalWrite(d,LOW);
digitalWrite(e,LOW);
digitalWrite(f,LOW);
digitalWrite(g,LOW);
digitalWrite(dp,LOW);
}
void digital_8(void) // Display digit 8
{
digitalWrite(a,HIGH);
digitalWrite(b,HIGH);
digitalWrite(c,HIGH);
digitalWrite(d,HIGH);
digitalWrite(e,HIGH);
digitalWrite(f,HIGH);
digitalWrite(g,HIGH);
digitalWrite(dp,LOW);
}
void digital_9(void) // Display digit 9
{
digitalWrite(a,HIGH);
digitalWrite(b,HIGH);
digitalWrite(c,HIGH);
digitalWrite(d,HIGH);
digitalWrite(e,LOW);
digitalWrite(f,HIGH);
digitalWrite(g,HIGH);
digitalWrite(dp,LOW);
}
void setup()
{
  // Initialize the digital pin LED as output.
  pinMode(a, OUTPUT);
  pinMode(b, OUTPUT);
  pinMode(c, OUTPUT);
  pinMode(d, OUTPUT);
  pinMode(e, OUTPUT);
  pinMode(f, OUTPUT);
  pinMode(g, OUTPUT);
  pinMode(dp, OUTPUT);
}
void loop()
{
while(1)
{
digital_9();// Display digit 9
delay(1000); // Delay 1 s
digital_8();// Display digit 8
delay(1000);
digital_7();// Display digit 7
delay(1000);
digital_6();// Display digit 6
delay(1000);
digital_5();// Display digit 5
delay(1000);
digital_4();// Display digit 4
delay(1000);
digital_3();// Display digit 3
delay(1000);
digital_2();// Display digit 2
delay(1000);
digital_1();// Display digit 1
delay(1000);
digital_0();// Display digit 0
delay(1000);
}}
//**********************************************************************
6. Project Observation:
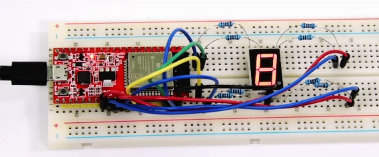
After the code is uploaded successfully, power it via the USB cable. The phenomenon you will see is: the one-digit display will show digits from 9 to 0.
Project 09 Four-Digit Display
1. Project Introduction:
The four-digit display is a very practical display device. It is needed for electronic clock displays, scorekeepers on the court, and people counters in parks. Because of its low price and ease of use, more and more projects will use 4-digit displays. In this project, we use the ESP32 to control a four-digit display to show four-digit numbers.
2. Project Components:
|
|
 |
|---|---|---|
| ESP32*1 | Breadboard*1 | Four-digit display*1 |
 |
|
|
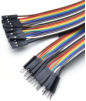
| Male-to-female Dupont wires*4 | USB Cable*1 |
3. Component Knowledge:
TM1650 four-digit display: It is a 12-pin four-digit common-cathode display (0.36 inch) with a clock dot, whose driver chip is TM1650. It only needs 2 signal lines for the microcontroller to control the four-digit display. The control interface level can be 5V or 3.3V.
G: Power supply negative terminal
V: Power supply positive terminal, +5V
DIO: Data IO module, can be connected to any digital pin
CLK: Clock pin, can be connected to any digital pin
4-digit display module specifications:
Operating voltage: DC 3.3V-5V
Operating current: ≤100MA
Maximum power: 0.5W
Display color: Red
4-digit display module schematic:

4. Project Wiring Diagram:

5. Add the TM1650 Library:
The code in this project uses a library named "TM1650". If you have already added the "TM1650" library, skip this step. If you have not added it yet, please install it before learning. The steps to add a third-party library are as follows:
How to install the library?
Open the Arduino IDE, click "Sketch" → "Include Library" → "Add .ZIP Library...". In the pop-up window, find the file named ..\library-files\arduino-c-windows\TM1650.ZIP in that directory, first select the TM1650.ZIP file, then click "Open".


6. Project Code:
//**********************************************************************

#include "SevenSegmentTM1637.h"
#include "SevenSegmentExtended.h"//Need to import the library file

SevenSegmentExtended   tm_4display(22, 21); //Define the display pins, CLk connected to digital A5 port, DIO connected to digital A4 port

void setup() {
  tm_4display.setBacklight(20);//Set the display brightness
  tm_4display.begin();//Begin communication with the display
}

void loop() {
  tm_4display.print("0000");
  delay(1000);
  tm_4display.print("1111");
  delay(1000);
  tm_4display.print("2222");
  delay(1000);
  tm_4display.print("3333");
  delay(1000);
  tm_4display.print("4444");
  delay(1000);
  tm_4display.print("5555");
  delay(1000);
  tm_4display.print("6666");
  delay(1000);
  tm_4display.print("7777");
  delay(1000);
  tm_4display.print("8888");
  delay(1000);
  tm_4display.print("9999");
  delay(1000);
  tm_4display.printTime( 15, 35, true);
  delay(1000);

}

//**********************************************************************************
6. Project Observation:
After the code is uploaded successfully, power it via the USB cable. The phenomenon you will see is: the four-digit display shows the four-digit numbers 0000-9999, and repeats these actions in an infinite loop.

Project 10 8×8 Dot Matrix
1. Project Introduction:
A dot matrix is an electronic digital display device that can display information on machines, clocks, public transportation departure indicators, and many other devices. In this project, we will use the ESP32 to control an 8x8 LED dot matrix to display patterns.
2. Project Components:
|
|
 |
|---|---|---|
| ESP32*1 | Breadboard*1 | 8×8 Dot Matrix*1 |
|
|
|
| Dupont wires several | USB Cable*1 |
3. Component Knowledge:
8×8 dot matrix module: The 8×8 dot matrix is composed of 64 LEDs, each placed at the intersection of a row and a column. When using a microcontroller to drive an 8×8 dot matrix, we need a total of 16 digital ports, which greatly wastes microcontroller resources. For this reason, we specially designed this module, which uses the HT16K33 chip to drive one 8×8 dot matrix, and only needs the microcontroller's I2C communication port to control the dot matrix, greatly saving microcontroller resources.
8×8 dot matrix module specifications:
Operating voltage: DC 5V
Operating current: ≤200MA
Maximum power: 1W
8×8 dot matrix module principle:
As shown in the schematic, if you want to light up the LED in the first row and first column, you only need to set C1 to high level and R1 to low level, and it lights up. If we want all the LEDs in the first row to light up, then we set R1 to low level and C1~C8 all to high level. The principle is very simple. But in this way we need to use a total of 16 IO ports, which greatly wastes microcontroller resources. For this reason, we specially designed this module, which uses the HT16K33 chip to drive one 8*×8 dot matrix, and only needs the microcontroller's I2C communication port to control the dot matrix, greatly saving microcontroller resources.

There are two rows of pins on the back of the module: one side is IN, and the other side is OUT. Connect the main board wiring to the IN side, through which the control signal is input; the OUT row of pins is used for cascading multiple modules, that is, to connect to the IN of the second module.

4. Project Wiring Diagram:

| No. | Dot Matrix Module | Main Board | Introduction |
|---|---|---|---|
| 1 | VCC | 3.3V | Power positive 3.3V or 5V |
| 2 | GND | GND | Power negative |
| 3 | DIN | 23 | Data input (MOSI) |
| 4 | CS | 5 | Chip select signal (selected at low level) |
| 5 | CLK | 18 | Clock signal (sck) |
5. Add the HT16K33_Lib_For_ESP32 Library:
The code in this project uses a library named "HT16K33_Lib_For_ESP32". If you have already added the "HT16K33_Lib_For_ESP32" library, skip this step. If you have not added it yet, please add it before learning.
How to install the library?
Open the Arduino IDE, click "Sketch" → "Include Library" → "Add .ZIP Library...". In the pop-up window, find the file named ..\library-files\arduino-c-windows\HT16K33_Lib_For_ESP32.ZIP in that directory, first select the HT16K33_Lib_For_ESP32.ZIP file, then click "Open".


6. Project Code:
//**********************************************************************************
/*
 * File Name : 8×8 dot matrix
 * Description : 8x8 LED dot matrix displays a "heart" pattern.
*/
#include <Arduino.h>
#include <MD_MAX72xx.h>

#define HARDWARE_TYPE MD_MAX72XX::FC16_HW
#define MAX_DEVICES 1

#define CLK_PIN   18  // clk connected to pin 18
#define DATA_PIN  23  // din connected to pin 23
#define CS_PIN    5   // cs connected to pin 5

MD_MAX72XX mx = MD_MAX72XX(HARDWARE_TYPE, CS_PIN, MAX_DEVICES);

const uint8_t heart[] = {
  0x00,
  0x66,
  0xFF,
  0xFF,
  0xFF,
  0x7E,
  0x3C,
  0x18
};

void setup() {
  mx.begin();
  mx.clear();
  for (uint8_t row = 0; row < 8; row++) {
    mx.setRow(0, row, heart[row]);
  }
}

void loop() {
}
//**********************************************************************************
6. Project Observation:
After the code is uploaded successfully, power it via the USB cable. The phenomenon you will see is: the 8*×8 dot matrix displays a "heart" pattern.

Project 11 Shift Register Controlling 8 LEDs
1. Project Introduction:
In the previous projects, we have already learned how to light up an LED.
Usually a development board has a limited number of IO ports. If you need to control a large number of devices, there will be a situation of insufficient IO ports. For example, in Project 2, each lamp requires one IO port to control, so if you need to control many lamps, the IO ports will be exhausted. To deal with this scenario, we introduce a shift register to expand the IO ports. In this project, we will use the ESP32, the 74HC595 chip, and LEDs to make a flowing light to understand the functions of the 74HC595 chip.
2. Project Components:
|
|
 |
 |
|---|---|---|---|
| ESP32*1 | Breadboard*1 | 74HC595N Chip*1 | Red LED*8 |
|
|
|
|
| 220Ω Resistor*8 | Jumper Wires several | USB Cable*1 |
3. Component Knowledge:
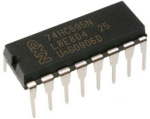
74HC595N chip: This chip has an 8-bit shift register and a memory, as well as a three-state output function. Simply put, its greatest function is to "use a small number of IO ports to expand multiple output ports." Normally, controlling 8 LEDs requires occupying 8 GPIO pins of the ESP32. But through the 74HC595N, you only need to occupy 3 GPIO pins to easily control 8 outputs, and you can also expand them indefinitely through cascading.
If you want to understand it in depth, you can check the related materials Click to jump

Pin Description:
| Pin: | Pin Description: |
|---|---|
| Pin 13 OE | It is an output enable pin, used to ensure whether the data of the latch is input to the Q0-Q7 pins. At low level, it does not output high level. In this experiment, we directly connect it to GND and keep it at low level to output data. |
| Pin 14 SI/DS | This is the pin through which the 74HC595 receives data, i.e., the serial data input. It can only input one bit at a time, so by inputting 8 times consecutively, one byte can be formed. |
| Pin 10 SCLR/MR | A pin that initializes the internal storage register. At low level, it initializes the internal storage register. In this experiment, we connect it to VCC to keep it at a high level. |
| Pin 11 SCK/SH_CP | The clock pin of the shift register. On the rising edge, the data in the shift register shifts back as a whole and receives new data input. |
| Pin 12 RCK/ST_CP | The clock input pin of the storage register. On the rising edge, data is transferred from the shift register to the storage register. At this time, the data is output in parallel from the Q0~Q7 ports. |
| Pin 9 SQH | The pin is a serial output pin, specifically used for chip cascading, connected to the SI end of the next 74HC595. |
| Q0--Q7 (Pin 15, Pins 1-7) | The eight-bit parallel output terminals, which can directly control the 8 segments of a digital display. |
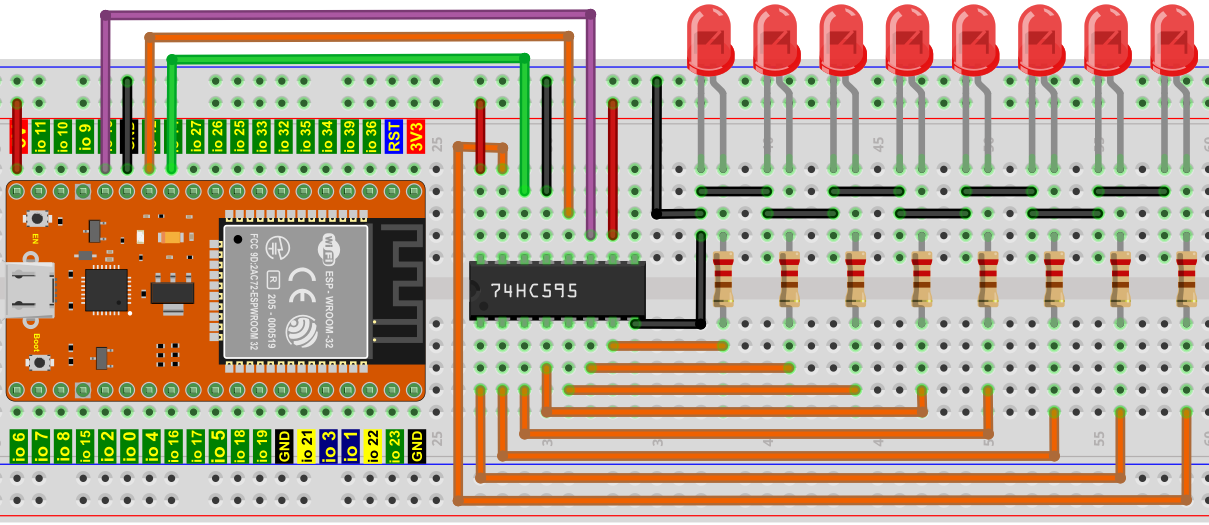
4. Project Wiring Diagram:
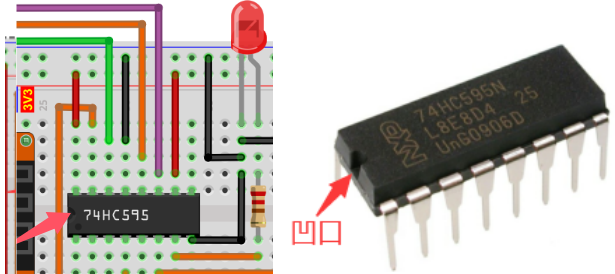
Note: You need to pay attention to the insertion direction of the 74HC595N chip.
5. Project Code:
//**********************************************************************
/*
 * File Name : 74HC595N controlling 8 LEDs
 * Description : Use 74HC575N to drive the LED flowing light.
*/
int dataPin = 14;   // The pin connected to the 74HC595 DS (Pin14)
int latchPin = 12;  // The ST_CP connection pin of the 74HC595 (Pin12)
int clockPin = 13;  // The SH_CP connection pin of the 74HC595 (Pin11)

void setup() {
  // Set the pins to output
  pinMode(latchPin, OUTPUT);
  pinMode(clockPin, OUTPUT);
  pinMode(dataPin, OUTPUT);
}

void loop() {
  // Define a single-byte variable, using 8 bits to represent the state of the 8 LEDs of the LED bar graph.
  //This variable is assigned 0x01, i.e., binary 00000001, indicating that only one lamp is lit.
  byte x = 0x01;    // 0b 0000 0001
  for (int j = 0; j < 8; j++) { // Make the led lights light up from right to left
    writeTo595(LSBFIRST, x);
    x <<= 1; // Shift the variable left by one bit, then the bright LED moves left one step.
    delay(50);
  }
  delay(100);
  x = 0x80;       //0b 1000 0000
  for (int j = 0; j < 8; j++) { // Make the led lights light up from left to right
    writeTo595(LSBFIRST, x);
    x >>= 1;
    delay(50);
  }
  delay(100);
}
void writeTo595(int order, byte _data ) {
  // Output low level to latchPin
  digitalWrite(latchPin, LOW);
  // Send serial data to the 74HC595
  shiftOut(dataPin, clockPin, order, _data);
  // Output high level to latchPin, the 74HC595 updates the data to the parallel output ports.
  digitalWrite(latchPin, HIGH);
}
//**********************************************************************************
6. Project Observation:
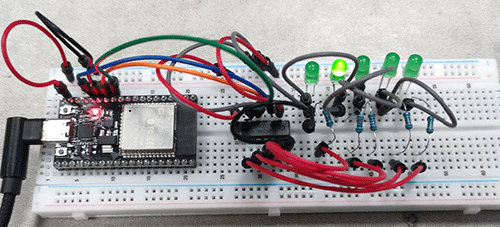
After the code is uploaded successfully, power it via the USB cable. The observable phenomenon is: the 8 LEDs start to blink in a flowing mode.
Project 12 Active Buzzer
1. Project Introduction:
The active buzzer is a sound-producing component. It is widely used as a sound-producing element for computers, printers, alarms, electronic toys, telephones, timers, etc. It has an internal vibration source and only needs to be connected to a 5V power supply to continuously emit a buzzing sound. In this project, we will use the ESP32 to control the active buzzer to emit a "beep beep" sound.
2. Project Components:
|
|
 |
 |
|---|---|---|---|
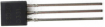
| ESP32*1 | Breadboard*1 | Active Buzzer*1 | NPN Transistor (S8050)*1 |
|
|
|
|
| 1KΩ Resistor*1 | Jumper Wires several | USB Cable*1 |
3. Component Knowledge:
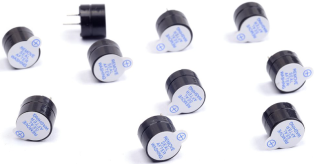
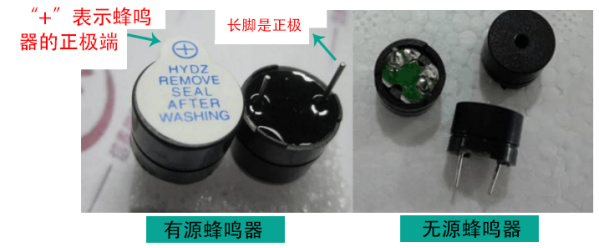
Active buzzer: It has a simple oscillator circuit inside, which can convert constant DC current into a pulse signal of a specific frequency. Once the active buzzer receives a high level, it will produce sound. In contrast, a passive buzzer is an integrated electronic buzzer without an internal vibration source, and it must be driven by a 2K-5K square wave, not a DC signal. The appearance of these two buzzers is very similar, but the buzzer with a green circuit board is a passive buzzer, while the other with black tape is an active buzzer. The passive buzzer cannot distinguish positive polarity, while the active buzzer can. As shown below:
Transistor: Since the buzzer requires a large current, the GPIO of the ESP32 output capacity cannot meet the requirement, so an NPN transistor is needed here to amplify the current. A transistor, full name: semiconductor transistor, is a semiconductor device that controls current. A transistor can be used to amplify weak signals, and it can also be used as a switch. It has three electrodes (pins): base (b), collector (c), and emitter (e). When current flows between "be", "ce" will allow several times the current to pass through (transistor amplification). At this time, the transistor works in the amplification region. When the current between "be" exceeds a certain value, "ce" will no longer allow the current to increase, and the transistor works in the saturation region. There are two types of transistors as shown below: PNP and NPN
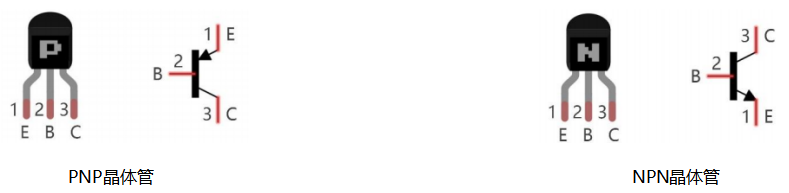
In our kit, the PNP transistor is marked 8550, and the NPN transistor is marked 8050.
Based on the characteristics of the transistor, it is often used as a switch in digital circuits. Since the microcontroller's output current capacity is very weak, we will use transistors to amplify the current and drive large-current components. When using an NPN transistor to drive a buzzer, the following method is usually adopted: if the GPIO outputs a high level, the current will flow through R1, the transistor will conduct, and the buzzer will make a sound. If the GPIO outputs a low level, no current flows through R1, the transistor will not conduct, and the buzzer will not sound. When using a PNP transistor to drive a buzzer, the following method is usually adopted: if the GPIO outputs a low level, the current will flow through R1, the transistor will conduct, and the buzzer will make a sound. If the GPIO outputs a high level, no current flows through R1, the transistor will not conduct, and the buzzer will not sound.
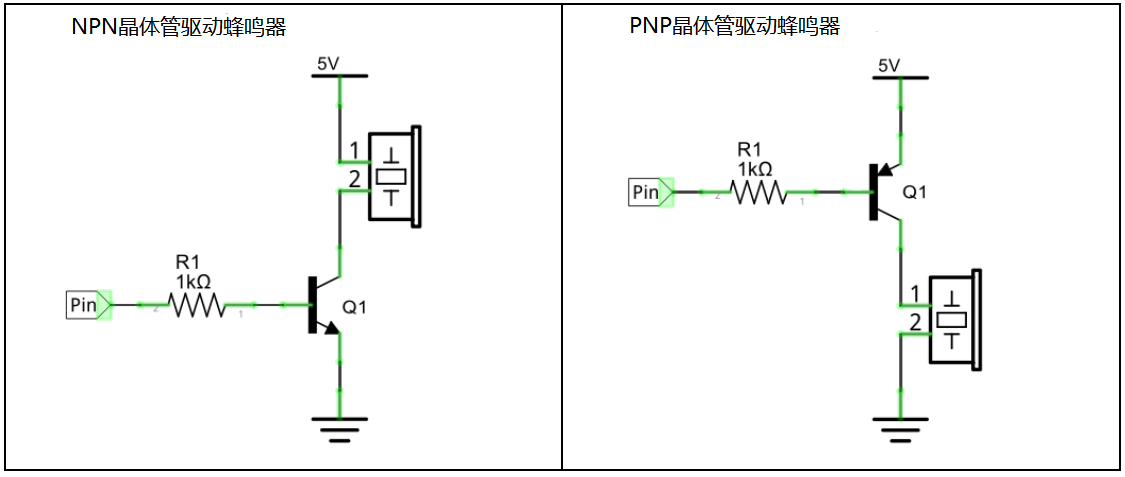
4. Project Wiring Diagram:
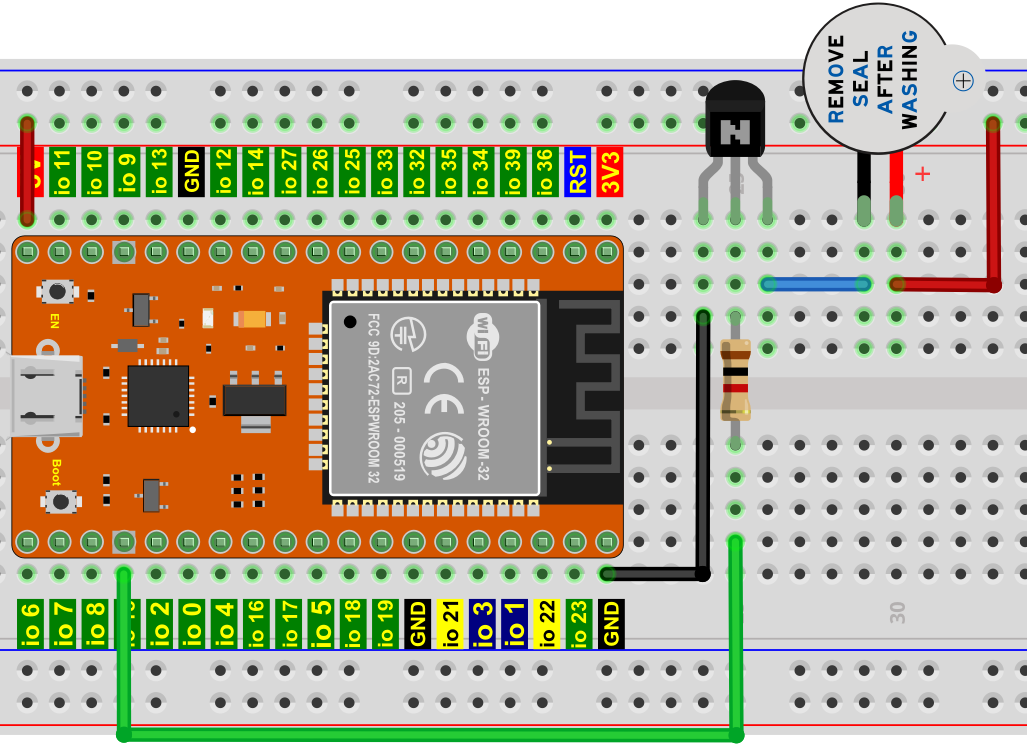
Note: The power supply for the buzzer in this circuit is 5V. Under a 3.3V power supply, the buzzer can work, but the loudness will be reduced.
5. Project Code:
//**********************************************************************
/*
 * File Name   : Active buzzer
 * Description : The active buzzer beeps.
*/
#define buzzerPin  15   //Define the buzzer pin

void setup ()
{
  pinMode (buzzerPin, OUTPUT);
}
void loop ()
{
  digitalWrite (buzzerPin, HIGH);
  delay (500);
  digitalWrite (buzzerPin, LOW);
  delay (500);
}
//**********************************************************************************
6. Project Observation:
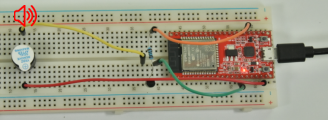
After the code is uploaded successfully, power it via the USB cable. The observable phenomenon is: the active buzzer emits a "beep beep" sound.
Project 13 Passive Buzzer
1. Project Introduction:
In the previous project, we studied the active buzzer, which can only make one kind of sound, which may make you feel monotonous. This project will learn about another kind of buzzer, the passive buzzer. Unlike the active buzzer, the passive buzzer can emit sounds of different frequencies. In this project, you will use the ESP32 to control the passive buzzer to work.
2. Project Components:
|
|
 |
|
|---|---|---|---|
| ESP32*1 | Breadboard*1 | Passive Buzzer*1 | NPN Transistor (S8050)*1 |
|
|
|
|
| 1KΩ Resistor*1 | Jumper Wires several | USB Cable*1 |
3. Component Knowledge:
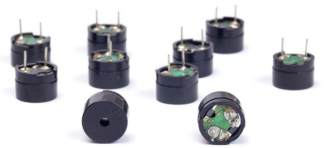
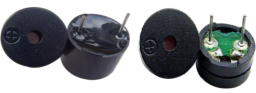
Passive buzzer: It is an integrated electronic buzzer without an internal vibration source. It must be driven by a 2K-5K square wave, not a DC signal. Its appearance is very similar to the active buzzer, but the buzzer with a green circuit board is a passive buzzer, while the other with black tape is an active buzzer. The passive buzzer cannot distinguish positive polarity, while the active buzzer can.
Transistor: Please refer to Project 12.
4. Project Wiring Diagram:
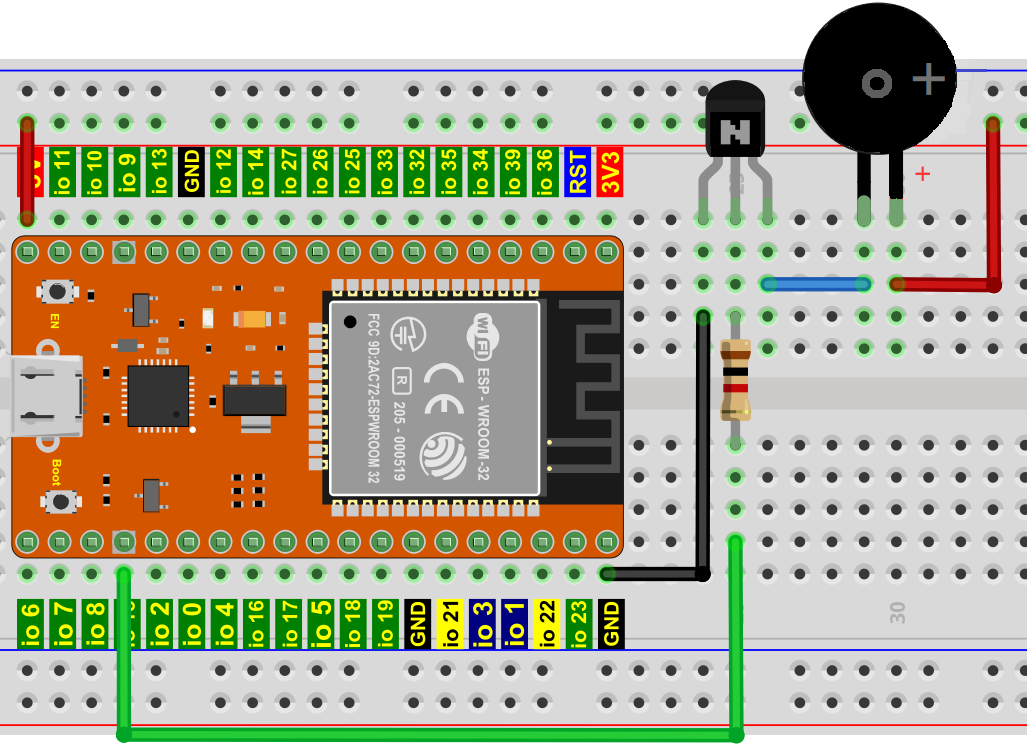
5. Project Code:
//**********************************************************************
/*
 * File Name   : Passive buzzer
 * Description : The passive buzzer emits an alarm.
*/
#define LEDC_CHANNEL_0 0

// The LEDC timer uses 13-bit precision

#define LEDC_TIMER_13_BIT  13

// Define the tool I/O port

#define BUZZER_PIN  15

//Create a music melody list

int melody[] = {330, 330, 330, 262, 330, 392, 196, 262, 196, 165, 220, 247, 233, 220, 196, 330, 392, 440, 349, 392, 330, 262, 294, 247, 262, 196, 165, 220, 247, 233, 220, 196, 330, 392,440, 349, 392, 330, 262, 294, 247, 392, 370, 330, 311, 330, 208, 220, 262, 220, 262,

294, 392, 370, 330, 311, 330, 523, 523, 523, 392, 370, 330, 311, 330, 208, 220, 262,220, 262, 294, 311, 294, 262, 262, 262, 262, 262, 294, 330, 262, 220, 196, 262, 262,262, 262, 294, 330, 262, 262, 262, 262, 294, 330, 262, 220, 196};

//Create a list of note durations

int noteDurations[] = {8,4,4,8,4,2,2,3,3,3,4,4,8,4,8,8,8,4,8,4,3,8,8,3,3,3,3,4,4,8,4,8,8,8,4,8,4,3,8,8,2,8,8,8,4,4,8,8,4,8,8,3,8,8,8,4,4,4,8,2,8,8,8,4,4,8,8,4,8,8,3,3,3,1,8,4,4,8,4,8,4,8,2,8,4,4,8,4,1,8,4,4,8,4,8,4,8,2};
void setup() {
  pinMode(BUZZER_PIN, OUTPUT); // Set the buzzer to output mode
}

void loop() {

  int noteDuration; //Create a variable noteDuration

  for (int i = 0; i < sizeof(noteDurations); ++i)

  {
      noteDuration = 800/noteDurations[i];

      ledcSetup(LEDC_CHANNEL_0, melody[i]*2, LEDC_TIMER_13_BIT);

      ledcAttachPin(BUZZER_PIN, LEDC_CHANNEL_0);

      ledcWrite(LEDC_CHANNEL_0, 50);

      delay(noteDuration * 1.30); //Delay
  }
}
//**********************************************************************
6. Project Observation:
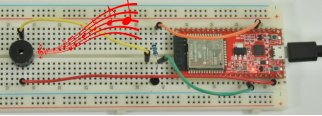
After the code is uploaded successfully, power it via the USB cable. The phenomenon you will see is: the passive buzzer plays music.
Project 14 Small Desk Lamp
1. Project Introduction:
Do you know that the ESP32 can light up an LED when you press an external button? In this project, we will use the ESP32, a button switch, and an LED to make a mini desk lamp.
2. Project Components:
|
|
 |
|---|---|---|
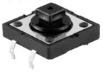
| ESP32*1 | Breadboard*1 | Button*1 |
 |
 |
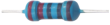 |
| 10KΩ Resistor*1 | Red LED*1 | 220Ω Resistor*1 |
 |
|
|
| Button Cap*1 | Jumper Wires several | USB Cable*1 |
3. Component Knowledge:
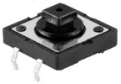
Button: A button can control the on and off of a circuit. When the button is connected into a circuit, the circuit is disconnected when the button is not pressed. Once the button is pressed, the circuit is connected, but after releasing it, it is disconnected again. But why is it only energized when pressed? This starts from the internal structure of the button. Before being pressed, the current cannot pass from one end of the button to the other; when pressed, the metal piece inside the button connects the two sides to let the current pass.
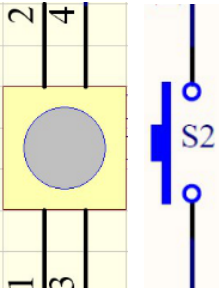
The internal structure of the button is shown in the figure: 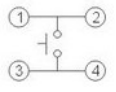 , before the button is pressed, 1 and 2 are conductive, and 3 and 4 are also conductive, but 1-3 or 1-4 or 2-3 or 2-4 are disconnected (not conductive); only when the button is pressed are 1-3 or 1-4 or 2-3 or 2-4 conductive.
When designing circuits, the button switch is one of the most commonly used components.
Button schematic:
What is button bounce?
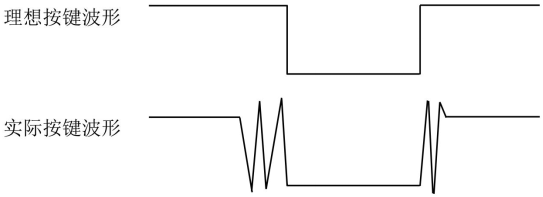
The switch circuit we imagine is "press the button - conduct immediately", "press again - disconnect immediately", but in fact it is not like this. A button usually uses a mechanical elastic switch, and when the mechanical contacts of the mechanical elastic switch open and close (usually around 10ms), a series of bounces will be generated due to the elastic effect, causing the button switch to not stably connect the circuit immediately when closed, and not instantly and completely disconnect when opened.
So how do you eliminate button bounce?
There are two commonly used methods to eliminate bounce: software methods and hardware methods. Here we focus on the convenient and simple software method. We already know that the bounce time generated by elastic inertia is around 10ms. Using a delay command to postpone the execution time of the command can achieve the effect of eliminating bounce.
So we add a 0.02-second delay in the code to achieve the button debounce function.

4. Project Wiring Diagram:
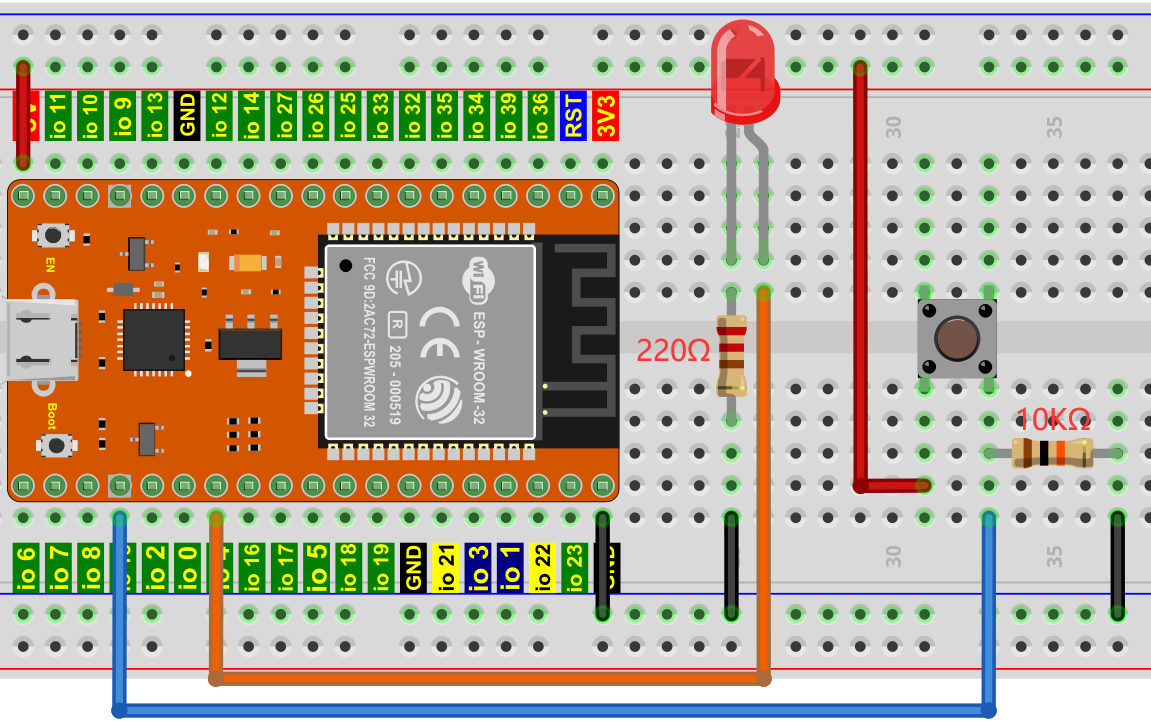
Note:
How to connect the LED
How to identify a five-color-ring 220Ω resistor and a five-color-ring 10KΩ resistor
5. Project Code:
//**********************************************************************
/*
 * File Name  : Small desk lamp
 * Description : Make a small desk lamp.
*/
#define PIN_LED    4
#define PIN_BUTTON 15
bool ledState = false;

void setup() {
  // Initialize the digital pin PIN_LED as output.
  pinMode(PIN_LED, OUTPUT);
  pinMode(PIN_BUTTON, INPUT);
}

// The loop function runs repeatedly forever
void loop() {
  if (digitalRead(PIN_BUTTON) == LOW) {
    delay(20);
    if (digitalRead(PIN_BUTTON) == LOW) {
      reverseGPIO(PIN_LED);
    }
    while (digitalRead(PIN_BUTTON) == LOW);
  }
}

void reverseGPIO(int pin) {
  ledState = !ledState;
  digitalWrite(pin, ledState);
}
//**********************************************************************
6. Project Observation:
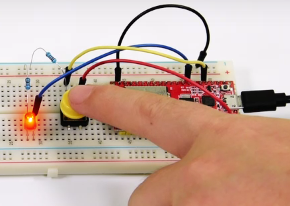
After the code is uploaded successfully, power it via the USB cable. The phenomenon you will see is: press the button, and the LED turns on; when the button is released, the LED still stays on. Press the button again, and the LED turns off; when the button is released, the LED stays off. Isn't it very much like a small desk lamp?
Project 15 Simulating an Hourglass
1. Project Introduction:
Ancient people had no electronic clocks, so they invented the hourglass to measure time. The hourglass has a relatively large capacity on both sides, with fine sand loaded on one side and a very small channel in the middle. Stand the hourglass upright, with the side containing the fine sand on top. Due to gravity, the fine sand flows down through the channel to the other side of the hourglass. When all the fine sand has flowed to the bottom, turn it over and record the number of repetitions in a day. The next day, you can know the approximate time of the day through the number of times the hourglass flows back and forth. In this lesson, we will use the ESP32 to control a tilt switch and LEDs to simulate an hourglass and make an electronic hourglass.
2. Project Components:
|
|
 |
|
|---|---|---|---|
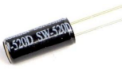
| ESP32*1 | Breadboard*1 | Tilt Switch*1 | 10KΩ Resistor*1 |
|
|
|
|
| Red LED*4 | 220Ω Resistor*4 | Jumper Wires several | USB Cable*1 |
3. Component Knowledge:
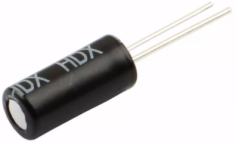
The tilt switch is also called a digital switch or ball switch, and there is a metal ball inside. It is used to detect small-angle tilting.
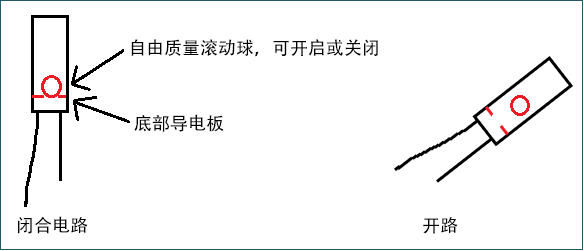
The principle is very simple: when the switch is tilted to a certain angle, the ball inside rolls down and touches the two contacts connected to the external pins, thus triggering the circuit. Otherwise, the ball will move away from the contacts, thus disconnecting the circuit.
Here the internal structure of the tilt switch is used to illustrate how it works, as shown below:
4. Project Wiring Diagram:
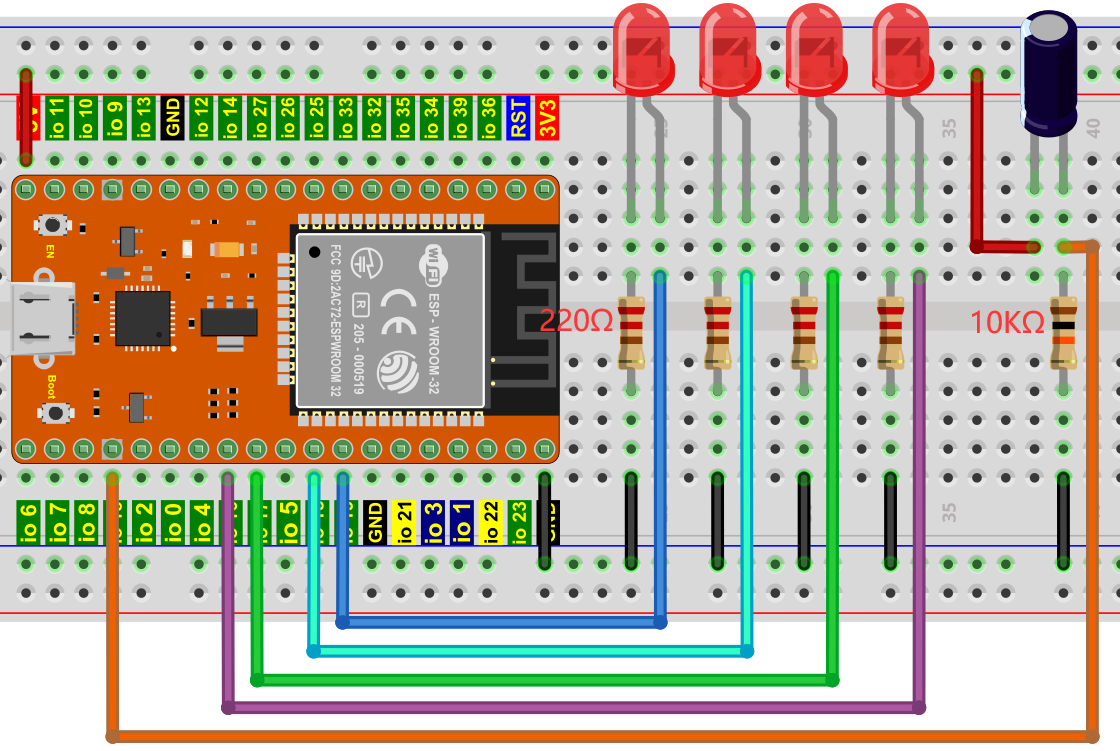
Note:
How to connect the LED
How to identify a five-color-ring 220Ω resistor and a five-color-ring 10KΩ resistor
5. Project Code:
//**********************************************************************
/*
 * File Name  : Tilt and LED
 * Description : Tilt switch and four LEDs simulate an hourglass.
*/
#define SWITCH_PIN  15  // The tilt switch is connected to Pin15
byte switch_state = 0;
void setup()
{
  for(int i=16;i<20;i++)
  {
    pinMode(i, OUTPUT);
  }
  pinMode(SWITCH_PIN, INPUT);
  for(int i=16;i<20;i++)
  {
    digitalWrite(i,0);
  }
  Serial.begin(9600);
}
void loop()
{
switch_state = digitalRead(SWITCH_PIN);
Serial.println(switch_state);
  if (switch_state == 0)
  {
    for(int i=16;i<20;i++)
    {
      digitalWrite(i,1);
      delay(500);
    }
}
 if (switch_state == 1)
 {
   for(int i=19;i>15;i--)
   {
    digitalWrite(i,0);
    delay(500);
   }
  }
}
//**********************************************************************************
6. Project Observation:
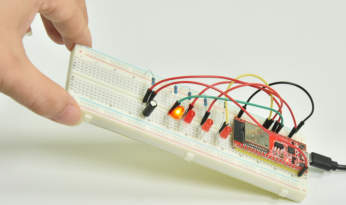
After the code is uploaded successfully, power it via the USB cable. The phenomenon you will see is: tilt the breadboard to a certain angle, and the LEDs will light up one by one. When returning to the previous angle, the LEDs will turn off one by one. Just like an hourglass, as time goes by, the sand leaks out.
Project 16 Anti-Theft Alarm
1. Project Introduction:
The PIR motion sensor measures the infrared (IR) rays emitted by moving objects. This sensor can detect the movement of people, animals, and cars, thereby triggering security alarms and lighting. They are used to detect movement and are ideal for security, such as anti-theft alarms and security lighting systems. In this project, we will use the ESP32 to control a PIR motion sensor, a buzzer, and an LED to simulate an anti-theft alarm.
2. Project Components:
|
|
 |
|
|---|---|---|---|
| ESP32*1 | Breadboard*1 | PIR Motion Sensor*1 | NPN Transistor (S8050)*1 |
 |
|
|
|
| Active Buzzer*1 | Red LED*1 | 220Ω Resistor*1 | 1KΩ Resistor*1 |
 |
|
|
|
| 3P to Dupont wire male single*1 | Jumper Wires several | USB Cable*1 |
3. Component Knowledge:
PIR motion sensor: It is a human-body infrared sensor based on the pyroelectric effect, which can detect the infrared rays emitted by the human body or animals. Combined with a Fresnel lens, the sensor can have a farther and wider detection range. It mainly uses the RE200B-P sensor element. When a person or animal is moving nearby, the module will output a high level 1; otherwise it outputs a low level 0. Special note: this sensor can detect people, animals, and cars in motion, but cannot detect stationary people, animals, and cars. The maximum detection distance is about 7 meters.
Note: The PIR motion sensor should avoid direct exposure to sunlight, car headlights, and incandescent lamps, and should not face heat sources (such as radiators, heaters) or air conditioners, to avoid false alarms caused by large environmental temperature changes. It is also susceptible to radio frequency radiation interference.
Sensor technical parameters:
Maximum input voltage: DC 5-15V
Maximum operating current: 50MA
Maximum power: 0.3W
Quiescent current: <50uA
Operating temperature: -20 ~ 85℃
Control signal: Digital signal (1/0)
Delay time: about 2.3 to 3 seconds
Sensing angle: less than 100 degrees cone angle
Maximum detection distance: about 7 meters
Sensor schematic:

4. Project Wiring Diagram:

5. Project Code:
//**********************************************************************
/*
 * File Name  : Anti-theft alarm
 * Description : PIR motion sensor, buzzer, and LED simulate an anti-theft alarm.
*/
#define buzzerPin   2   // Buzzer pin
#define ledPin   0     // LED pin
#define pirPin   15     // PIR motion sensor pin
byte pirStat = 0;   // PIR motion sensor state
void setup() {
 pinMode(buzzerPin, OUTPUT);
 pinMode(ledPin, OUTPUT);
 pinMode(pirPin, INPUT);
}
void loop()
{
 pirStat = digitalRead(pirPin);

 if (pirStat == HIGH)
 {            // If a person or moving animal is detected
   digitalWrite(buzzerPin, HIGH);  // The buzzer buzzes
   digitalWrite(ledPin, HIGH);  // The LED lights up
   delay(500);
   digitalWrite(buzzerPin, LOW);  // The buzzer stops
   digitalWrite(ledPin, LOW);  // The LED turns off
   delay(500);
 }
 else {  // Otherwise, no person or moving animal is detected,
   digitalWrite(buzzerPin, LOW); // Turn off the buzzer
   digitalWrite(ledPin, LOW);  // The LED turns off
 }
}
//*********************************************************************************
6. Project Observation:
After the code is uploaded successfully, power it via the USB cable. The phenomenon you will see is: if the PIR motion sensor detects a person moving nearby, the buzzer will continuously emit an alarm, and the LED will continuously flash.
Project 17 OLED Display
1. Project Introduction:
In life, we can use modules such as displays to do various experiments. You can also DIY a variety of small items. For example, use a temperature sensor and a display to make a temperature tester, or use an ultrasonic module and a display to make a distance tester. Below, we will use the LCD_128X32_DOT module as a display and connect it to the ESP32 control board. We will use the ESP32 board to control the LCD_128X32_DOT display to show various English characters, common symbols, and numbers.
Note: We have upgraded the LCD screen accessory to the more commonly used OLED screen. The documentation is being updated progressively. If you find that the code runs incorrectly, please contact customer service to fix it.
2. Project Components:
|
|
 |
|---|---|---|
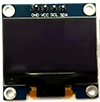
| ESP32*1 | Breadboard*1 | OLED Screen*1 |
|
|
|
| Male-to-female Dupont wires*4 | USB Cable*1 |
3. Component Knowledge:
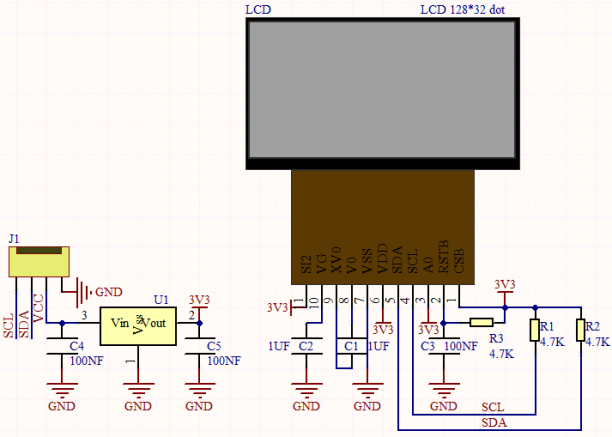
LCD_128X32_DOT: An LCD screen module with 128X32 pixels, whose driver chip is ST7567A. The module uses IIC communication, and it can display not only English letters and symbols, but also Chinese characters and patterns. When in use, you can also set it in the code so that English letters and symbols can be displayed in different sizes.
LCD_128X32_DOT schematic:
LCD_128X32_DOT technical parameters:
Display pixels: 128 * 32 characters
Operating voltage: DC 5V
Operating current: 100mA (5V)
Optimal operating voltage of the module: 5V
Brightness and contrast can be controlled through program instructions
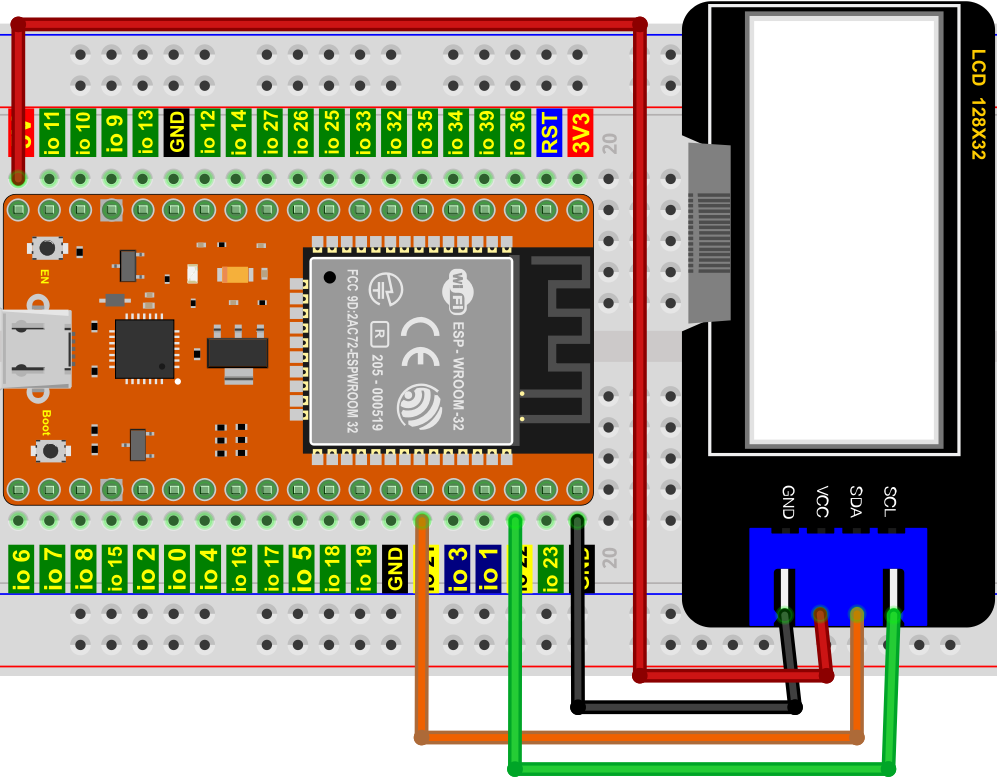
4. Project Wiring Diagram:
5. Add the LCD_128×32 Library:
The code in this project uses the "Adafruit_SSD1306" and "Adafruit_GFX" libraries. If you have not added them yet, please install them before learning. The steps to add a third-party library are as follows:
Open the Arduino IDE, click "the library management icon on the left". In the search box, enter Adafruit_SSD1306 and Adafruit_GFX respectively, and click "Install".
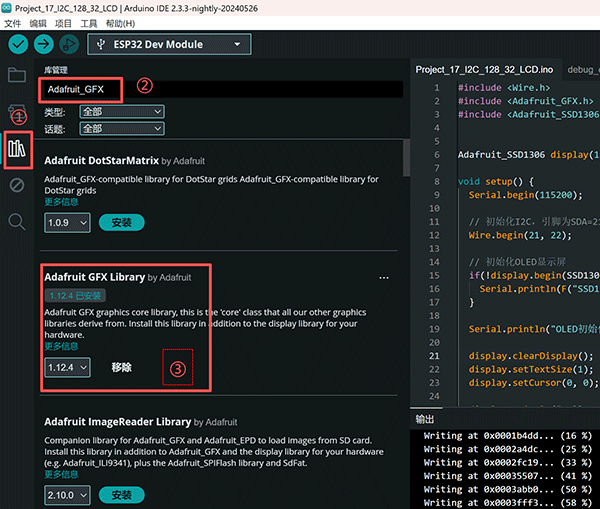
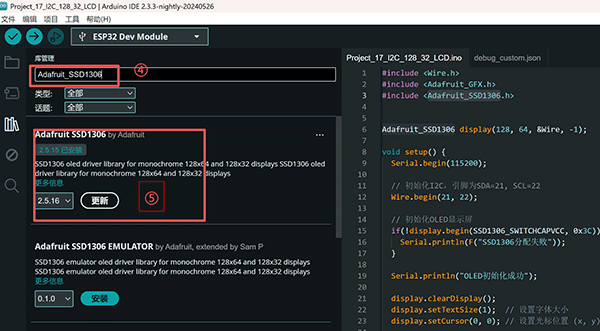
6. Project Code:
//**********************************************************************************
/*
 * File Name  : OLED 128*32
 * Description : OLED 128*32 displays a string
*/
//**********************************************************************************
#include <Wire.h>
#include <Adafruit_GFX.h>
#include <Adafruit_SSD1306.h>

Adafruit_SSD1306 display(128, 32, &Wire, -1);

void setup() {
  Serial.begin(9600);

  // Initialize I2C, the display pins are SDA=21, SCL or SCK=22
  Wire.begin(21, 22);

  if(!display.begin(SSD1306_SWITCHCAPVCC, 0x3C)) {
    Serial.println("初始化失败");
    return;
  }

  Serial.println("OLED初始化成功");

  display.clearDisplay();
  display.setTextSize(1);  // Set the font size
  display.setTextColor(SSD1306_WHITE); // Set the text color (white)
  display.setCursor(0, 0); // Set the cursor position (x, y)

  display.println("Hello world");
  display.println("0123456789");
  display.println("Using SoftI2C");
  display.display();

  Serial.println("显示内容已更新");
}

void loop() {
  // You can add the content you want to display here
  delay(1000);
}
//**********************************************************************************
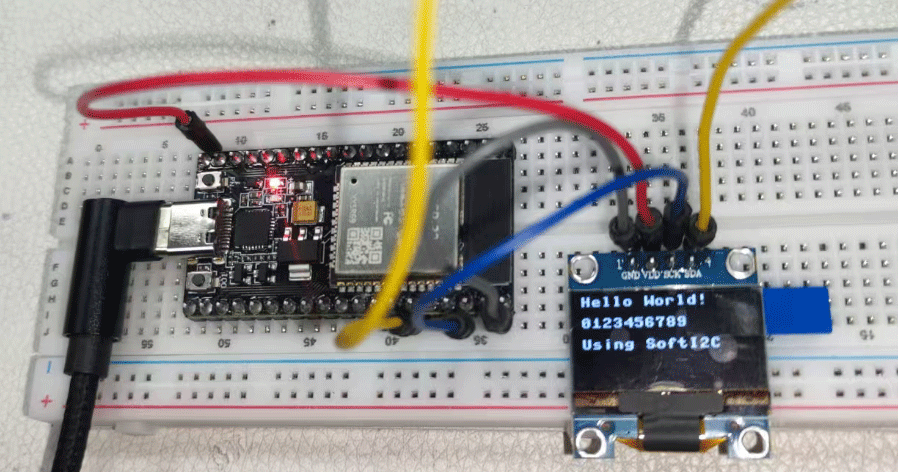
7. Project Observation: Compile and upload the code to the ESP32. After the code is uploaded successfully, power it via the USB cable. The phenomenon you will see is: the first line of the 128X32 LCD module display shows "Hello World!", the second line shows "0123456789", and the third line shows "Using SoftI2C".
Project 18 Small Fan
1. Project Introduction:
In hot summer, electric fans are needed to cool us down. So in this project, we will use the ESP32 to control a 130 motor module and small fan blades to make a small electric fan.
2. Project Components:
|
|
 |
|---|---|---|
| ESP32*1 | Breadboard*1 | 130 Motor Module*1 |
 |
 |
 |
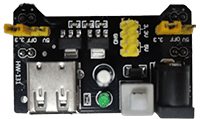
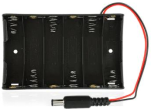
| Breadboard Power Supply Module*1 | 6-cell AA Battery Holder*1 | Fan Blade*1 |
|
 |
|
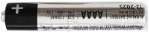
| Dupont Wires several | AA Battery (self-provided)*6 | USB Cable*1 |
3. Component Knowledge:
130 motor module: This motor control module uses the HR1124S motor control chip. The HR1124S is a single-channel H-bridge driver chip for DC motor solutions. The H-bridge driving part of the HR1124S uses PMOS and NMOS power transistors with low on-resistance. The low on-resistance ensures low power loss of the chip, allowing the chip to work safely for a longer time. In addition, the HR1124S has low standby current and low quiescent operating current. These performances make the 130 motor module easy to use in toy solutions.
130 motor module parameters:
Operating voltage: 3.3v~5V
Operating current: ≤200MA
Operating power: 2W
Operating temperature: -10℃~+50℃
130 motor module principle:
The function of the HR1124S chip is to help drive the motor. The motor requires a large current, so it cannot be driven by a triode, let alone directly by an IO port. In future work developing projects, drive modules are almost always used to drive motors, and a motor driver is never developed from scratch. There are two control methods: one is high/low level control (controlling rotation and stop), and the other is PWM control (controlling speed).

Breadboard power supply module:
Description:
This module can conveniently provide 3.3V and 5V power supplies to the breadboard. It has a DC2.1 input (DC7-12V), and also has a USB Type C interface power input.
Specifications:
Input voltage: DC jack: 7-12V; Type C USB: 5V
Current: 3.3V: maximum 500mA; 5V: maximum 500mA;
Maximum power: 2.5W
Dimensions: 53mmx26.3mm
Environmental attribute: ROHS
Interface description:
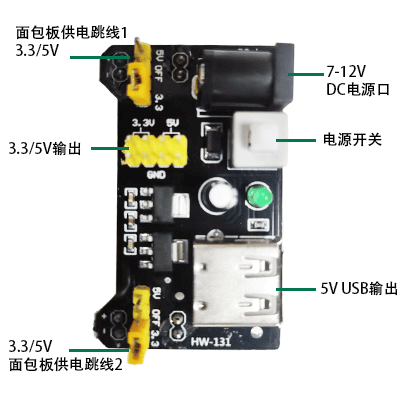
Schematic:
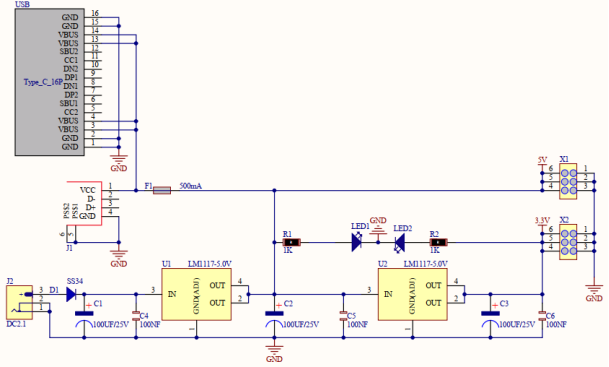
4. Project Wiring Diagram:

You can also take power directly from the development board, just plug in the USB, and wire it as follows (note that the fan will rotate after the fan program is burned, so it is best to hold it in your hand):
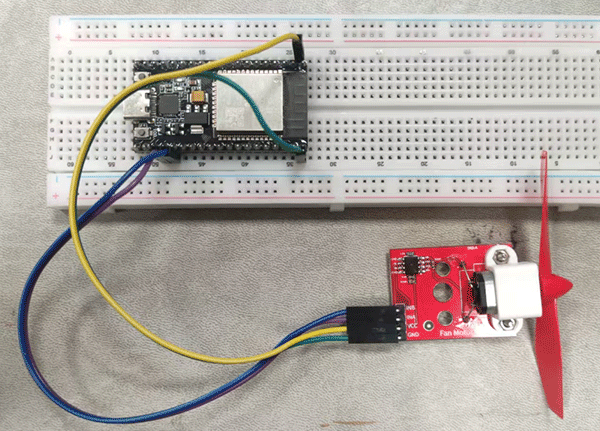
(Note: Connect the wiring first, then install a small fan blade on the DC motor.)
5. Project Code:
//**********************************************************************************
/*
 * File Name  : Small fan
 * Description : The fan rotates clockwise, stops, rotates counterclockwise, stops, in a loop.
*/
#define Motorla    15  // Motor_IN+ pin of the motor
#define Motorlb     2  // Motor_IN pin of the motor

void setup(){
  pinMode(Motorla, OUTPUT);//Set Motorla to OUTPUT
  pinMode(Motorlb, OUTPUT);//Set Motorlb to OUTPUT
}
void loop(){
//Set to rotate counterclockwise for 5s
  digitalWrite(Motorla,HIGH);
  digitalWrite(Motorlb,LOW);
  delay(5000);
//Set to stop rotating for 2s
  digitalWrite(Motorla,LOW);
  digitalWrite(Motorlb,LOW);
  delay(2000);
//Set to rotate clockwise for 5s
  digitalWrite(Motorla,LOW);
  digitalWrite(Motorlb,HIGH);
  delay(5000);
//Set to stop rotating for 2s
  digitalWrite(Motorla,LOW);
  digitalWrite(Motorlb,LOW);
  delay(2000);
}
//********************************************************************************
6. Project Observation:
After the code is uploaded successfully, connect the external power supply and power it on. The phenomenon you will see is: the small fan first rotates counterclockwise for 5 seconds, stops for 2 seconds, then rotates clockwise for 5 seconds, stops for 2 seconds, and repeats in this pattern.

Project 19 Servo
1. Project Introduction:
A servo is a motor that can rotate very precisely. It has been widely used in toy cars, remote control helicopters, airplanes, robots, and other fields. In this project, we will use the ESP32 to control the rotation of a servo.
2. Project Components:
|
|
 |
|---|---|---|
| ESP32*1 | Breadboard*1 | Servo*1 |
 |
|
|
| Jumper Wires several | USB Cable*1 |
3. Component Knowledge:
Servo: A servo is a position-servo driver, mainly composed of a housing, a circuit board, a coreless motor, gears, and a position detector. Its working principle is that the receiver or microcontroller sends a signal to the servo. There is a reference circuit inside, which generates a reference signal with a period of 20ms and a width of 1.5ms. The obtained DC bias voltage is compared with the voltage of the potentiometer to obtain the voltage difference output. The IC on the circuit board determines the rotation direction, then drives the coreless motor to start rotating, transmits the power to the swing arm through the reduction gear, and at the same time the position detector sends back a signal to determine whether the target position has been reached. It is suitable for control systems that require the angle to change continuously and be maintained. When the motor speed is constant, the reduction gear drives the potentiometer to rotate through the cascade, making the voltage difference 0 and the motor stop rotating. Generally, the rotation angle range of a servo is 0 degrees to 180 degrees.
The pulse period for controlling the servo is 20ms, and the pulse width is 0.5ms ~ 2.5ms, corresponding to positions of -90°~ +90°. The following takes a 180°-angle servo as an example:

Servos come in various specifications, but they all have three connection wires, brown, red, and orange (different brands may have different colors). Brown is GND, red is the positive power supply, and orange is the signal wire.

4. Project Wiring Diagram:
When powering the servo, please note that the power supply voltage should be 3.3V-5V. Please make sure that no errors occur when connecting the servo to the power supply.

5. Add the ESP32Servo Library:
Install the third-party servo library through library management: ESP32Servo. If it is already installed, this can be skipped.

6. Project Code:
//**********************************************************************
/*
 * File Name  : Servo rotation
 * Description : Control the servo to sweep
*/
#include <ESP32Servo.h>

Servo myservo;  // Create a servo object to control the servo

int posVal = 0;    // Variable to store the servo position
int servoPin = 15; // Servo pin

void setup() {
  myservo.setPeriodHertz(50);           // Standard 50 Hz servo
  myservo.attach(servoPin, 500, 2500);  // Attach the servo on servoPin to the servo object
}
void loop() {

  for (posVal = 0; posVal <= 180; posVal += 1) { // From 0° to 180°
    // In steps of 1 degree
    myservo.write(posVal);       // Tell the servo to go to the variable 'posVal' position
    delay(15);                   // Wait 15ms for the servo to reach the position
  }
  for (posVal = 180; posVal >= 0; posVal -= 1) { // From 180° to 0°
    myservo.write(posVal);       // Tell the servo to go to the variable 'posVal' position
    delay(15);                   // Wait 15ms for the servo to reach the position
  }
}
//********************************************************************************
6. Project Observation:
After the code is uploaded successfully, power it via the USB cable. The phenomenon you will see is: the servo will rotate from 0° to 180°, and then reverse direction to rotate from 180° to 0°, repeating these actions in an infinite loop.

Project 20 Stepper Motor
1. Project Introduction:
The stepper motor has precise positioning and is the most important component in industrial robots, 3D printers, large lathes, and other mechanical equipment. In this project, we will use the ESP32 to control the ULN2003 stepper motor driver board to drive the stepper motor to rotate.
2. Project Components:
|
|
 |
|---|---|---|
| ESP32*1 | Breadboard*1 | ULN2003 Stepper Motor Driver Board*1 |
|
|
 |
| Breadboard Power Supply Module*1 | 6-cell AA Battery Holder*1 | Stepper Motor*1 |
|
|
|
| Male-to-female Dupont Wires several | AA Battery (self-provided)*6 | USB Cable*1 |
3. Project Knowledge:
Stepper motor: It is a motor controlled by a series of electromagnetic coils. It can rotate a precise number of degrees (or steps) as needed, allowing you to move it to a precise position and hold that position. It does this by energizing the coils inside the motor for a very short time, but you must keep powering the motor to hold it in the position you want. There are two basic types of stepper motors, unipolar steppers and bipolar steppers. In this project, we use a unipolar stepper motor 28-BYJ48.

Working principle of the 28BYJ-48 stepper motor:
The stepper motor is mainly composed of a stator and a rotor. The stator is fixed, and the part surrounding the A, B, C, D coil groups as shown below. When the coil group is energized, a magnetic field is generated; the rotor is the rotating part, the part in the middle of the stator as shown below, and its two poles are permanent magnets.
The rotation principle of a single-step 4-beat: first, coil group A is energized, and the two rotor poles face coil group A directly; then coil group A is disconnected, coil group B is energized, and the rotor rotates clockwise to coil group B, and the rotor rotates one step; B is disconnected, C is energized, and the rotor rotates to group C; C is disconnected, D is energized, and the rotor rotates to group D; group D is disconnected, group A is energized, and the rotor rotates to coil group A. In this way, the rotor rotates half a circle, 180 degrees, and then repeats once more, B-C-D-A, the rotor rotates back to coil group A, and in this way the rotor rotates one full circle, rotating 8 steps in total. As shown in the figure below, this is the principle of single-beat rotation of a stepper motor: A - B - C - D - A ....
If you want the stepper motor to rotate counterclockwise, you only need to reverse the beat order, D - C - B - A - D .....

Half-step 8-beat rotation principle: the 8-beat uses the single-double beat form, A - AB - B - BC - C - CD - D - DA - A ...... In this way, when rotating one beat, the rotor will only rotate half a step. For example, coil group A is energized, and the rotor rotates to face coil group A directly; then A and B are energized together, so the place where the generated magnetic field is strongest is in the middle of the AB coil group, and the two rotor poles will rotate to the middle of the AB coil group, that is, rotating half a step clockwise.
Stepper motor parameters:
The stepper motor we provide requires 32 steps for the rotor to rotate one full circle, and it also goes through a 1:64 reduction gear set to drive the output shaft. Thus, for the output shaft to rotate one full circle, it needs: 32 * 64 = 2048 steps.
Voltage 5V, 4-phase stepper motor, the step angle in 4-beat mode is 11.25, the step angle in 8-beat mode is 5.625, and the reduction ratio is 1:64.
ULN2003 stepper motor driver board: The ULN2003 stepper motor driver converts weak signals into stronger control signals, thereby driving the stepper motor.
The following schematic shows how to use the ULN2003 stepper motor driver board interface to connect a unipolar stepper motor to the pins of the ESP32, and shows how to use the interface of four TIP120s.

4. Project Wiring Diagram:
Jumper the power supply module to 5V, connect the VCC of the stepper motor driver board to the breadboard 5V, and GND to the breadboard GND;
Connect the development board pin 5v to the breadboard 5V and GND to the breadboard GND, or directly use USB power.
| Development Board Pin | Motor Driver Board Pin |
|---|---|
| 15 | IN1 |
| 16 | IN2 |
| 17 | IN3 |
| 18 | IN4 |

5. Project Code:
//**********************************************************************
/*
 * File Name : Stepper motor
 * Description : Use ULN2003 to drive the stepper motor.
*/
// Connect the stepper motor driver interface
int outPorts[] = {15, 16, 17, 18};

void setup() {
  // Set the pins to output
  for (int i = 0; i < 4; i++) {
    pinMode(outPorts[i], OUTPUT);
  }
}

void loop()
{
  // Rotate one full circle
  moveSteps(true, 32 * 64, 3);
  delay(1000);
  // Rotate one full circle in the other direction
  moveSteps(false, 32 * 64, 3);
  delay(1000);
}

//Suggestion: when ms is between 3 and 20, the motor rotates accurately
void moveSteps(bool dir, int steps, byte ms) {
  for (unsigned long i = 0; i < steps; i++) {
    moveOneStep(dir); // Rotate one step
    delay(constrain(ms,3,20));        // Control the speed
  }
}

void moveOneStep(bool dir) {
  // Define a variable, using four low bits to represent the port state
  static byte out = 0x01;
  // Determine the shift direction according to the rotation direction
  if (dir) {  // Circular left shift
    out != 0x08 ? out = out << 1 : out = 0x01;
  }
  else {      // Circular right shift
    out != 0x01 ? out = out >> 1 : out = 0x08;
  }
  // Output the signal to each port
  for (int i = 0; i < 4; i++) {
    digitalWrite(outPorts[i], (out & (0x01 << i)) ? HIGH : LOW);
  }
}

void moveAround(bool dir, int turns, byte ms){
  for(int i=0;i<turns;i++)
    moveSteps(dir,32*64,ms);
}
void moveAngle(bool dir, int angle, byte ms){
  moveSteps(dir,(angle*32*64/360),ms);
}
//********************************************************************************
6. Project Observation:
After the code is uploaded successfully, connect the external power supply and power it on. The phenomenon you will see is: the four LEDs D1, D2, D3, D4 on the ULN2003 driver module light up, and the stepper motor first rotates counterclockwise, then rotates clockwise, and maintains this state in a loop.

Project 21 Relay
1. Project Introduction:
In daily life, we generally use AC to drive electrical equipment, and sometimes we use switches to control electrical appliances. If the switch is directly connected to the AC circuit, once leakage occurs, people will be in danger. From the perspective of safety, we specially designed this relay module with NO (normally open) and NC (normally closed) terminals. In this lesson, we will learn a relatively special and useful switch, the relay module.
2. Project Components:
|
|
 |
|
|---|---|---|---|
| ESP32*1 | Breadboard*1 | Relay Module*1 | Red LED*1 |
|
|
|
|
| 3P to Dupont wire male single*1 | USB Cable*1 | 220Ω Resistor*1 | Jumper Wires several |
3. Component Knowledge:
Relay: It mainly uses the HK4100F-DC 5V-SHC relay component. The relay has 3 terminal posts for the external circuit, namely NO, COM, and NC terminals (silkscreen on the back).
Normally open (NO): This pin is normally open, unless a signal is provided to the signal pin of the relay module. Therefore, the common contact pin disconnects its connection through the NC pin and establishes a connection through the NO pin.
Common contact (COM): This pin is used to connect other modules/components, such as LEDs.
LED:
Normally closed (NC): This NC pin is connected through the COM pin to form a closed circuit. The relay module can be controlled through a development board such as the ESP32 to switch between closed and open.
When the relay receives no control signal, the COM terminal and the NC terminal are connected, and the COM terminal and the NO terminal are disconnected. During control, connect G to the GND of the control board, V to the 5V of the control board, and S to the digital port of the control board. When the S signal terminal is set to high level, the relay turns on, the relay COM terminal and NC terminal disconnect, and the COM terminal and NO terminal connect; when the S signal terminal is set to low level, the relay turns off, the relay COM terminal and NC terminal connect, and the COM terminal and NO terminal disconnect.
- Operating voltage: 5V (DC)
- Operating current: ≤50MA
- Maximum power: 0.25W
- Input signal: Digital signal
- Contact current: <3A
Relay schematic:

4. Project Wiring Diagram:

5. Project Code:
//**********************************************************************************
/*
 * File Name  : Relay
 * Description : Relay on and off.
*/
#define  Relay  15 // Define digital 15
void setup()
{
pinMode(Relay, OUTPUT); // Set "Relay" to "output"
}
void loop()
{
digitalWrite(Relay, HIGH); // Turn on the relay
delay(1000); //Delay 1 s
digitalWrite(Relay, LOW); // Turn off the relay
delay(1000); // Delay 1 s
}
//**********************************************************************************
6. Project Observation:
After the code is uploaded successfully, power it via the USB cable. The phenomenon you will see is: the relay will cycle on and off, on for 1 second with the LED lit for 1 second, off for 1 second with the LED off for 1 second. At the same time, you can hear the sound of the relay turning on and off, and you can see the indicator light on the relay indicating the change of state.

Project 22 Dimmable Light
1. Project Introduction:
A potentiometer is a three-terminal resistor with a sliding or rotating contact, which forms an adjustable voltage divider. Its working principle is to change the position of the sliding contact on a uniform resistor. In a potentiometer, the entire input voltage is applied to the entire length of the resistor, and the output voltage is the voltage value between the fixed contact and the sliding contact. In this project, we will learn to use the ESP32 to read the value of the potentiometer, and combine it with an LED to make a dimmable light.
2. Project Components:
|
|
 |
|
|---|---|---|---|
| ESP32*1 | Breadboard*1 | Adjustable Potentiometer*1 | Red LED*1 |
|
|
 |
|
| 220Ω Resistor*1 | USB Cable*1 | Jumper Wires several |
3. Component Knowledge:
Adjustable potentiometer: The adjustable potentiometer is a type of resistor and analog electronic component, having two states, 0 and 1 (high level and low level). The analog values are different, and its data state presents a linear state such as 1 ~ 1024.
ADC: ADC is an electronic integrated circuit used to convert analog signals (such as voltage) into digital or binary form composed of 1s and 0s. The range of the ADC on our ESP32 is 12-bit, which means the resolution is 2^12=4096, indicating that a range (3.3V) will be equally divided into 4096 parts. The range of analog values corresponds to the ADC value. Therefore, the more bits the ADC has, the denser the analog division, and the higher the precision of the final conversion.
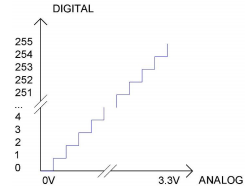
Section 1: The analog quantity in the range of 0V—(3.3/4095)V corresponds to digital 0;
Section 2: The analog quantity in the range of (3.3/4095)V—2*(3.3/4095)V corresponds to digital 1;
......
The following analog will be divided accordingly. The conversion formula is as follows:

DAC: The reverse of this process requires a DAC, a digital-to-analog converter. The digital I/O port can output high and low levels (0 or 1), but it cannot output intermediate voltage values, which is where the DAC is useful. The ESP32 has two DAC output pins with 8-bit precision, GPIO25 and GPIO26, which can divide VCC (here 3.3V) into 2^8=256 parts. For example, when the digital quantity is 1, the output voltage value is 3.3/256×1V; when the digital quantity is 128, the output voltage value is 3.3/256 ×128=1.65V. The higher the precision of the DAC, the higher the precision of the output voltage value.
The conversion formula is as follows:

ADC on the ESP32 board:
The ESP32 has 16 pins that can be used to measure analog signals. The GPIO pin serial numbers and the analog pin definitions are shown in the table below:
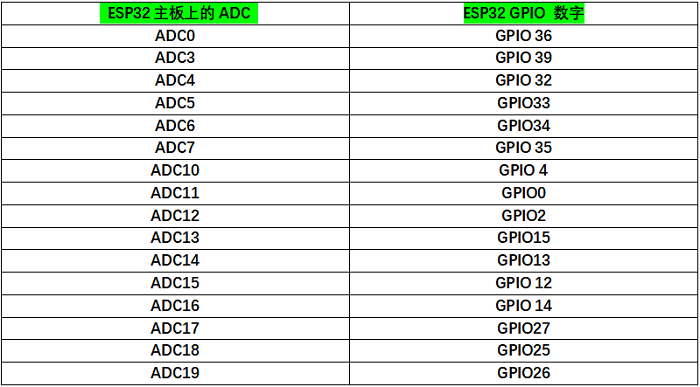
DAC on the ESP32 board:

4. Read the ADC value, DAC value, and voltage value of the potentiometer:
We connect the potentiometer to the analog IO port of the ESP32 to read the ADC value, DAC value, and voltage value of the potentiometer. Please refer to the following wiring diagram for the connection:
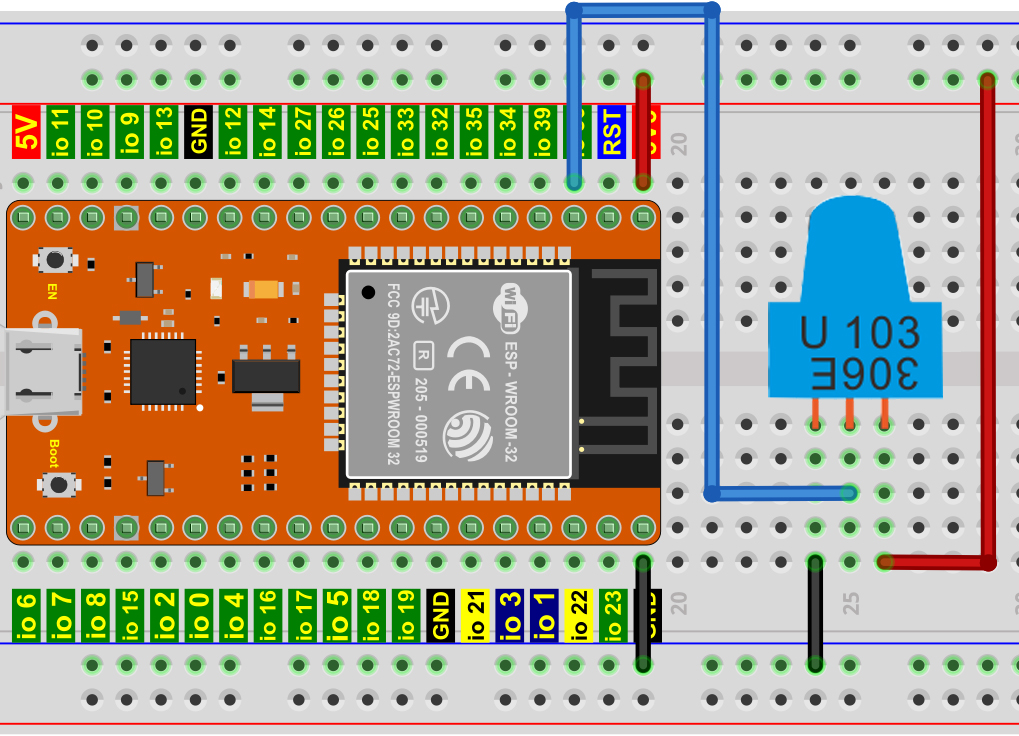
//**********************************************************************************
/*
 * File Name   : Read the analog value of the potentiometer
 * Description : Basic usage of ADC, DAC, and voltage
*/
#define PIN_ANALOG_IN  36  //Potentiometer pin

void setup() {
  Serial.begin(115200);
}

//In loop(), use the analogRead() function to obtain the ADC value,
//then use the map() function to convert the value into an 8-bit precision DAC value.
//The input and output voltages are calculated by the following formula,
//and the information is finally printed out.

void loop() {
  int adcVal = analogRead(PIN_ANALOG_IN);
  int dacVal = map(adcVal, 0, 4095, 0, 255);
  double voltage = adcVal / 4095.0 * 3.3;
  Serial.printf("ADC Val: %d, \t DAC Val: %d, \t Voltage: %.2fV\n", adcVal, dacVal, voltage);
  delay(200);
}
//**********************************************************************************
Compile and upload the code to the ESP32. After the code is uploaded successfully, power it via the USB cable, open the serial monitor, and set the baud rate to 115200. The observable phenomenon is: the serial monitor window will print out the ADC value, DAC value, and voltage value of the potentiometer. When the potentiometer handle is turned, the ADC value, DAC value, and voltage value change.
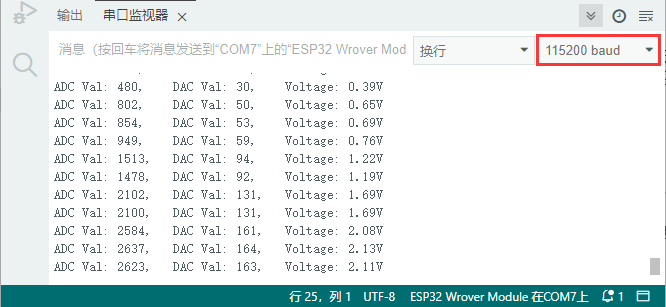
5. Wiring diagram of the dimmable light:
In the previous step, we read the ADC value, DAC value, and voltage value of the potentiometer. Now we need to convert the ADC value of the potentiometer into the brightness of the LED to make a light with adjustable brightness. See the wiring diagram below:
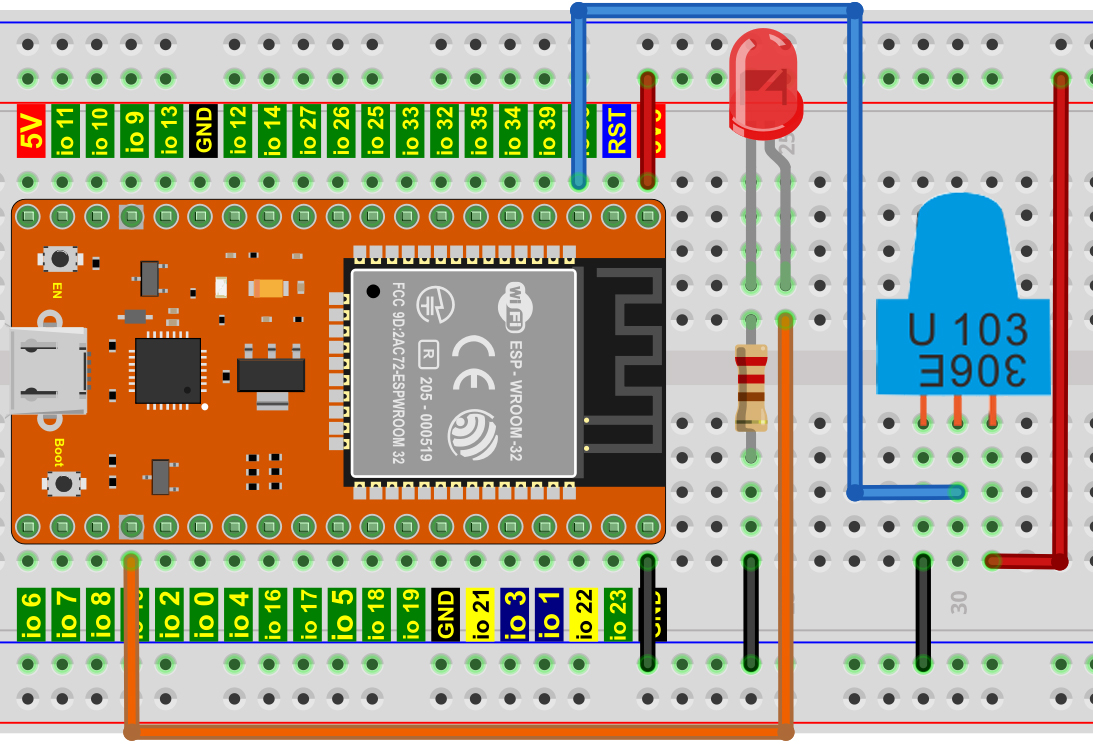
6. Project Code:
//**********************************************************************************
/*
 * File Name  : Dimmable light
 * Description : Control the brightness of the LED through the potentiometer.
*/
#define PIN_ANALOG_IN    36  //Potentiometer pin
#define PIN_LED     15  // LED pin
#define CHAN            0
void setup() {
  ledcSetup(CHAN, 1000, 12);
  ledcAttachPin(PIN_LED, CHAN);
}

void loop() {
  int adcVal = analogRead(PIN_ANALOG_IN); //Read the adc
  int pwmVal = adcVal;        // Remap adcVal to pwmVal
  ledcWrite(CHAN, pwmVal);    // Set the pulse width.
  delay(10);
}
//**********************************************************************************
7. Project Observation:
Compile and upload the code to the ESP32. After the code is uploaded successfully, power it via the USB cable. The phenomenon you will see is: turning the potentiometer handle will change the brightness of the LED accordingly.
Project 23 Flame Alarm
1. Project Introduction:
Fire is a terrible disaster, and fire alarm systems are very useful in houses, commercial buildings, and factories. In this project, we will use the ESP32 to control a flame sensor, a buzzer, and an LED to simulate a fire alarm device. This is a meaningful maker activity.
2. Project Components:
|
|
 |
|
|---|---|---|---|
| ESP32*1 | Breadboard*1 | Flame Sensor*1 | Red LED*1 |
|
|
 |
|
| Active Buzzer*1 | 220Ω Resistor*1 | 10KΩ Resistor*1 | Jumper Wires several |
|
 |
 |
|
| NPN Transistor (S8050)*1 | 1kΩ Resistor*1 | USB Cable*1 |
3. Component Knowledge:
Flame sensor (infrared receiving triode): Flames emit a certain degree of IR light, which is invisible to human eyes, but our infrared receiving triode can detect it and remind the microcontroller (such as the ESP32) that a fire has been detected. The infrared receiving triode can detect flames, and then convert the flame brightness into a fluctuating level signal. The short pin of the infrared receiving triode is the negative terminal, and the other long pin is the positive terminal. We should connect the short pin (negative terminal) to 5V, and connect the long pin (positive terminal) to an analog pin, a resistor, and GND. As shown in the figure below:
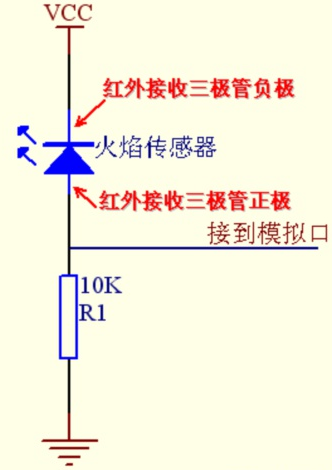
Note: The flame sensor should avoid direct exposure to sunlight, car headlights, and incandescent lamps, and should not face heat sources (such as radiators, heaters) or air conditioners, to avoid false alarms caused by large environmental temperature changes. It is also susceptible to radio frequency radiation interference.
4. Read the ADC value, DAC value, and voltage value of the flame sensor:
We first use a simple code to read the ADC value, DAC value, and voltage value of the flame sensor and print them out. Please refer to the following wiring diagram for the connection:
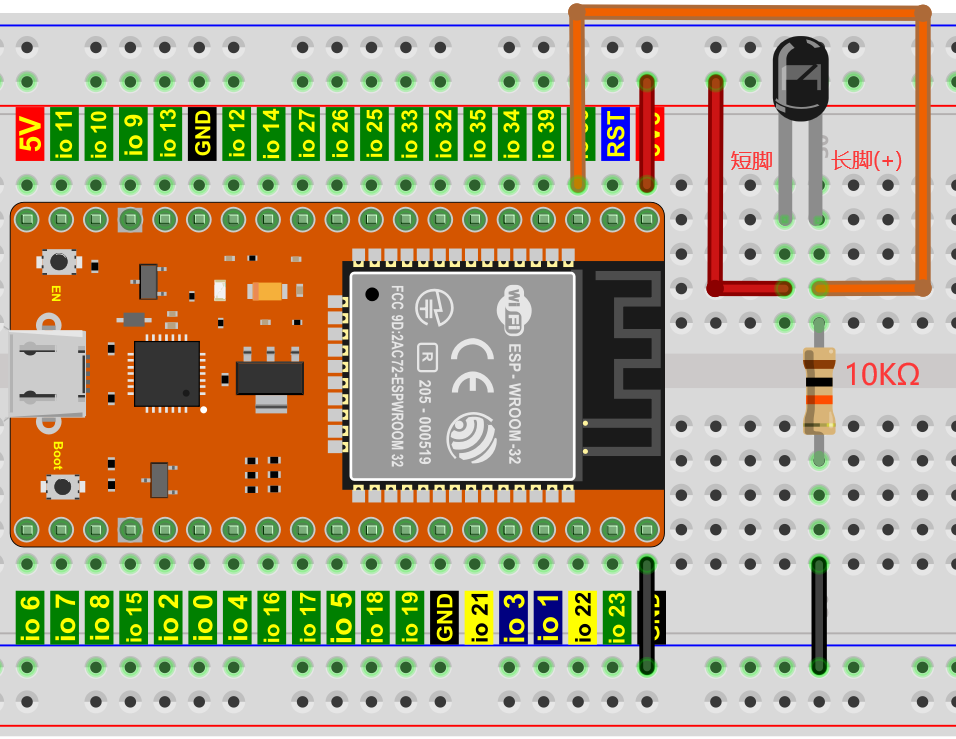
//**********************************************************************************
/*
 * File Name  : Read the analog value of the flame sensor
 * Description : Basic usage of ADC, DAC, and voltage
*/
#define PIN_ANALOG_IN  36  //Flame sensor pin

void setup() {
  Serial.begin(115200);
}

//In loop(), use the analogRead() function to obtain the ADC value,
//then use the map() function to convert the value into an 8-bit precision DAC value.
//The input and output voltages are calculated by the following formula,
//and the information is finally printed out.

void loop() {
  int adcVal = analogRead(PIN_ANALOG_IN);
  int dacVal = map(adcVal, 0, 4095, 0, 255);
  double voltage = adcVal / 4095.0 * 3.3;
  Serial.printf("ADC Val: %d, \t DAC Val: %d, \t Voltage: %.2fV\n", adcVal, dacVal, voltage);
  delay(200);
}
//**********************************************************************************
Compile and upload the code to the ESP32. After the code is uploaded successfully, power it via the USB cable, open the serial monitor, and set the baud rate to 115200. The observable phenomenon is: the serial monitor window will print the ADC value, DAC value, and voltage value read by the flame sensor. When the flame approaches the flame sensor, the ADC value, DAC value, and voltage value increase; conversely, the ADC value, DAC value, and voltage value decrease.
5. Wiring diagram of the flame alarm:
Next, we will use the flame sensor, the buzzer, and the LED to make an interesting project—a fire alarm device. When the flame sensor detects a flame, the LED flashes and the buzzer alarms.
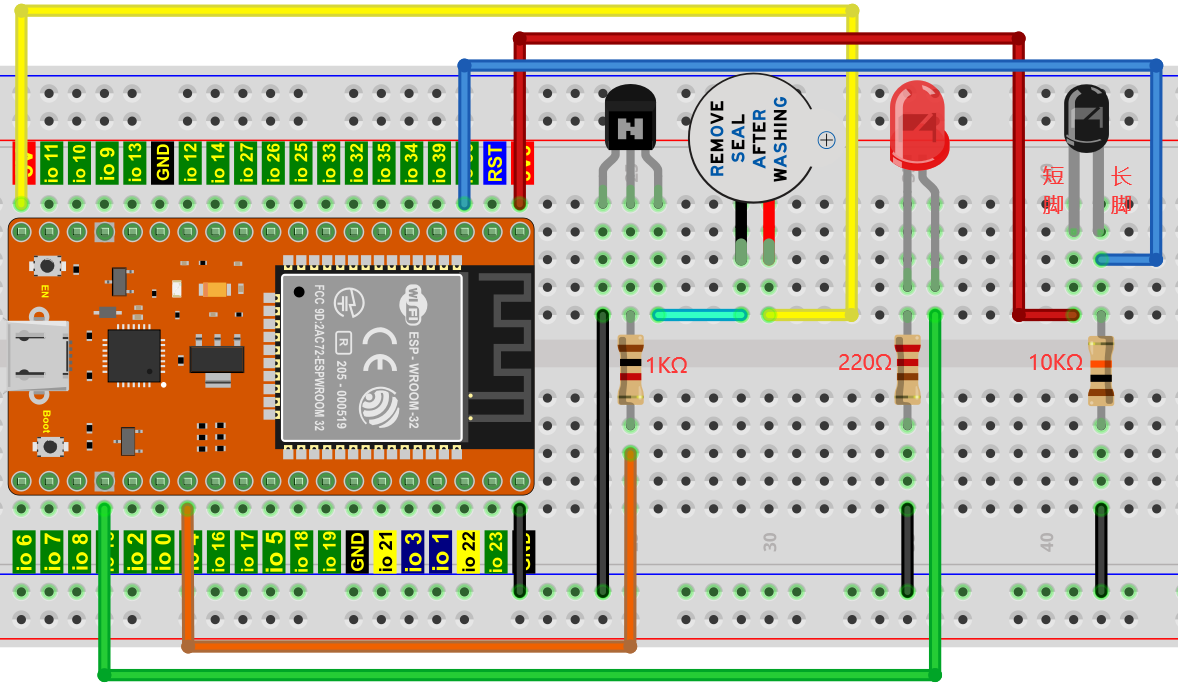
6. Project Code:
(Note: The threshold value 500 in the code can be reset according to the actual situation)
//**********************************************************************************
/*
 * File Name : Flame alarm
 * Description : Control the buzzer and LED through the flame sensor.
*/
#define PIN_ADC0      36  //Flame sensor pin
#define PIN_LED       15  // LED pin
#define PIN_BUZZER    4  // Buzzer pin

void setup() {
  pinMode(PIN_LED, OUTPUT);
  pinMode(PIN_BUZZER, OUTPUT);
  pinMode(PIN_ADC0, INPUT);
}

void loop() {
  int adcVal = analogRead(PIN_ADC0); //Read the ADC value of the flame sensor
  if (adcVal >= 500) {
    digitalWrite (PIN_BUZZER, HIGH); //The buzzer beeps
    digitalWrite(PIN_LED, HIGH); // Light up the LED
    delay(500); // Delay 0.5s.
    digitalWrite (PIN_BUZZER, LOW);
    digitalWrite(PIN_LED, LOW); // Turn off the LED
    delay(500); // Delay 0.5s.
  }
 else
 {
    digitalWrite(PIN_LED, LOW);  //Turn off the LED
    digitalWrite (PIN_BUZZER, LOW); //Turn off the buzzer
  }
}
//**********************************************************************************
Compile and upload the code to the ESP32. After the code is uploaded successfully, power it via the USB cable. The phenomenon you will see is: when the flame sensor detects a flame, the LED flashes and the buzzer alarms; otherwise, the LED does not light up and the buzzer does not sound.
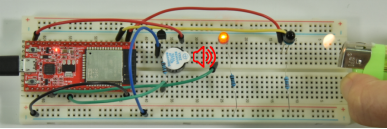
Project 24 Night Light
1. Project Introduction:
Sensors or components are everywhere in our daily life. For example, some public street lamps automatically light up at night and automatically turn off during the day. Why is that? In fact, these all use a photosensitive element, a component that can sense the intensity of the external ambient light. At night, when the outdoor brightness decreases, the street lamp will automatically turn on; during the day, the street lamp will automatically turn off. The principle is very simple. In this experiment, we use the ESP32 to control an LED to achieve this street lamp effect.
2. Project Components:
|
|
 |
|
|---|---|---|---|
| ESP32*1 | Breadboard*1 | Photoresistor*1 | Red LED*1 |
|
|
|
|
| 220Ω Resistor*1 | 10KΩ Resistor*1 | Jumper Wires several | USB Cable*1 |
3. Component Knowledge:
Photoresistor: It is a photosensitive resistor. Its principle is that the brightness (light) received on the surface of the photoresistor reduces its resistance, and the resistance value of the photoresistor changes with the strength of the detected ambient light. With this characteristic, we can use the photoresistor to detect light intensity. The photoresistor and its electronic symbol are as follows:
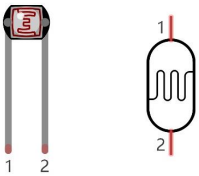
The following circuit is used to detect changes in the resistance value of the photoresistor:
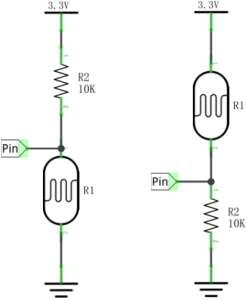
In the above circuit, when the resistance of the photoresistor changes due to changes in light intensity, the voltage between the photoresistor and resistor R2 also changes. Therefore, the light intensity can be obtained by measuring this voltage. This project uses the circuit on the left side of the above figure for wiring.
4. Read the ADC value, DAC value, and voltage value of the photoresistor:
We first use a simple code to read the ADC value, DAC value, and voltage value of the photoresistor and print them out. Please refer to the following wiring diagram for the connection:
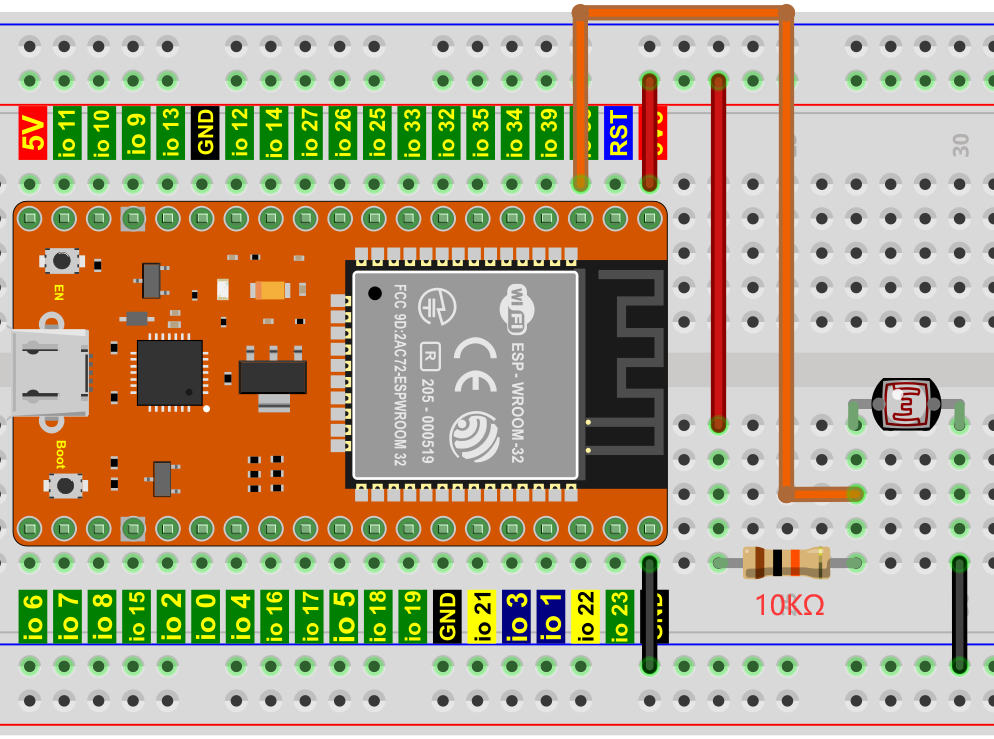
//**********************************************************************************
/*
 * File Name  : Read the analog value of the photosensitive sensor
 * Description : Basic usage of ADC
*/
#define PIN_ANALOG_IN  36  //Photosensitive sensor pin

void setup() {
  Serial.begin(115200);
}

//In loop(), use the analogRead() function to obtain the ADC value,
//then use the map() function to convert the value into an 8-bit precision DAC value.
//The input and output voltages are calculated by the following formula,
//and the information is finally printed out.

void loop() {
  int adcVal = analogRead(PIN_ANALOG_IN);
  int dacVal = map(adcVal, 0, 4095, 0, 255);
  double voltage = adcVal / 4095.0 * 3.3;
  Serial.printf("ADC Val: %d, \t DAC Val: %d, \t Voltage: %.2fV\n", adcVal, dacVal, voltage);
  delay(200);
}
//**********************************************************************************
5. Wiring diagram of the light-controlled lamp:
We made a small dimmable light earlier, and now we will make a light-controlled lamp. Their principles are the same, that is, obtain the analog value of the sensor through the ESP32, and then adjust the brightness of the LED.
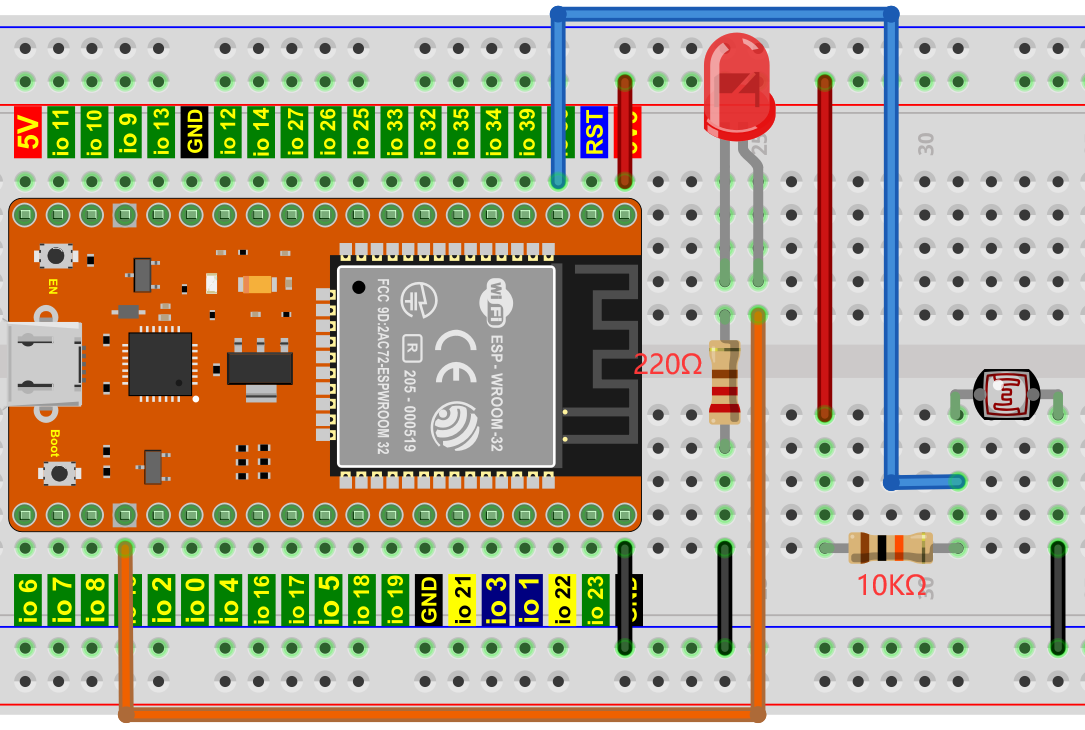
6. Project Code:
//**********************************************************************************
/*
 * File Name  : Night light
 * Description : Control the LED brightness through the photosensitive sensor.
*/
#define PIN_ANALOG_IN    36  // Photosensitive sensor pin
#define PIN_LED     15  // LED pin
#define CHAN            0
#define LIGHT_MIN       372
#define LIGHT_MAX       2048
void setup() {
  ledcSetup(CHAN, 1000, 12);
  ledcAttachPin(PIN_LED, CHAN);
}

void loop() {
  int adcVal = analogRead(PIN_ANALOG_IN); //Read the adc
  int pwmVal = map(constrain(adcVal, LIGHT_MIN, LIGHT_MAX), LIGHT_MIN, LIGHT_MAX, 0, 4095);  // Remap adcVal to pwmVal
  ledcWrite(CHAN, pwmVal);    // Set the pulse width.
  delay(10);
}
//**********************************************************************************
Compile and upload the code to the ESP32. After the code is uploaded successfully, power it via the USB cable. The phenomenon you will see is: when the light intensity in the environment where the photoresistor is located is weakened, the LED becomes brighter; conversely, the LED becomes dimmer.
Project 25 Human Body Induction Light
1. Project Introduction:
Human body induction lights are generally used in dark corridor areas. With the development of technology, the use of human body induction lights is very common in our real life. Corridors in residential areas, bedrooms in rooms, garages in underground cities, bathrooms, and other areas all use human body induction lights. Human body induction lights in real life are generally composed of a PIR sensor, a lamp, a photoresistor sensor, etc.
In this project, we will learn how to use a PIR motion sensor, an LED, and a photoresistor to make a human body induction light.
2. Project Components:
|
|
|
|
|---|---|---|---|
| ESP32*1 | Breadboard*1 | Photoresistor*1 | Red LED*1 |
|
|
|
|
| 220Ω Resistor*1 | 10KΩ Resistor*1 | Jumper Wires several | USB Cable*1 |
|
|
||
| PIR Motion Sensor*1 | 3P to Dupont wire male single*1 |
3. Project Wiring Diagram:

4. Project Code:
//**********************************************************************************
/*
 * File Name  : Human body induction light
 * Description : Control the LED through the photosensitive sensor and the PIR motion sensor.
*/
#define PIN_ADC0  36   //Photosensitive sensor pin
#define PIN_LED   4  // LED pin
#define pirPin   15     // PIR sensor pin
byte pirStat = 0;   // PIR sensor state
void setup() {
  Serial.begin(115200);
  pinMode(PIN_LED, OUTPUT);
  pinMode(PIN_ADC0, INPUT);
  pinMode(pirPin, INPUT);
}

void loop() {
  int adcVal = analogRead(PIN_ADC0); //Read the ADC value of the photosensitive sensor
  pirStat = digitalRead(pirPin); //Read the value of the PIR sensor
  if (adcVal >= 2000) {
      if (pirStat == HIGH){
         digitalWrite(PIN_LED, HIGH);//Light up the LED
         }
      else{
         digitalWrite(PIN_LED, LOW);//Turn off the LED
        }
  }
   else{
      digitalWrite(PIN_LED, LOW);//Turn off the LED
      }
}
//**********************************************************************************
Compile and upload the code to the ESP32. After the code is uploaded successfully, power it via the USB cable. The phenomenon you will see is: when your hand covers the photosensitive part of the photoresistor to simulate a dark state, and then you wave your other hand in front of the PIR motion sensor, the LED will also light up. If the photosensitive part of the photoresistor is not covered, and you wave your hand in front of the PIR motion sensor at this time, the LED remains off.

Project 26 Voice-Activated Fan
1. Project Introduction:
The sound sensor has a built-in capacitive electret microphone and a power amplifier. It can be used to detect the sound intensity of the environment. In this project, we use the ESP32 to control a sound sensor and a motor module to simulate a voice-activated fan.
2. Project Components:
|
|
|
 |
|---|---|---|---|
| ESP32*1 | Breadboard*1 | 130 Motor Module*1 | Sound Sensor*1 |
|
|
|
|
| Breadboard Power Supply Module*1 | 6-cell AA Battery Holder*1 | Fan Blade*1 | 3P to Dupont wire male single*1 |
|
|
|
|
| Dupont Wires several | AA Battery (self-provided)*6 | USB Cable*1 |
3. Component Knowledge:

Sound sensor: It is usually used to detect the loudness of sound in the surrounding environment. The micro control board can collect its output signal through the analog input interface. The S pin of the sensor is the analog output, which is the real-time output of the microphone voltage signal. The sensor comes with a potentiometer so that you can adjust the signal strength. You can use it to make some interactive works, such as voice-operated switches, etc.
Sound sensor parameters:
- Operating voltage: 3.3V-5V (DC)
- Operating current: ≤100mA
- Maximum power: 0.5W
- Output signal: Analog signal
Sound sensor schematic:
It mainly uses a high-sensitivity microphone element and the LM386 chip. The high-sensitivity microphone element is used to detect external sound. Using the LM386 chip to build a suitable circuit, we amplify the sound detected by the high-sensitivity microphone, with a maximum amplification of 200 times. When using it, we can adjust the amplification of the sound by rotating the potentiometer on the sensor. When adjusting, rotate the potentiometer clockwise to the end, and the amplification is maximum.

4. Read the ADC value, DAC value, and voltage value of the sound sensor:
We first use a simple code to read the ADC value, DAC value, and voltage value of the sound sensor and print them out. Please refer to the following wiring diagram for the connection:

//**********************************************************************************
/*
 * File Name : Read the analog value of the sound sensor
 * Description : Basic usage of ADC
*/
#define PIN_ANALOG_IN  36  //Sound sensor pin

void setup() {
  Serial.begin(115200);
}

//In loop(), use the analogRead() function to obtain the ADC value,
//then use the map() function to convert the value into an 8-bit precision DAC value.
//The input and output voltages are calculated by the following formula,
//and the information is finally printed out.

void loop() {
  int adcVal = analogRead(PIN_ANALOG_IN);
  int dacVal = map(adcVal, 0, 4095, 0, 255);
  double voltage = adcVal / 4095.0 * 3.3;
  Serial.printf("ADC Val: %d, \t DAC Val: %d, \t Voltage: %.2fV\n", adcVal, dacVal, voltage);
  delay(200);
}
//**********************************************************************************
Compile and upload the code to the ESP32. After the code is uploaded successfully, power it via the USB cable, open the serial monitor, and set the baud rate to 115200. The observable phenomenon is: the serial monitor window will print the analog value read by the sound sensor. When you clap your hands toward the sensor, the analog value of the sound sensor changes significantly.

5. Wiring diagram of the smart fan:
Next, we formally enter this project. We use the sound sensor, the 130 motor module, and fan blades to simulate a voice-activated fan. The wiring diagram is as follows:

(Note: Connect the wiring first, then install a small fan blade on the DC motor.)
6. Project Code:
(Note: The threshold value 600 in the code can be reset according to the actual situation)
//**********************************************************************************
/*
 * File Name : Voice-activated fan
 * Description : Control the fan through the sound sensor.
*/
#define PIN_ADC0   36  //Sound sensor pin
#define PIN_Motorla    15  // Motor_IN+ pin of the motor
#define PIN_Motorlb    2 // Motor_IN pin of the motor

void setup() {
  pinMode(PIN_Motorla, OUTPUT);//Set Motorla to output
  pinMode(PIN_Motorlb, OUTPUT);//Set Motorlb to output
  pinMode(PIN_ADC0, INPUT);//Set PIN_ADC2 to INPUT
}

void loop() {
  int adcVal = analogRead(PIN_ADC0); //Read the ADC value of the sound sensor
  if (adcVal > 600) {
    digitalWrite(PIN_Motorla,HIGH); //Rotate
    digitalWrite(PIN_Motorlb,LOW);
    delay(5000); //Delay 5S
  }
  else
  {
    digitalWrite(PIN_Motorla,LOW); //Stop rotating
    digitalWrite(PIN_Motorlb,LOW);
  }
}
//**********************************************************************************
Compile and upload the code to the ESP32. After the code is uploaded successfully, connect the external power supply and power it on. The phenomenon you will see is: clap your hands toward the sound sensor. When the sound intensity exceeds the threshold, the small fan rotates; conversely, the small fan does not rotate.

Project 27 Temperature Measurement
1. Project Introduction:
The LM35 is a commonly used and easy-to-use temperature sensor. It does not require other hardware; you only need one analog port. The difficulty lies in compiling the code to convert the analog value it reads into Celsius temperature. In this project, we use a temperature sensor and 3 LEDs to make a temperature tester. When the temperature sensor touches objects of different temperatures, the LEDs will show different colors.
2. Project Components:
|
|
|
|
|---|---|---|---|
| ESP32*1 | Breadboard*1 | Red LED*1 | Yellow LED*1 |
|
|
 |
|
| Green LED*1 | 220Ω Resistor*3 | LM35 Temperature Sensor*1 | 3P to Dupont wire male single*1 |
|
|
||
| Jumper Wires several | USB Cable*1 |
3. Component Knowledge:
LM35 temperature sensor: It is a commonly used LM35 temperature sensor, which mainly uses the LM35DZ sensor element. The output voltage of this element is linearly related to the Celsius temperature scale. At room temperature, an accuracy of 1/4℃ can be achieved without additional calibration. The LM35 temperature sensor can produce different voltages according to different temperatures. When the temperature is 0℃, it outputs 0V; for every 1℃ increase, the output voltage will increase by 10mv. The conversion formula is as follows:

4. Read the temperature value of the LM35:
We first use a simple code to read the value of the temperature sensor and print it out. Its wiring diagram is shown below:

Here, the analog pin of the ESP32 that the LM35 outputs to is GPIO36. This analog voltage is converted into digital form, and processed to obtain the temperature reading.
//**********************************************************************************
/*
 * File Name : Read the LM35 temperature value
 * Description : Convert the ADC value to the LM35 temperature value
*/
#define PIN_ANALOG_IN  36  //Temperature sensor pin

void setup() {
  Serial.begin(115200);
}

//In loop(), use the analogRead() function to obtain the ADC value,
//then use the map() function to convert the value into an 8-bit precision DAC value.
//Calculate the measured voltage value, Celsius value, and Fahrenheit value through the following formulas,
//and print these data through the serial monitor.

void loop() {
  int adcVal = analogRead(PIN_ANALOG_IN);
  int dacVal = map(adcVal, 0, 4095, 0, 255);
  double voltage = adcVal / 4095.0 * 3.3;
  float temperatureC = (voltage * 1000.0) / 10.0 ;
  float temperatureF = (temperatureC * 1.8) + 32.0;
  Serial.print("ADC Value: " + String(adcVal));
  Serial.print("--DAC Value: " + String(dacVal));
  Serial.print("--Voltage Value: " + String(voltage) + "V");
  Serial.print("--temperatureC: " + String(temperatureC) + "C");
  Serial.println("--temperatureF: " + String(temperatureF) + "F");
  delay(200);
}
//**********************************************************************************

5. Wiring diagram of temperature measurement:
Now use the LM35 temperature sensor and 3 LEDs to make a temperature test. When the LM35 temperature sensor senses different temperatures, different LEDs will light up. Wire it as shown in the figure below.

6. Project Code:
(Note: The threshold values 20 and 25 in the code can be reset according to the actual situation)
//**********************************************************************************
/*
 * File Name  : Temperature measurement
 * Description : When the LM35 senses different temperatures, different LEDs will light up
*/
#define PIN_ADC0       36      //LM35 sensor pin
#define PIN_GREENLED   4      //Green LED pin
#define PIN_YELLOWLED  2      //Yellow LED pin
#define PIN_REDLED     15      //Red LED pin
void setup() {
  Serial.begin(115200);
  pinMode(PIN_GREENLED, OUTPUT); //Set PIN_GREENLED to output
  pinMode(PIN_YELLOWLED, OUTPUT);//Set PIN_YELLOWLED to output
  pinMode(PIN_REDLED, OUTPUT);//Set PIN_REDLED to output
  pinMode(PIN_ADC0, INPUT);//Set PIN_ADC0 to input
}

void loop() {
  int adcVal = analogRead(PIN_ADC0);
  double voltage = adcVal / 4095.0 * 3.3;
  float temperatureC = (voltage * 1000.0) / 10.0 ;
  float temperatureF = (temperatureC * 1.8) + 32.0;
  Serial.print("ADC Value: " + String(adcVal));
  Serial.print("---Voltage Value: " + String(voltage) + "V");
  Serial.print("---temperatureC: " + String(temperatureC) + "℃");
  Serial.println("---temperatureF: " + String(temperatureF) + "F");
  if (temperatureC >= 25) {
    delay(100);
    digitalWrite(PIN_GREENLED, LOW);
    digitalWrite(PIN_YELLOWLED, LOW);
    digitalWrite(PIN_REDLED, HIGH);
  }
  else if (temperatureC >= 20 && temperatureC < 25) {
    digitalWrite(PIN_GREENLED, LOW);
    digitalWrite(PIN_YELLOWLED, HIGH);
    digitalWrite(PIN_REDLED, LOW);
  }
  else {
    digitalWrite(PIN_GREENLED, HIGH);
    digitalWrite(PIN_YELLOWLED, LOW);
    digitalWrite(PIN_REDLED, LOW);
  }

  delay(500);
}
//**********************************************************************************
Compile and upload the code to the ESP32. After the code is uploaded successfully, power it via the USB cable. The phenomenon you will see is: open the serial monitor and set the baud rate to 115200. The observable phenomenon is: the serial monitor window will print the temperature value read by the LM35 temperature sensor. When the LM35 temperature sensor senses different temperatures, different LEDs will light up.

Project 28 Joystick Controlling RGB Light
1. Project Introduction:
The joystick module is a component with two analog inputs and one digital input. It is widely used in game operations, robot control, drone control, and other fields. In this project, we use the ESP32 and the joystick module to control RGB. In this way, you can gain a deeper understanding of the principle and operation of the joystick module in practice.
2. Project Components:
|
|
 |
|
|---|---|---|---|
| ESP32*1 | Breadboard*1 | Joystick Module*1 | RGB LED*1 |
|
|
|
|
| 220Ω Resistor*3 | Jumper Wires several | USB Cable*1 | Male-to-female Dupont wires*5 |
3. Component Knowledge:
Joystick module: It mainly uses the PS2 handle joystick element. In fact, the joystick module has 3 signal terminal pins, simulating 3-dimensional space. The pins of the joystick module are GND, VCC, and signal terminals (VRx, VRy, SW). Among them, the signal terminals X and Y simulate the X-axis and Y-axis of space. During control, the X and Y signal terminals of the module are connected to the analog ports of the control board, and the coordinates of the object on the X and Y axes of space are controlled by controlling the two analog input values. The signal terminal SW simulates the Z-axis of space, and it is generally connected to a digital port and used as a button.
VCC is connected to the power output terminal V/VCC (3.3/5V) of the control board, and GND is connected to the G/GND of the control board. In the original state, the read voltage is about 1.65V/2.5V. For the X-axis direction, when gradually moving in the direction of the arrow, the read voltage value increases with it, and can reach the maximum voltage; when gradually moving in the opposite direction of the arrow, the read voltage value gradually decreases, down to the minimum voltage. For the Y-axis direction, when gradually pressing in the direction of the arrow on the module, the read voltage value increases with it, and can reach the maximum voltage; when gradually pressing in the opposite direction of the arrow, the read voltage value gradually decreases, down to the minimum voltage. For the Z-axis direction, the signal terminal B is connected to a digital port. In the original state, it outputs 0, and outputs 1 when pressed. In this way, we can read two analog values and the high/low level of a digital port to determine the working state of the joystick on the module.
Module parameters:
- Input voltage: DC 3.3V ~ 5V
- Output signal: X/Y dual-axis analog values + Z-axis digital signal
- Applicable scope: suitable for controlling the movement of control point coordinates in a plane, the control of dual-degree-of-freedom servos, etc.
- Product features: exquisite appearance, superior joystick feel, simple operation, sensitive response, long service life.
4. Read the value of the joystick module:
We must use the analog IO ports of the ESP32 to read values from the X/Y pins of the joystick module, and use a digital IO port to read the digital signal of the button. Please wire it according to the wiring diagram below (due to accessory replacement, B=SW in the figure below):

//**********************************************************************************
/*
 * File Name  : Read the joystick value
 * Description : Read data from the joystick module.
*/
int xyzPins[] = {36, 39, 14};   //Pins x, y, z
void setup() {
  Serial.begin(115200);
  pinMode(xyzPins[0], INPUT); //x axis.
  pinMode(xyzPins[1], INPUT); //y axis.
  pinMode(xyzPins[2], INPUT_PULLUP);   //The z axis is a button.
}

//In loop(), use analogRead() to read the values of the X axis and Y axis
//and use digitalRead() to read the value of the Z axis, then display them.

void loop() {
  int xVal = analogRead(xyzPins[0]);
  int yVal = analogRead(xyzPins[1]);
  int zVal = digitalRead(xyzPins[2]);
  Serial.println("X,Y,Z: " + String(xVal) + ", " +  String(yVal) + ", " + String(zVal));
  delay(500);
}
//**********************************************************************************


5. Wiring diagram of the joystick module controlling RGB:
We just read the value of the joystick module. Here we need to use the joystick module and RGB to do something. Connect them as shown in the figure below:

6. Project Code:
//**********************************************************************************
/*
 * File Name  : Joystick controlling the light
 * Description : Control RGB through the joystick to light up different colors.
*/
int x_Pin = 36;   //x pin
int y_Pin = 39;   //y pin
int z_Pin = 14;   //z pin
int ledPins[] = {4, 0, 2};    //Define red, green, blue pins
const byte chns[] = {0, 1, 2};        //Define PWM channels

void setup() {
  pinMode(x_Pin, INPUT); //x axis.
  pinMode(y_Pin, INPUT); //y axis.
  pinMode(z_Pin, INPUT_PULLUP);   //The z axis is a button.
  for (int i = 0; i < 3; i++) {   //Set up pwm channels, 1KHz, 8bit
    ledcSetup(chns[i], 1000, 8);
    ledcAttachPin(ledPins[i], chns[i]);
  }
}

//In loop(), use analogRead() to read the values of the X axis and Y axis
//and use digitalRead() to read the value of the Z axis, then display them.

void loop() {
  int xVal = analogRead(x_Pin);
  int yVal = analogRead(y_Pin);
  int zVal = digitalRead(z_Pin);
  if (xVal < 1000){
     ledcWrite(chns[0], 255); //Common cathode LED, high level turns on the LED.
     ledcWrite(chns[1], 0);
     ledcWrite(chns[2], 0);
   }
  else if (xVal > 3000){
     ledcWrite(chns[0], 0);
     ledcWrite(chns[1], 255);
     ledcWrite(chns[2], 0);
   }
  else if (yVal < 1000){
     ledcWrite(chns[0], 0);
     ledcWrite(chns[1], 0);
     ledcWrite(chns[2], 255);
   }
  else if (yVal > 3000){
     ledcWrite(chns[0], 255);
     ledcWrite(chns[1], 255);
     ledcWrite(chns[2], 255);
   }
}
//**********************************************************************************
Compile and upload the code to the ESP32. After the code is uploaded successfully, power it via the USB cable. The phenomenon you will see is: ① If the joystick moves to the far left in the X direction, the RGB light turns red; ② If the joystick moves to the far right in the X direction, the RGB light turns green; ③ If the joystick moves to the top in the Y direction, the RGB light turns white; ④ If the joystick moves to the bottom in the Y direction, the RGB light turns blue.


Project 29 Temperature and Humidity Meter
1. Project Introduction:
In winter, the humidity in the air is very low, meaning the air is very dry. Combined with the cold, human skin is prone to cracking due to excessive dryness, so a humidifier is needed to add humidity to the air at home. But how do you know the air is too dry? Then you need a device to detect air humidity. This lesson will learn the use of the temperature and humidity sensor. We use a temperature and humidity sensor to make a temperature and humidity meter, and also combine it with the LCD 128X32 DOT to display the temperature and humidity values.
2. Project Components:
|
|
|
 |
|---|---|---|---|
| ESP32*1 | Breadboard*1 | OLED Screen*1 | Temperature and Humidity Sensor*1 |
|
|
||
| Dupont Wires several | USB Cable*1 |
3. Component Knowledge:
Temperature and humidity sensor: It is a temperature and humidity composite sensor with calibrated digital signal output, with a humidity accuracy of ±5%RH, a temperature accuracy of ±2℃, a humidity range of 20-90%RH, and a temperature range of 0~50℃. The temperature and humidity sensor uses dedicated digital module acquisition technology and temperature and humidity sensing technology to ensure that the product has extremely high reliability and excellent long-term stability. The temperature and humidity sensor includes a resistive humidity-sensing element and an NTC temperature-measuring element, which is very suitable for temperature and humidity measurement scenarios that do not require high precision and real-time performance. The operating voltage is in the range of 3.3V-5.5V.
The temperature and humidity sensor has three pins, namely VCC, GND, and S. S is the data output pin. Serial communication is used.
Depending on the batch, it may also be the + - out three pins: + connected to the power supply, - connected to GND, and OUT is the data output pin.
Single-bus format definition of the temperature and humidity sensor:
| Name | Single-bus format definition |
|---|---|
| Start signal | The microprocessor pulls the data bus (SDA) low for at least 18ms (no more than 30ms) to notify the sensor to prepare data. |
| Response signal | The sensor pulls the data bus (SDA) low for 83µs, then pulls it high for 87µs to respond to the host's start signal. |
| Humidity | The high byte of humidity is the integer part of the humidity data, and the low byte of humidity is the fractional part of the humidity data |
| Temperature | The high byte of temperature is the integer part of the temperature data, and the low byte of temperature is the fractional part of the temperature data, and if Bit8 of the temperature low byte is 1, it indicates a negative temperature; otherwise it is a positive temperature |
| Check bit | Check bit = humidity high byte + humidity low byte + temperature high byte + temperature low byte |
Data timing diagram of the temperature and humidity sensor:
After the user host (MCU) sends a start signal, the temperature and humidity sensor converts from low-power mode to high-speed mode. After the host start signal ends, the temperature and humidity sensor sends a response signal, sends 40 bits of data, and triggers a data acquisition. The signal transmission is shown in the figure.

The temperature and humidity sensor can easily add temperature and humidity data to your DIY electronic projects. It is perfect for remote weather stations, home environment control systems, and farm or garden monitoring systems.
Parameters of the temperature and humidity sensor:
- Operating voltage: +5 V
- Temperature range: 0-50 °C, error: ± 2 °C
- Humidity range: 20-90% RH, error: ± 5% RH
- Digital interface
Schematic of the temperature and humidity sensor:

4. Read the temperature and humidity value:

How to add the xht11 library:
The code in this project uses a library named "xht11". If you have already added the "xht11" library, skip this step. If you have not added it yet, please add it before learning. The steps to add a third-party library are as follows:
Open the Arduino IDE, click "Sketch" → "Include Library" → "Add .ZIP Library...". In the pop-up window, find the file named ..\library-files\arduino-c-windows\xht11.ZIP in that directory, first select the xht11.ZIP file, then click "Open".


//**********************************************************************************
/*
 * File Name  : Temperature and humidity meter
 * Description : LCD displays the temperature and humidity values.
*/
#include "xht11.h"
#include <Adafruit_GFX.h>
#include <Adafruit_SSD1306.h>


//The out pin of the temperature and humidity sensor is connected to 13
xht11 xht(13);
unsigned char dht[4] = {0, 0, 0, 0};    //Only receive the first 32 bits of data, not the parity bit

Adafruit_SSD1306 display(128, 32, &Wire, -1);

void setup()
{
  Serial.begin(9600);

 // Initialize I2C, the display pins are SDA=21, SCL or SCK=22
  Wire.begin(21, 22);

  if(!display.begin(SSD1306_SWITCHCAPVCC, 0x3C)) {
    Serial.println("初始化失败");
    return;
  }
  Serial.println("setup done");
}

char string[10];

//LCD displays the humidity and temperature values
void loop()
{

  if (xht.receive(dht))  // When data is read
  {
    display.clearDisplay();
    display.setTextSize(2);  // Set the font size
    display.setTextColor(SSD1306_WHITE); // Set the text color (white)

    display.setCursor(2, 2); // Set the cursor position (x, y)
    display.print("temp:");
    display.setCursor(60, 2);
    display.print(dht[2]);
    display.setCursor(90, 2);
    display.print("C");

    display.setCursor(2, 30); // Set the cursor position (x, y)
    display.print("humd:");
    display.setCursor(60, 30);
    display.print(dht[0]);
    display.setCursor(90, 30);
    display.print("%");

    display.display();

    // Serial output
    Serial.print(dht[2]);Serial.print(" C   ");
    Serial.print(dht[0]);Serial.println(" %");
  }

  delay(200);
}
//**********************************************************************************

5. Wiring diagram of the temperature and humidity meter:
Now we begin to use the LCD_128X32_DOT to print the value of the temperature and humidity sensor, and we will see the corresponding values on the screen of the LCD_128X32_DOT. Let's start this project. Please wire it according to the wiring diagram below:

6. Project Code:
The xht11 and LCD_128×32 libraries have been added earlier, so there is no need to add them again. If they have not been added, you need to add the xht11 and LCD_128×32 libraries. For the method of adding the xht11 library, please refer to the method above in this project. For the method of adding the LCD_128×32 library, please refer to the method in Project 17 OLED Display.
//**********************************************************************************
/*
 * File Name  : Temperature and humidity meter
 * Description : LCD displays the temperature and humidity values.
*/
#include "xht11.h"
#include "lcd128_32_io.h"

//gpio13
xht11 xht(13);
unsigned char dht[4] = {0, 0, 0, 0};//Only receive the first 32 bits of data, not the parity bit

lcd lcd(21, 22); //Create the lCD128 *32 pins, sda->21, scl->22

void setup() {
  lcd.Init(); //Initialize
  lcd.Clear();  //Clear the screen
}
char string[10];

//LCD displays the humidity and temperature values
void loop() {
  if (xht.receive(dht)) { //Returns true when correctly selected
    }
  lcd.Cursor(0,0); //Set the display position
  lcd.Display("Temper:"); //Set the display
  lcd.Cursor(0,8);
  lcd.DisplayNum(dht[2]);
  lcd.Cursor(0,11);
  lcd.Display("C");
  lcd.Cursor(2,0);
  lcd.Display("humid:");
  lcd.Cursor(2,8);
  lcd.DisplayNum(dht[0]);
  lcd.Cursor(2,11);
  lcd.Display("%");
  delay(200);
}
//**********************************************************************************
Compile and upload the code to the ESP32. After the code is uploaded successfully, power it via the USB cable. The phenomenon you will see is: the screen of the LCD 128X32 DOT displays the corresponding temperature value and humidity value of the environment detected by the temperature and humidity sensor.

Project 30 Distance Measuring Instrument
1. Project Introduction:
The HC-SR04 ultrasonic sensor is a very affordable distance sensor, mainly used for obstacle avoidance in various robot projects. It is also used as a water level sensor, and even as a parking sensor. We treat the ultrasonic sensor as the eyes of a bat. In the dark, bats can still identify objects and directions ahead through ultrasonic waves. In this project, we use the ESP32 to control an ultrasonic sensor and LEDs to simulate an ultrasonic distance meter.
2. Project Components:
|
|
 |
|
|---|---|---|---|
| ESP32*1 | Breadboard*1 | Ultrasonic Sensor*1 | Dupont Wires several |
|
|
|
|
| Red LED*4 | 220Ω Resistor*4 | Jumper Wires several | USB Cable*1 |
3. Component Knowledge:
HC-SR04 ultrasonic sensor: Like a bat, it uses sonar to determine the distance to an object. It provides accurate non-contact range detection, high precision, and stable readings. Its operation is not affected by sunlight or black materials, just like a precise camera (acoustically, soft materials like cloth are difficult to detect). It has an ultrasonic transmitter and receiver.

On the front of the ultrasonic sensor are two metal cylinders. These are the transducers. Transducers convert mechanical energy into electrical signals. In the ultrasonic sensor, there is a transmitting transducer and a receiving transducer. The transmitting transducer converts electrical signals into ultrasonic pulses, and the receiving transducer converts the reflected ultrasonic pulses back into electrical signals. If you look at the back of the ultrasonic sensor, you will see an IC behind the transmitting transducer. This is the IC that controls the transmitting transducer. There is also an IC behind the receiving transducer. This is a quad operational amplifier, which amplifies the signal generated by the receiving transducer into a signal strong enough to transmit to the microcontroller.
Timing diagram:
The figure shows the timing diagram of the HC-SR04. To start a measurement, the Trig of the SR04 must receive a high (5V) pulse of at least 10us, which will start the sensor to emit 8 cycles of 40kHz ultrasonic pulses and wait for the reflected ultrasonic pulses. When the sensor detects ultrasonic waves from the receiver, it will set the Echo pin to high (5V) and delay for a period (width), proportional to the distance. To obtain the distance, measure the width of the Echo pin.

Time = echo pulse width, in us (microseconds)
Distance in centimeters = Time / 58
Distance (in inches) = Time / 148
4. Read the distance value of the ultrasonic sensor
We will start with a simple ultrasonic distance measurement and print the measured distance.

The HC-SR04 ultrasonic sensor has four pins: Vcc, Trig, Echo, and GND. The Vcc pin provides the power to generate ultrasonic pulses, connected to Vcc/+5V. The GND pin is connected to ground/GND. The Trig pin is where the control board sends the signal to start the ultrasonic pulse. The Echo pin is where the ultrasonic sensor sends information about the travel duration of the ultrasonic pulse to the control board. Wire it as shown below:

//**********************************************************************************
/*
 * File Name  : Ultrasonic distance measurement
 * Description : Use the ultrasonic module to measure distance.
*/
const int TrigPin = 13; // Define TrigPin
const int EchoPin = 14; // Define EchoPin.
int duration = 0; // Define the initial value of duration as 0
int distance = 0;//Define the initial value of distance as 0
void setup()
{
  pinMode(TrigPin , OUTPUT); // Set trigPin to output mode
  pinMode(EchoPin , INPUT); // Set echoPin to input mode
  Serial.begin(115200);  // Set the serial monitor with a baud rate of 115200.
}
void loop()
{
 // Make trigPin output high level for 10μs to trigger the HC_SR04
  digitalWrite(TrigPin , HIGH);
  delayMicroseconds(10);
  digitalWrite(TrigPin , LOW);
  // Wait for HC-SR04 to return to high level, measure this waiting time
  duration = pulseIn(EchoPin , HIGH);
  // Calculate the distance according to the time
  distance = (duration/2) / 28.5 ;
  Serial.print("Distance: ");
  Serial.print(distance); //Print the distance value through the serial port
  Serial.println("cm");
  delay(300); // Wait 300ms.
}
//**********************************************************************************
Compile and upload the code to the ESP32. After the code is uploaded successfully, power it via the USB cable, open the serial monitor, and set the baud rate to 115200. The observable phenomenon is: the serial monitor window will print the distance value between the ultrasonic sensor and the object.

5. Wiring diagram of the ultrasonic distance meter:
Next, we will use the ESP32 to control the ultrasonic sensor and 4 LEDs to simulate an ultrasonic distance meter. Wire it as shown in the figure below:

6. Project Code:
//**********************************************************************************
/*
 * File Name  : Ultrasonic distance meter
 * Description : Four LEDs are controlled by the ultrasonic distance measurement.
*/
const int TrigPin = 13;    // Define TrigPin
const int EchoPin = 14;    // Define EchoPin.
const int PIN_LED1 = 4;    // Define PIN_LED1
const int PIN_LED2 = 0;    // Define PIN_LED2
const int PIN_LED3 = 2;    // Define PIN_LED3
const int PIN_LED4 = 15;    // Define PIN_LED4
int duration = 0;    // Define the initial value of duration as 0
int distance = 0;   // Define the initial value of distance as 0
void setup()
{
  pinMode(TrigPin , OUTPUT); // Set trigPin to output mode
  pinMode(EchoPin , INPUT); // Set echoPin to input mode
  pinMode(PIN_LED1 , OUTPUT);  // Set PIN_LED1 to output mode
  pinMode(PIN_LED2 , OUTPUT);  // Set PIN_LED2 to output mode
  pinMode(PIN_LED3 , OUTPUT);  // Set PIN_LED3 to output mode
  pinMode(PIN_LED4 , OUTPUT);  // Set PIN_LED4 to output mode
  Serial.begin(115200);  //Set the serial monitor with a baud rate of 115200.
}
void loop()
{
// Make trigPin output high level for 10μs to trigger the HC_SR04
  digitalWrite(TrigPin , HIGH);
  delayMicroseconds(10);
  digitalWrite(TrigPin , LOW);
// Wait for HC-SR04 to return to high level, measure this waiting time
  duration = pulseIn(EchoPin , HIGH);
// calculate the distance according to the time
  distance = (duration/2) / 28.5 ;
  Serial.print("Distance: ");
  Serial.print(distance); //Print the distance value through the serial port
  Serial.println("cm");
  if ( distance <= 5 )
  {
    digitalWrite(PIN_LED1, HIGH);
  }
  else
  {
    digitalWrite(PIN_LED1, LOW);
  }
  if ( distance <= 10 )
  {
    digitalWrite(PIN_LED2, HIGH);
  }
  else
  {
    digitalWrite(PIN_LED2, LOW);
  }
  if ( distance <= 15 )
  {
    digitalWrite(PIN_LED3, HIGH);
  }
  else
  {
    digitalWrite(PIN_LED3, LOW);
  }
  if ( distance <= 20 )
  {
    digitalWrite(PIN_LED4, HIGH);
  }
  else
  {
    digitalWrite(PIN_LED4, LOW);
  }
}
//**********************************************************************************
Compile and upload the code to the ESP32. After the code is uploaded successfully, power it via the USB cable, open the serial monitor, and set the baud rate to 115200. The observable phenomenon is: the serial monitor window will print the distance value between the ultrasonic sensor and the object. In addition, when we move our hand in front of the ultrasonic sensor, the corresponding LED will light up.

Project 31 Temperature Instrument
1. Project Introduction:
A thermistor is a resistor whose resistance depends on temperature and changes in temperature. It is widely used in devices such as gardening and home alarm systems. Therefore, we can use this characteristic to make a temperature instrument.
2. Project Components:
|
|
|
 |
|---|---|---|---|
| ESP32*1 | Breadboard*1 | OLED Screen*1 | Thermistor*1 |
|
|
|
|
| 10KΩ Resistor*1 | Male-to-female Dupont wires*4 | USB Cable*1 | Jumper Wires several |
3. Component Knowledge:
Thermistor: A thermistor is a temperature-sensitive resistor. When the thermistor senses a change in temperature, its resistance changes. We can use this characteristic of the thermistor to detect temperature intensity. The thermistor and its electronic symbol are shown below.
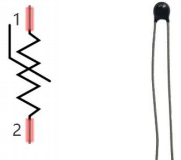
The relationship between the resistance value of the thermistor and temperature is:
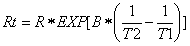
Where:
Rt is the resistance of the thermistor at temperature T2;
R is the nominal resistance value of the thermistor at temperature T1;
EXP[n] is the n-th power of e;
B is the temperature index;
T1, T2 are Kelvin temperatures (absolute temperature), Kelvin temperature = 273.15 + Celsius temperature. For the parameters of the thermistor, we use: B=3950, R=10KΩ, T1=25℃. The circuit connection method of the thermistor is similar to that of the photoresistor, as shown below:
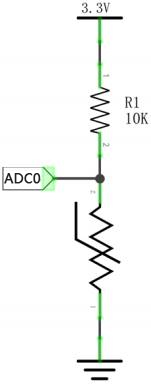
We can use the value measured by the ADC converter to obtain the resistance value of the thermistor, and then use the formula to obtain the temperature value. Therefore, the temperature formula can be derived as:
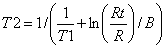
4. Read the value of the thermistor:
First, we learn to read the current ADC value, voltage value, and temperature value of the thermistor and print them out. Please wire it according to the wiring diagram below:
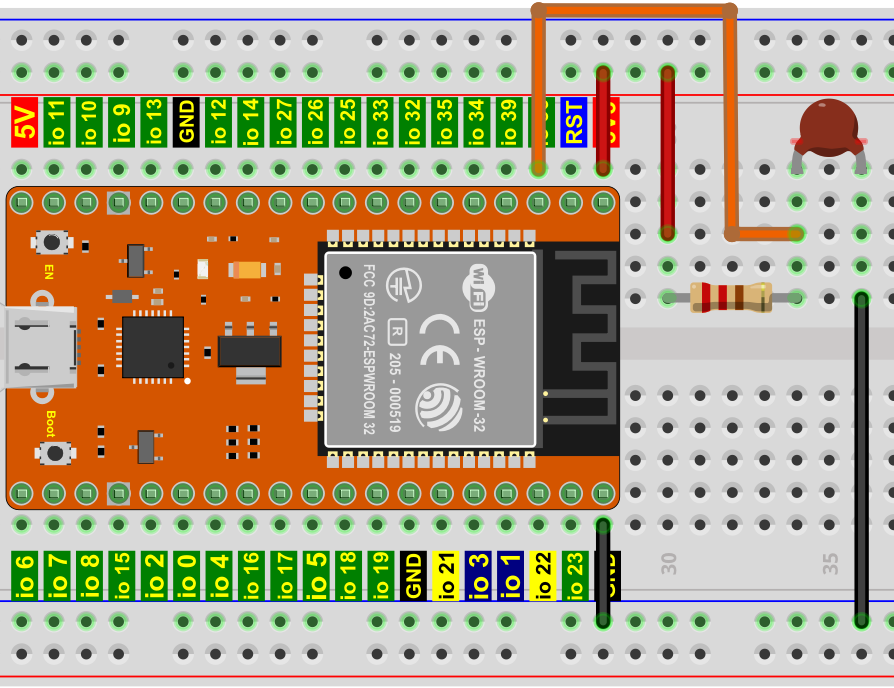
//**********************************************************************************
/*
 * File Name : Thermistor
 * Description : Read the resistance value of the thermistor.
*/
#define PIN_ANALOG_IN   36
void setup() {
  Serial.begin(115200);
}

void loop() {
  int adcValue = analogRead(PIN_ANALOG_IN);                       //Read the ADC pin
  double voltage = (float)adcValue / 4095.0 * 3.3;                // Calculate the voltage
  double Rt = 10 * voltage / (3.3 - voltage);                     //Calculate the resistance value of the thermistor
  double tempK = 1 / (1 / (273.15 + 25) + log(Rt / 10) / 3950.0); //Calculate the temperature (Kelvin)
  double tempC = tempK - 273.15;                                  //Calculate the temperature (Celsius)
  Serial.printf("ADC value : %d,\tVoltage : %.2fV, \tTemperature : %.2fC\n", adcValue, voltage, tempC);
  delay(1000);
}
//**********************************************************************************
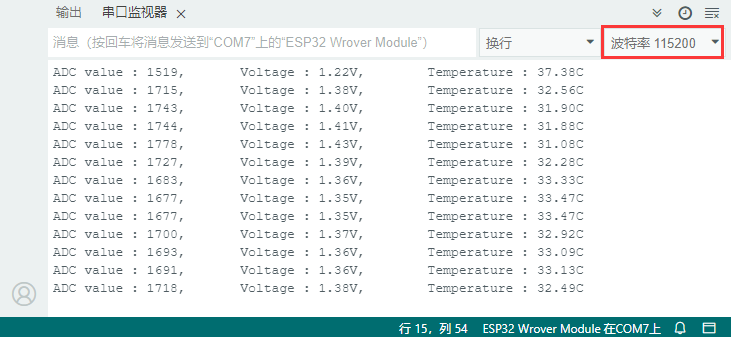
5. Wiring diagram of the temperature instrument:
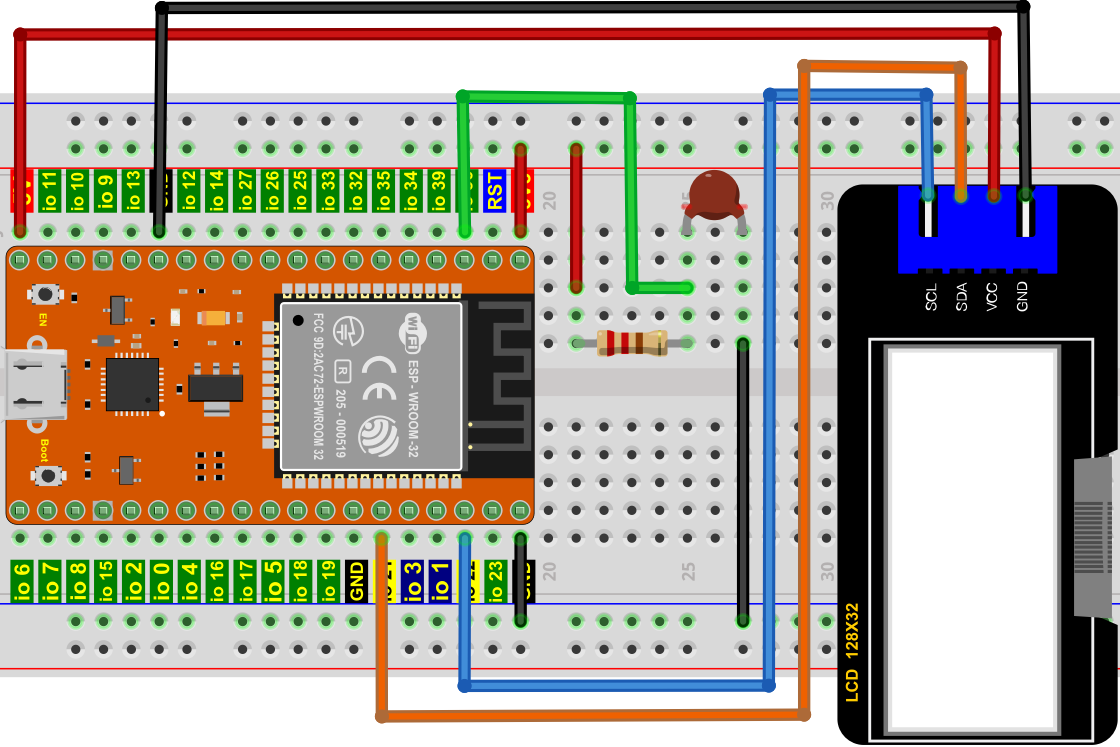
6. Add the LCD_128×32 Library:
The code in this project uses a library named "LCD_128×32". If you have already added the "LCD_128×32" library, skip this step. If you have not added it yet, please install it before learning. The steps to add a third-party library are as follows:
Open the Arduino IDE, click "Sketch" → "Include Library" → "Add .ZIP Library...". In the pop-up window, find the file named ..\library-files\arduino-c-windows\LCD_128X32.ZIP in that directory, first select the LCD_128X32.ZIP file, then click "Open".
7. Project Code:
//**********************************************************************************
/*
 * File Name  : Temperature instrument
 * Description : LCD displays the temperature of the thermistor.
*/
#include <Wire.h>
#include <Adafruit_GFX.h>
#include <Adafruit_SSD1306.h>

#define PIN_ANALOG_IN   36
Adafruit_SSD1306 display(128, 32, &Wire, -1);

void setup() {
  Serial.begin(115200);

  // Initialize I2C, the pins are SDA=21, SCL=22
  Wire.begin(21, 22);

  // Initialize the OLED display
  if(!display.begin(SSD1306_SWITCHCAPVCC, 0x3C)) {
    Serial.println(F("SSD1306分配失败"));
  }

  Serial.println("OLED初始化成功");

  display.clearDisplay();
  display.setTextColor(SSD1306_WHITE); // Set the text color to white
  display.setTextSize(1);  // Set the font size
  display.setCursor(0, 0); // Set the cursor position (x, y)

  Serial.println("程序启动完毕");
}

void loop() {
  int adcValue = analogRead(PIN_ANALOG_IN);                       //Read the ADC pin
  double voltage = (float)adcValue / 4095.0 * 3.3;                // Calculate the voltage
  double Rt = 10 * voltage / (3.3 - voltage);                     //Calculate the resistance value of the thermistor
  double tempK = 1 / (1 / (273.15 + 25) + (log(Rt / 10) / 3950.0)); //Calculate the temperature (Kelvin)
  double tempC = tempK - 273.15;                                  //Calculate the temperature (Celsius)

  display.clearDisplay();
  display.setCursor(0,0);  display.print("Voltage:");
  display.setCursor(50,0); display.print(voltage);
  display.setCursor(75,0); display.print("V");

  display.setCursor(0,25); display.print("tempC:");
  display.setCursor(50,25); display.print(tempC);
  display.display();
  delay(1000);
}
//**********************************************************************************
Compile and upload the code to the ESP32. After the code is uploaded successfully, power it via the USB cable. The phenomenon you will see is: the screen of the LCD 128X32 DOT displays the voltage value of the thermistor and the temperature value of the current environment.
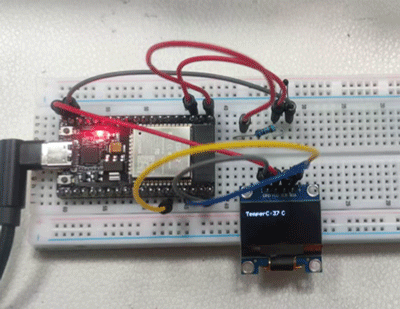
Project 32 RFID - This tutorial will be replaced in the new version
1. Experiment Introduction:
Now many residential communities use the card-swiping door-opening function, which is very convenient. In this lesson, we will learn to use RFID (Radio Frequency Identification) wireless communication technology to read and write cards (keychain/white magnetic card) and control the rotation of a servo through the RFID-MFRC522 module.
2. Experiment Components:
If the goods you received do not contain the access control card kit, it is because they were upgraded to a smoke alarm to coordinate with the IoT tutorial. Please see the next lesson.
|
|
 |
|
 |
|---|---|---|---|---|
| ESP32*1 | Breadboard*1 | RFID-RC522 Module*1 | Servo*1 | White Magnetic Card*1 |
|
|
|
 |
|
| Dupont Wires several | Jumper Wires several | USB Cable*1 | Keychain*1 |
3. Component Knowledge:
RFID: Radio frequency identification. The card reader is composed of a radio frequency module and a high-frequency magnetic field. The Tag transponder is the device to be sensed, and this device does not contain a battery. It only contains a micro integrated circuit chip, the medium for storing data, and the antenna for receiving and sending signals. To read the data in the tag, it must first be placed within the reading range of the card reader. The card reader will generate a magnetic field. Because magnetic energy generates electricity according to Lenz's law, the RFID Tag will be powered, thereby activating the device.
RFID-RC522 module: It uses the Philips MFRC522 original chip to design the card reading circuit. It is easy to use and low in cost, suitable for users who develop devices, card readers, and other advanced applications, and users who need to design/produce radio frequency card terminals. This module can be directly installed into various card reader molds. The module uses a voltage of 5V, and through the IIC interface with just a few simple lines, it can directly connect and communicate with any user's CPU main board or microcontroller.
Specifications:
- Operating voltage: DC 5V
- Operating current: 13—100mA/DC 5V
- Idle current: 10-13mA/DC 5V
- Sleep current: <80uA
- Peak current: <100mA
- Operating frequency: 13.56MHz
- Maximum power: 0.5W
- Supported card types: mifare1 S50, mifare1 S70, mifare UltraLight, mifare Pro, mifare Desfire
- Ambient operating temperature: Celsius -20—80℃
- Ambient storage temperature: Celsius -40—85℃
- Ambient relative humidity: relative humidity 5%—95%
- Data transmission rate: maximum 10Mbit/s
4. RFID reading UID:
We will read the unique ID number (UID) of the RFID card, identify the type of the RFID card, and display the relevant information through the serial port. Its wiring diagram is shown below:
Add the MFRC522_I2C and Wire libraries:
If you have already added the "MFRC522_I2C" and "Wire" libraries, skip this step. If you have not added the "MFRC522_I2C" and "Wire" libraries, please add them before learning. The steps to add a third-party library are as follows:
Open the Arduino IDE, click "Sketch" → "Include Library" → "Add .ZIP Library...". In the pop-up window, find the file named ..\library-files\arduino-c-windows\MFRC522_I2C.ZIP in that directory, first select the MFRC522_I2C.ZIP file, then click "Open".


Then in the pop-up window, find the file named ..\library-files\arduino-c-windows\Wire.ZIP in that directory, first select the Wire.ZIP file, then click "Open"

//**********************************************************************************
/*
 * File Name : RFID
 * Description : RFID reads UID
*/
#include <Wire.h>
#include "MFRC522_I2C.h"
// The IIC pins default to GPIO21 and GPIO22 of the ESP32
// 0x28 is the i2c address of SDA. If it does not match, please use i2c to check your address.
MFRC522 mfrc522(0x28);   // Create MFRC522.

void setup() {
  Serial.begin(115200);           // Initialize serial communication with the PC
  Wire.begin();                   // Initialize I2C
  mfrc522.PCD_Init();             // Initialize MFRC522
  ShowReaderDetails();            // Display PCD - MFRC522 card reader
  Serial.println(F("Scan PICC to see UID, type, and data blocks..."));
}

void loop() {
  //
  if ( ! mfrc522.PICC_IsNewCardPresent() || ! mfrc522.PICC_ReadCardSerial() ) {
    delay(50);
    return;
  }

  // Select a door card. UID and SAK are mfrc522.uid.

  // Save the UID
  Serial.print(F("Card UID:"));
  for (byte i = 0; i < mfrc522.uid.size; i++) {
    Serial.print(mfrc522.uid.uidByte[i] < 0x10 ? " 0" : " ");
    Serial.print(mfrc522.uid.uidByte[i], HEX);
  }
  Serial.println();
}

void ShowReaderDetails() {
  //  Run or call the MFRC522 software
  byte v = mfrc522.PCD_ReadRegister(mfrc522.VersionReg);
  Serial.print(F("MFRC522 Software Version: 0x"));
  Serial.print(v, HEX);
  if (v == 0x91)
    Serial.print(F(" = v1.0"));
  else if (v == 0x92)
    Serial.print(F(" = v2.0"));
  else
    Serial.print(F(" (unknown)"));
  Serial.println("");
  // When returning 0x00 or 0xFF, the communication signal may not be transmitted
  if ((v == 0x00) || (v == 0xFF)) {
    Serial.println(F("WARNING: Communication failure, is the MFRC522 properly connected?"));
  }
}
//**********************************************************************************

Special note: For different RFID-RC522 white magnetic cards and keychains, their white magnetic card values and keychain values may all be different.
5. Wiring diagram of RFID MFRC522:
Now use the RFID-RC522 module, the white magnetic card/keychain, and the servo to simulate an intelligent access control system. When the white magnetic card/keychain is close to the sensing area of the RFID-RC522 module, the servo rotates. Wire it as shown in the figure below.

6. Add the MFRC522_I2C, Wire, and ESP32Servo libraries:
The MFRC522_I2C, Wire, and ESP32Servo libraries have been added earlier, so there is no need to add them again. If they have not been added, you need to add the MFRC522_I2C, Wire, and ESP32Servo libraries. The steps to add a third-party library are as follows:
First add the ESP32Servo library:
Install the third-party servo library through library management: ESP32Servo. If it is already installed, this can be skipped.
Then add the MFRC522_I2C and Wire libraries:
If the MFRC522_I2C and Wire libraries have already been added in the experiment above (RFID reading UID), there is no need to add them again; if the MFRC522_I2C and Wire libraries have not been added, add them by referring to the method in the experiment above (RFID reading UID).
7. Project Code:
Special note: For different RFID-RC522 white magnetic cards and keychains, the white magnetic card and keychain values read by the RFID-RC522 may all be different. You should replace the white magnetic card and keychain values in the program code with the white magnetic card and keychain values read by your own RFID-RC522 module, otherwise the white magnetic card and keychain may not be able to control the servo.
For example: you should replace the rfid_str string in the program code with the white magnetic card and keychain values read by your own RFID-RC522 module.
//*************************************************************************************
/*
 * File Name  : RFID mfrc522 controlling the servo
 * Description : RFID controls the servo to simulate opening a door
*/
#include <Wire.h>
#include "MFRC522_I2C.h"
// The IIC pins default to GPIO21 and GPIO22 of the ESP32
// 0x28 is the i2c address of SDA. If it does not match, please use i2c to check your address.
MFRC522 mfrc522(0x28);   // Create MFRC522.

#include <ESP32Servo.h>
Servo myservo;  // Create a servo object to control the servo
int servoPin = 15; // Servo pin

String rfid_str = "";

void setup() {
  Serial.begin(115200);
  Wire.begin();
  mfrc522.PCD_Init();
  ShowReaderDetails();            // Display PCD - MFRC522 card reader
  Serial.println(F("Scan PICC to see UID, type, and data blocks..."));

  myservo.setPeriodHertz(50);           // Standard 50 Hz servo
  myservo.attach(servoPin, 500, 2500);  // Attach the servo on servoPin to the servo object
  myservo.write(0);
  delay(500);
}

void loop() {
   if ( ! mfrc522.PICC_IsNewCardPresent() || ! mfrc522.PICC_ReadCardSerial() ) {
    delay(50);
    return;
  }

  // Select a door card. UID and SAK are mfrc522.uid.

  // Save the UID
  rfid_str = ""; //Clear the string
  Serial.print(F("Card UID:"));
  for (byte i = 0; i < mfrc522.uid.size; i++) {
    rfid_str = rfid_str + String(mfrc522.uid.uidByte[i], HEX);  //Convert to string
    //Serial.print(mfrc522.uid.uidByte[i] < 0x10 ? " 0" : " ");
    //Serial.print(mfrc522.uid.uidByte[i], HEX);
  }
  Serial.println(rfid_str);

  if (rfid_str == "d963d3b3" || rfid_str == "d4e8e5e9") {
    myservo.write(180);
    delay(500);
    Serial.println("  open the door!");
    }
}

void ShowReaderDetails() {
  //  Run or call the MFRC522 software
  byte v = mfrc522.PCD_ReadRegister(mfrc522.VersionReg);
  Serial.print(F("MFRC522 Software Version: 0x"));
  Serial.print(v, HEX);
  if (v == 0x91)
    Serial.print(F(" = v1.0"));
  else if (v == 0x92)
    Serial.print(F(" = v2.0"));
  else
    Serial.print(F(" (unknown)"));
  Serial.println("");
  // When returning 0x00 or 0xFF, the communication signal may not be transmitted
  if ((v == 0x00) || (v == 0xFF)) {
    Serial.println(F("WARNING: Communication failure, is the MFRC522 properly connected?"));
  }
}
//*************************************************************************************
8. Project Observation:
Compile and upload the code to the ESP32. After the code is uploaded successfully, power it via the USB cable, open the serial monitor, and set the baud rate to 115200; the phenomenon you will see is: when we use the white magnetic card or the key card to swipe the card, the serial monitor displays the information of the white magnetic card or key card and "open the door", as shown in the figure below, and the servo rotates to the corresponding angle to simulate opening the door.


Project 32 Smoke Alarm
1. Project Introduction:
Fire is one of the most common disasters in life. A smoke alarm can issue an alarm in the early stage of a fire (when smoke is first generated), gaining precious time for personnel evacuation and firefighting, and is widely used in homes, hotels, shopping malls, factories, and other places.
This experiment uses the MQ-2 smoke/gas sensor to detect the concentration of smoke and combustible gas in the air in real time. When the detected concentration exceeds the set threshold, the ESP32 will control the active buzzer to emit an alarm sound, and at the same time print the detection data through the serial port, realizing a simple "smoke alarm".
Later, we will launch an IoT APP tutorial: "MQTT Internet of Things", which uses the smoke sensor to monitor the home environment in real time, and can remotely send early warning information to the mobile phone in case of gas leakage or fire.
2. Project Components:
|
|
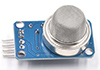 |
|---|---|---|
| ESP32*1 | Breadboard*1 | Smoke Sensor*1 |
|
|
|
| USB Cable*1 | Jumper Wires several | |
|
|
|
| NPN Transistor (S8050)*1 | Active Buzzer*1 | 1KΩ Resistor*1 |
3. Component Knowledge:
The MQ-2 is a widely used semiconductor gas sensor, which can detect smoke and combustible gases such as liquefied gas, propane, and hydrogen.
Inside the MQ-2 there is a gas-sensitive element made of tin dioxide (SnO₂) semiconductor material, with a circle of heating wire on its surface. During operation, the heating wire heats the gas-sensitive element to a high temperature, so that the oxygen on its surface adsorbs to form oxygen negative ions, and the element is in a high-resistance state. When combustible gas or smoke molecules in the air come into contact with the surface of the element, a chemical reaction occurs, causing the carrier concentration on the element surface to increase and the resistance to decrease, thereby changing the output voltage. The higher the gas concentration, the larger the output analog voltage.
Tip: The MQ-2 needs to warm up for a few minutes after being powered on before the reading tends to stabilize. This is a normal phenomenon.
4. Project Wiring:
| ESP32 Pin | Function | Connection |
|---|---|---|
| GPIO12 | ADC input | AO of the MQ-2 |
| GPIO14 | Digital input | DO of the MQ-2 |
| GPIO15 | Digital output | Buzzer signal terminal |
5. Project Code:
const int Pin_smog_A = 12;  // Analog quantity pin
const int Pin_smog_D = 14;  // Digital quantity pin
const int Pin_Buzzer = 15;  // Buzzer pin

void setup()
{
  Serial.begin(115200);
  pinMode(Pin_Buzzer, OUTPUT);
}

void loop()
{
  // Read the raw ADC value (0 - 4095)
  int ValueA = analogRead(Pin_smog_A);
  int ValueD = digitalRead(Pin_smog_D);

  // Print to the serial monitor
  Serial.print("模拟量: ");
  Serial.print(ValueA);
  Serial.print(" 数字量:");
  Serial.print(ValueD);

  if(ValueA > 100 || ValueD == 0){
    digitalWrite(Pin_Buzzer, LOW);
    Serial.println(" 触发报警");
  }else{
    digitalWrite(Pin_Buzzer, HIGH);
    Serial.println("");
  }
  delay(1000);
}
6. Project Observation:
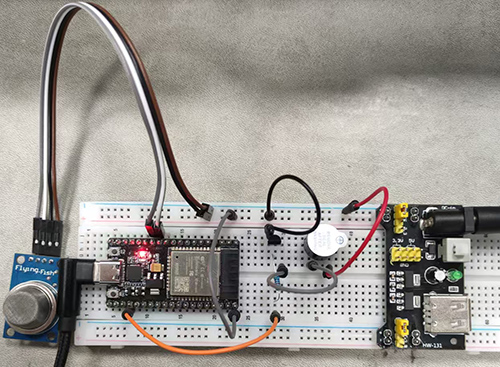
You can use a lighter to spray a little gas toward the sensor (no need to ignite it), and the buzzer will sound.
Project 33 Password Lock
1. Project Introduction:
For commonly used digital button sensors, one button uses one IO port. Sometimes when we need more buttons, too many IO ports will be occupied. To save the use of IO ports, multiple buttons are made into a matrix type, and through the control of rows and columns, fewer IO ports are used to control more buttons. In this project, we will learn to use the ESP32 and a membrane 4*4 matrix keyboard to control a servo and a buzzer.
2. Project Components:
|
|
|
|---|---|---|
| ESP32*1 | Breadboard*1 | Servo*1 |
 |
|
|
| Membrane 4×4 Matrix Keyboard*1 | USB Cable*1 | Jumper Wires several |
|
|
|
| NPN Transistor (S8050)*1 | Active Buzzer*1 | 1KΩ Resistor*1 |
3. Component Knowledge:
4×4 matrix keyboard: A keyboard is a device that integrates many keys. As shown in the figure below, a 4x4 keyboard integrates 16 keys.
Like the LED matrix integration, in the 4x4 keyboard, each row of keys is connected with one pin, and each column of keys is the same. This connection can reduce the occupation of processor ports. The internal circuit is shown below.

The usage method is similar to the matrix LED, that is, using the row scanning or column scanning method to detect the state of the keys on each column or each row. Taking the column scanning method as an example, send a low level to the 4th column (Pin4), detect the level states of rows 1, 2, 3, 4, and determine whether the A, B, C, D keys are pressed. Then send the low level to columns 3, 2, 1 in turn, and detect whether other keys are pressed. Then, you can obtain the state of all keys.
4. Read the key value of the 4*4 matrix keyboard:
We first use a simple code to read the key value of the 4*4 matrix keyboard and print it out. Its wiring diagram is shown below:

How to install the Keypad library:
Search for and install the third-party library Keypad in library management. If you are interested, you can also implement all the code yourself according to the principle of the numeric keyboard.
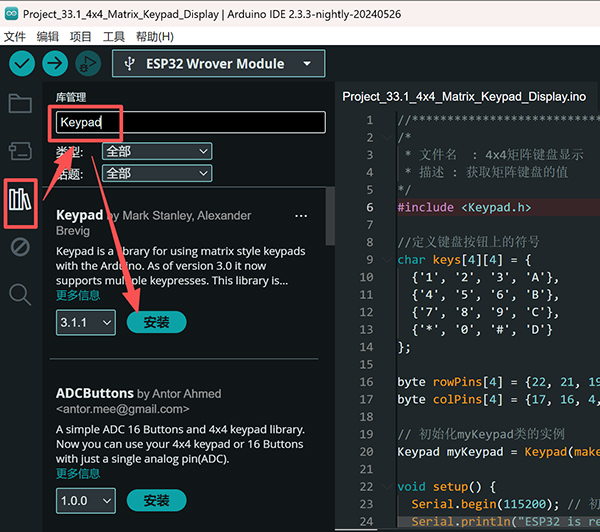
//**********************************************************************************
/*
 * File Name  : 4x4 matrix keyboard display
 * Description : Get the value of the matrix keyboard
*/
#include <Keypad.h>

//Define the symbols on the keyboard buttons
char keys[4][4] = {
  {'1', '2', '3', 'A'},
  {'4', '5', '6', 'B'},
  {'7', '8', '9', 'C'},
  {'*', '0', '#', 'D'}
};

byte rowPins[4] = {22, 21, 19, 18}; // The row pins connected to the keyboard
byte colPins[4] = {17, 16, 4, 0};   // The column pins connected to the keyboard

// Initialize the instance of the myKeypad class
Keypad myKeypad = Keypad(makeKeymap(keys), rowPins, colPins, 4, 4);

void setup() {
  Serial.begin(115200); // Initialize the serial port, baud rate set to 115200
  Serial.println("ESP32 is ready!");  // Print the string "ESP32 is ready!"
}

void loop() {
  // Get character input
  char keyPressed = myKeypad.getKey();
  // If there is character input, send it to the serial port
  if (keyPressed) {
    Serial.println(keyPressed);
  }
}
//**********************************************************************************

5. Wiring diagram of the password lock:
In the previous experiment, we already know the key value of the 4×4 matrix keyboard. Next, we use the 4×4 matrix keyboard as a keyboard to control the servo and the buzzer.

6. Add the Keypad and ESP32Servo libraries:
The Keypad and ESP32Servo libraries have been added earlier, so there is no need to add them again. If they have not been added, you need to add the Keypad and ESP32Servo libraries. The steps to add a third-party library are as follows:
First add the ESP32Servo library:
Install the third-party servo library through library management: ESP32Servo. If it is already installed, this can be skipped.
7. Project Code:
//**********************************************************************************
/*
 * File Name : Password lock
 * Description : Make a simple password lock.
*/
#include <Keypad.h>
#include <ESP32Servo.h>

// Define the symbols on the keyboard buttons
char keys[4][4] = {
  {'1', '2', '3', 'A'},
  {'4', '5', '6', 'B'},
  {'7', '8', '9', 'C'},
  {'*', '0', '#', 'D'}
};

byte rowPins[4] = {22, 21, 19, 18};   // The row pins connected to the keyboard
byte colPins[4] = {17, 16, 4, 0};   // The column pins connected to the keyboard

// Initialize the instance of the myKeypad class
Keypad myKeypad = Keypad(makeKeymap(keys), rowPins, colPins, 4, 4);

Servo  myservo;     // Create a servo object to control the servo
int servoPin = 15;  // Define the servo pin
int buzzerPin = 2; // Define the buzzer pin

char passWord[] = {"1234"}; // Save the correct password

void setup() {
  myservo.setPeriodHertz(50);           // Standard 50 Hz servo
  myservo.attach(servoPin, 500, 2500);  // Attach the servo on servoPin to the servo object
                                        // Set the high level time range of the servo to achieve precise rotation from 0 to 180°
  myservo.write(0);                     // Set the initial angle of the servo
  pinMode(buzzerPin, OUTPUT);
  Serial.begin(115200);
}

void loop() {
  static char keyIn[4];     // Save the input characters
  static byte keyInNum = 0; // Save the number of input characters
  char keyPressed = myKeypad.getKey();  // Get character input
  // Process the input characters
  if (keyPressed) {
    // Emit a prompt sound each time the key is pressed
    digitalWrite(buzzerPin, HIGH);
    delay(100);
    digitalWrite(buzzerPin, LOW);
    // Save the input characters
    keyIn[keyInNum++] = keyPressed;
    // Judge correctness after input
    if (keyInNum == 4) {
      bool isRight = true;            // Save whether the password is correct
      for (int i = 0; i < 4; i++) {   // Judge whether each character of the password is correct
        if (keyIn[i] != passWord[i])
          isRight = false;            // If there is a wrong character, mark it as wrong.
      }
      if (isRight) {                  // If the input password is correct
        myservo.write(90);           // Open the switch
        delay(2000);                  // Delay for a period of time
        myservo.write(0);            // Close the switch
        Serial.println("passWord right!");
      }
      else {                          // Wrong password input
        digitalWrite(buzzerPin, HIGH);// Wrong password prompt sound
        delay(1000);
        digitalWrite(buzzerPin, LOW);
        Serial.println("passWord error!");
      }
      keyInNum = 0; // Reset the number of input characters to 0
    }
  }
}
//**********************************************************************************
Compile and upload the code to the ESP32. After the code is uploaded successfully, power it via the USB cable. The phenomenon you will see is: enter a 4-character password on the keyboard. If the input is correct (correct password: 1234), the servo will rotate a certain angle, and then return to its original position. If the input is wrong, an input error alarm will be emitted.

Project 34 IR Remote Controlling Sound and LED
1. Project Introduction:
Infrared remote control is a low-cost, easy-to-use wireless communication technology. IR light is very similar to visible light, except that its wavelength is slightly longer. This means that infrared light cannot be detected by the human eye, which is perfect for wireless communication. For example, when you press a button on a TV remote control, an infrared LED repeatedly switches on and off 38,000 times per second, transmitting information (such as volume or channel control) to the infrared photoreceptor on the TV.
We will first explain how common infrared communication protocols work. Then we will start this project with a remote control and an infrared receiving component.
2. Project Components:
|
|
 |
|
|---|---|---|---|
| ESP32*1 | Breadboard*1 | IR Receiver*1 | RGB LED*1 |
|
|
|
 |
| Active Buzzer*1 | 220Ω Resistor*3 | 10KΩ Resistor*1 | IR Remote Control*1 |
|
|
|
|
| NPN Transistor (S8050)*1 | 1kΩ Resistor*1 | USB Cable*1 | Jumper Wires several |
3. Component Knowledge:
Infrared (IR) remote control: It is a device that can emit infrared light signals. Pressing different buttons, the infrared transmitting tube at the front of the remote control will emit infrared rays of different commands. Infrared remote control technology is widely used, such as TVs, air conditioners, etc. Therefore, in today's technologically advanced society, infrared remote control technology makes it convenient for you to switch TV programs and adjust air conditioner temperature.
The remote control we use is shown below:

This infrared remote control uses NEC encoding.
Infrared (IR) receiver: It is a component that can receive infrared light, so it can be used to receive the infrared light signal emitted by the infrared remote control. The infrared receiver demodulates the received infrared light signal and converts it back to binary, and then passes the information to the microcontroller.
Infrared signal modulation process diagram:

4. Decode the infrared signal:
We connect the infrared receiving component to the ESP32 according to the wiring diagram below.

How to install the IRremoteESP8266 library:
The code in this project uses a library named "IRremoteESP8266". If the "IRremoteESP8266" library has already been added, skip this step. If you have not added it yet, please install it before learning. The steps to add a third-party library are as follows:
Open the Arduino IDE, click "Sketch" → "Include Library" → "Add .ZIP Library...". In the pop-up window, find the file named ..\library-files\arduino-c-windows\IRremoteESP8266-2.7.4.ZIP in that directory, first select the IRremoteESP8266-2.7.4.ZIP file, then click "Open".


//**********************************************************************************
/*
 * File Name  : Decoded infrared signal
 * Description : The decoded infrared remote control is printed out through the serial port.
*/
#include <Arduino.h>
#include <IRremoteESP8266.h>
#include <IRrecv.h>
#include <IRutils.h>

const uint16_t recvPin = 0; // Infrared receiving pin
IRrecv irrecv(recvPin);      // Create a class object for the receiver
decode_results results;       // Create a decode result class object

void setup() {
  Serial.begin(115200);       // Initialize the serial port, baud rate set to 115200
  irrecv.enableIRIn();        // Start the receiver
  Serial.print("IRrecvDemo is now running and waiting for IR message on Pin ");
  Serial.println(recvPin);   //Print the signal received by the infrared receiving pin
}

void loop() {
  if (irrecv.decode(&results)) {          // Wait for decoding
    serialPrintUint64(results.value, HEX);// Print out the decoding result
    Serial.println("");
    irrecv.resume();                      // Release IRremote. Receive the next value
  }
  delay(1000);
}
//**********************************************************************************

Write down the key encoding value associated with each key of the infrared remote control, because you will need this information later.

5. Wiring diagram of the infrared remote control:

6. Project Code:
The IRremoteESP8266 library has been added earlier, so there is no need to add it again. If it has not been added, you need to add the IRremoteESP8266 library, and the method is shown above in this project. After the IRremoteESP8266 library is added, you can open the code we provide:
//**********************************************************************************
/*
 * File Name  : Infrared control of sound and LED
 * Description : Infrared remote control controls RGB and active buzzer.
*/
#include <Arduino.h>
#include <IRremoteESP8266.h>
#include <IRrecv.h>
#include <IRutils.h>

const uint16_t recvPin = 0; // Infrared receiving pin
IRrecv irrecv(recvPin);      // Create a class object for the receiver
decode_results results;       // Create a decode result class object

int ledPins[] = {22, 21, 4};    //Define red, green, blue pins
const byte chns[] = {0, 1, 2};        //Define PWM channels
int buzzerPin = 15;  // Pin of the buzzer pin

void setup() {
  irrecv.enableIRIn();                  // Start the receiver
  pinMode(buzzerPin, OUTPUT);
  for (int i = 0; i < 3; i++) {   //Set up pwm channels, 1KHz, 8bit
    ledcSetup(chns[i], 1000, 8);
    ledcAttachPin(ledPins[i], chns[i]);
  }
}

void loop() {
  if(irrecv.decode(&results)) {        // Wait for decoding
    handleControl(results.value);       // Process the command from the remote control
    irrecv.resume();                    // Receive the next value
  }
}

void handleControl(unsigned long value) {
  // Make a sound when it receives a command
  digitalWrite(buzzerPin, HIGH);
  delay(100);
  digitalWrite(buzzerPin, LOW);
  // Process the command
  if (value == 0xFF6897) // Receive the number "1"
  {
      ledcWrite(chns[0], 255); //Common cathode LED, high level turns on the LED.
      ledcWrite(chns[1], 0);
      ledcWrite(chns[2], 0);
      delay(1000);
  }
   else if (value == 0xFF9867) // Receive the number '2'
   {
      ledcWrite(chns[0], 0);
      ledcWrite(chns[1], 255);
      ledcWrite(chns[2], 0);
      delay(1000);
   }
    else if (value == 0xFFB04F) // Receive the number '3'
   {
      ledcWrite(chns[0], 0);
      ledcWrite(chns[1], 0);
      ledcWrite(chns[2], 255);
      delay(1000);
    }
    else if (value == 0xFF30CF) // Receive the number '4'
   {
      ledcWrite(chns[0], 255);
      ledcWrite(chns[1], 255);
      ledcWrite(chns[2], 0);
      delay(1000);
    }
    else if (value == 0xFF18E7) // Receive the number '5'
   {
      ledcWrite(chns[0], 255);
      ledcWrite(chns[1], 0);
      ledcWrite(chns[2], 255);
      delay(1000);
    }
    else if (value == 0xFF7A85)  // Receive the number '6'
   {
      ledcWrite(chns[0], 0);
      ledcWrite(chns[1], 255);
      ledcWrite(chns[2], 255);
      delay(1000);
    }
    else if (value == 0xFF10EF)  // Receive the number '7'
   {
      ledcWrite(chns[0], 255);
      ledcWrite(chns[1], 255);
      ledcWrite(chns[2], 255);
      delay(1000);
    }
    else{
      ledcWrite(chns[0], 0);
      ledcWrite(chns[1], 0);
      ledcWrite(chns[2], 0);
      delay(1000);
      }
  }
//**********************************************************************************
Compile and upload the code to the ESP32. After the code is uploaded successfully, power it via the USB cable. The phenomenon you will see is: press the 1~7 keys of the infrared remote control, the buzzer will beep once each time, and at the same time the RGB will light up red, green, blue, yellow, magenta, cyan, and white respectively. Press any other key (except keys 1-7), and the RGB goes out.

Project 35 Bluetooth
This chapter mainly introduces how to perform simple data transmission between the ESP32's Bluetooth and a mobile phone. Project 35.1 is conventional Bluetooth, and Project 35.2 is Bluetooth controlling an LED.
Project 35.1 Conventional Bluetooth
1. Project Components:
|
|
 |
|---|---|---|
| ESP32*1 | USB Cable*1 | Smartphone/Tablet (self-provided)*1 |
In this project, we need to use a Bluetooth application called Serial Bluetooth Terminal to assist the experiment. If you have not installed it yet, please click to install: https://www.appsapk.com/serial-bluetooth-terminal/. Below is its logo.
2. Component Knowledge:
Bluetooth is a short-distance communication system, which can be divided into two types, namely Bluetooth Low Energy (BLE) and classic Bluetooth. Simple data transmission has two modes: master mode and slave mode.
Master mode: In this mode, the work is done on the master device, and it can connect with slave devices. We can search for and select nearby slave devices to connect. When a device in master mode initiates a connection request, it needs the address and pairing password information of other Bluetooth devices. After pairing is complete, it can directly connect with them.
Slave mode: A Bluetooth module in slave mode can only accept connection requests from the master, but cannot initiate connection requests. After connecting with the master device, it can send data to the master device and also receive data from the master device. Bluetooth devices can exchange data with each other, with one device in master mode and the other in slave mode. When they exchange data, the Bluetooth device in master mode will search for and select nearby devices to connect. When establishing the connection, they can exchange data. When the mobile phone exchanges data with the ESP32, the mobile phone is usually in master mode, and the ESP32 is in slave mode.
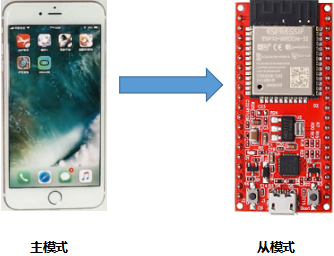
3. Project Wiring:
Use a USB cable to connect the ESP32 board to the USB port on the computer.
4. Project Code:

//**********************************************************************************
/*
 * File Name : Classic Bluetooth
 * Description : The ESP32 communicates with the mobile phone through Bluetooth, and prints the mobile phone data through the serial port
*/
#include "BluetoothSerial.h"

BluetoothSerial SerialBT;
String buffer;
void setup() {
  Serial.begin(115200);
  SerialBT.begin("ESP32test"); //Bluetooth device name
  Serial.println("\nThe device started, now you can pair it with bluetooth!");
}

void loop() {
  if (Serial.available()) {
    SerialBT.write(Serial.read());
  }
  if (SerialBT.available()) {
    Serial.write(SerialBT.read());
  }
  delay(20);
}
//**********************************************************************************
5. Project Observation:
Compile and upload the code to the ESP32. After the upload is successful, open the serial monitor and set the baud rate to 115200. When you see the serial port print out the string, as shown below, it means that the ESP32's Bluetooth is ready and waiting to connect with the mobile phone. (If after opening the serial monitor and setting the baud rate to 115200, the serial monitor window does not show the following information, you can press the reset key of the ESP32 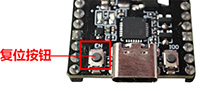 )
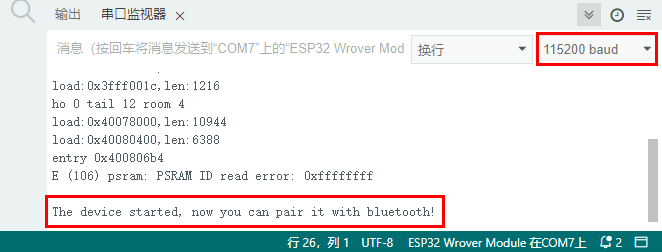
Please confirm that your mobile phone has Bluetooth enabled, and that the "Serial Bluetooth Terminal" Bluetooth application has been installed.
The mobile phone automatically searches for nearby Bluetooth devices, click "ESP32 test" to pair, and a pairing dialog box appears. Click "Pair", so that the "ESP32 test" device is connected.
Open the software APP, click the left side of the terminal. Select "Devices".
Select ESP32test in classic Bluetooth mode, and a connection success prompt as shown in the figure below will appear.
Now, data can be transmitted between your mobile phone and the computer through the ESP32.
Enter "Hi!" in the text box in the IDE. When the mobile phone receives it, reply "Hi!" to your mobile phone; the mobile phone sends "Hello!", and when the computer receives it, reply "Hello!" to your computer.
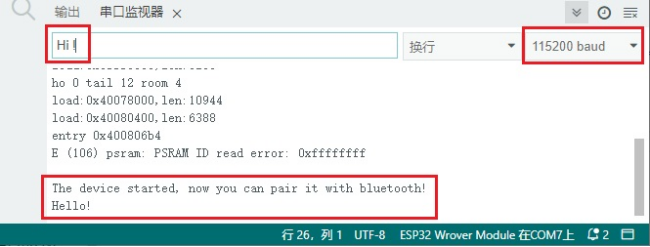
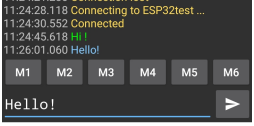
Project 35.2 Bluetooth Controlling LED
1. Project Components:
|
|
|
|
|---|---|---|---|
| ESP32*1 | Breadboard*1 | Red LED*1 | Smartphone/Tablet (self-provided)*1 |
|
|
|
|
| 220Ω Resistor*1 | Jumper Wires*2 | USB Cable*1 |
2. Project Wiring:
3. Project Code:

//**********************************************************************************
/*
 * File Name  : Bluetooth controlling LED
 * Description : The mobile phone controls the esp32 indicator light through Bluetooth.
           When the mobile phone sends "LED_on", the ESP32 LED will light up.
           When the mobile phone sends "LED_off", the ESP32 LED will turn off.
*/
#include "BluetoothSerial.h"
#include "string.h"
#define LED 15
BluetoothSerial SerialBT;
char buffer[20];
static int count = 0;
void setup() {
  pinMode(LED, OUTPUT);
  SerialBT.begin("ESP32test"); //Bluetooth device name
  Serial.begin(115200);
  Serial.println("\nThe device started, now you can pair it with bluetooth!");
}

void loop() {
  while(SerialBT.available())
  {
    buffer[count] = SerialBT.read();
    count++;
  }
  if(count>0){
    Serial.print(buffer);
    if(strncmp(buffer,"led_on",6)==0){
      digitalWrite(LED,HIGH);
    }
    if(strncmp(buffer,"led_off",7)==0){
      digitalWrite(LED,LOW);
    }
    count=0;
    memset(buffer,0,20);
  }
}
//**********************************************************************************
4. Project Observation:
Compile and upload the code to the ESP32. The operation of the APP is the same as Project 35.1. To make the external LED turn on and off, you only need to change the sent content to "led_on" and "led_off". The data sent by the mobile APP:
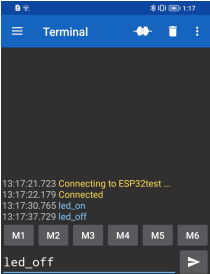
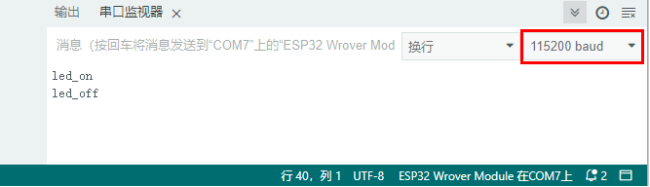
The phenomenon of the LED:
Note: If the sent content is not "led_on" or "led_off", then the state of the LED will not change. If the LED is on, when irrelevant content is received, the LED stays on; correspondingly, if the LED is off, when irrelevant content is received, the LED stays off.
Project 36 WiFi Operating Modes
In today's era of rapid technological development, the method of uniformly controlling intelligent devices through a mobile phone has gradually gained people's favor. This method uses a microcontroller to establish a connection between the mobile phone and the intelligent device through the WiFi module and the Internet network, so as to achieve remote control of the intelligent device. Our development board has a built-in WiFi module. In this chapter, we will focus on the WiFi development of the ESP32.
The ESP32 has 3 different WiFi operating modes: Station mode, AP mode, and AP+Station mode.
Project 36.1: WiFi Station Mode
1. Experiment Components:
|
|
|---|---|
| USB Cable x1 | ESP32x1 |
2. Experiment Wiring:
Use a USB cable to connect the ESP32 board to the USB port on the computer.
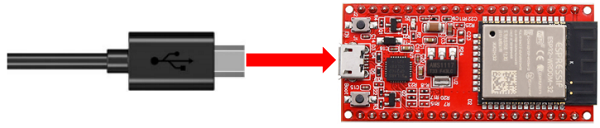
3. Component Knowledge:
Station mode: When the ESP32 selects Station mode, it acts as a WiFi client. It can connect to a router network and communicate with other devices on the router through the WiFi connection. As shown in the figure below, the PC and the router are already connected. If the ESP32 wants to communicate with the PC, the PC and the router need to be connected.
4. Project Code:
//**********************************************************************************
/*
 * File Name  : WiFi Station mode
 * Mode : Use the ESP32 to connect to the router
*/
#include <WiFi.h> //Include the WiFi Library header file of the ESP32.

//Please enter the correct router name and password.
const char *ssid_Router     = "ChinaNet-2.4G-0DF0"; //Enter the router name
const char *password_Router = "ChinaNet@233"; //Enter the router password

void setup(){
  Serial.begin(115200);
  delay(2000);
  Serial.println("Setup start");
  WiFi.begin(ssid_Router, password_Router);//Set the ESP32 to "Station mode" and connect to the router.
  Serial.println(String("Connecting to ")+ssid_Router);
//Check every 0.5s whether the ESP32 is connected to the router successfully.
  while (WiFi.status() != WL_CONNECTED){
    delay(500);
    Serial.print(".");
  }
  Serial.println("\nConnected, IP address: ");
  Serial.println(WiFi.localIP());//The serial monitor prints out the IP address assigned to the ESP32.
  Serial.println("Setup End");
}

void loop() {
}
//**********************************************************************************

5. Project Observation:
After confirming that the WiFi name and password are entered correctly, compile and upload the code to the ESP32 board. After the upload is successful, open the serial monitor and set the baud rate to 115200. When the ESP32 is successfully connected to ssid_Router, the serial monitor will print out the IP address assigned by WiFi to the ESP32. Then the serial monitor window will display as follows: (If after opening the serial monitor and setting the baud rate to 115200, the serial monitor window does not show the following information, you can press the reset key of the ESP32
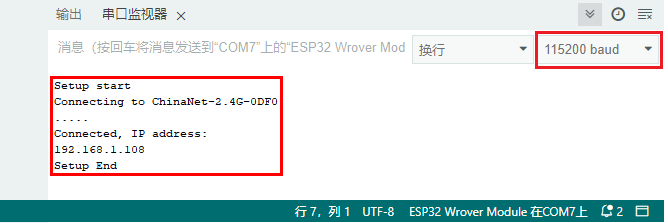
Project 36.2: WiFi AP Mode
1. Experiment Components & Wiring:
The experiment components and wiring are the same as Project 36.1: WiFi Station Mode above.
2. Component Knowledge:
AP mode: When the ESP32 selects AP mode, it will create a hotspot network independent of the Internet, waiting for other WiFi devices to connect. As shown in the figure below, the ESP32 is used as the hotspot. If the mobile phone or PC needs to communicate with the ESP32, it must connect to the ESP32's hotspot. Communication can only be carried out after establishing the connection through the ESP32.
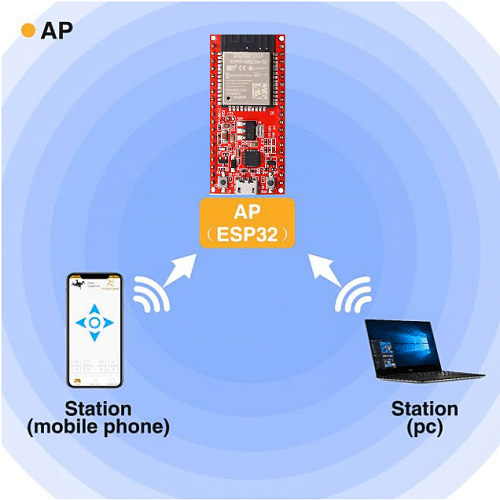
3. Project Code:
//**********************************************************************************
/*
 * File Name  : WiFi AP
 * Description : Set the ESP32 to open an access point
*/
#include <WiFi.h> //Include the WiFi Library header file of the ESP32.

const char *ssid_AP     = "ESP32_Wifi"; //Enter the AP name
const char *password_AP = "12345678"; //Enter the AP password

IPAddress local_IP(192,168,1,108);//Set the IP address of the ESP32 itself
IPAddress gateway(192,168,1,1);   //Set the gateway of the ESP32 itself
IPAddress subnet(255,255,255,0);  //Set the subnet mask of the ESP32 itself

void setup(){
  Serial.begin(115200);
  delay(2000);
  Serial.println("Setting soft-AP configuration ... ");
  WiFi.disconnect();
  WiFi.mode(WIFI_AP);
  Serial.println(WiFi.softAPConfig(local_IP, gateway, subnet) ? "Ready" : "Failed!");
  Serial.println("Setting soft-AP ... ");
  boolean result = WiFi.softAP(ssid_AP, password_AP);
  if(result){
    Serial.println("Ready");
    Serial.println(String("Soft-AP IP address = ") + WiFi.softAPIP().toString());
    Serial.println(String("MAC address = ") + WiFi.softAPmacAddress().c_str());
  }else{
    Serial.println("Failed!");
  }
  Serial.println("Setup End");
}

void loop() {
}
//**********************************************************************************

4. Project Observation:
Correctly enter the AP name and password of the ESP32, compile and upload the code to the ESP32 board. After the upload is successful, open the serial monitor and set the baud rate to 115200. Then the serial monitor window will display as follows: (If after opening the serial monitor and setting the baud rate to 115200, the serial monitor window does not show the following information, you can press the reset key of the ESP32 )
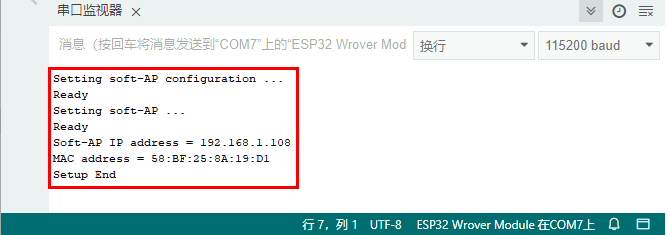
When observing the information printed by the serial monitor, open the WiFi scanning function of the mobile phone, and you can see that the ssid_AP on the ESP32 is called, which is called "ESP32_Wifi" in this program code. You can enter the password "12345678" to connect to it, and you can also modify its AP name and password by modifying the program code.
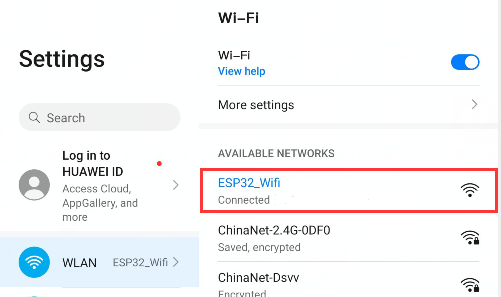
Project 36.3: WiFi AP+Station Mode
1. Experiment Components & Wiring:
The experiment components and wiring are the same as Project 36.1: WiFi Station Mode and Project 36.2: WiFi AP Mode above.
2. Component Knowledge:
AP+Station mode: In addition to AP mode and Station mode, the ESP32 can also use AP mode and Station mode simultaneously. This mode contains the functions of the previous two modes. Turn on the Station mode of the ESP32 and connect it to the router network, so that it can communicate with the Internet through the router. At the same time, turn on its AP mode to create a hotspot network. Other WiFi devices can choose to connect to the router network or the hotspot network to communicate with the ESP32.
3. Project Code:
//**********************************************************************************
/*
 * File Name : WiFi AP+Station
 * Description : The ESP32 connects to the user's router and opens an access point
*/
#include <WiFi.h>

const char *ssid_Router     =  "ChinaNet-2.4G-0DF0";  //Enter the router name
const char *password_Router =  "ChinaNet@233";  //Enter the router password
const char *ssid_AP         =  "ESP32_Wifi"; //Enter the AP name
const char *password_AP     =  "12345678";  //Enter the AP password

void setup(){
  Serial.begin(115200);
  Serial.println("Setting soft-AP configuration ... ");
  WiFi.disconnect();
  WiFi.mode(WIFI_AP);
  Serial.println("Setting soft-AP ... ");
  boolean result = WiFi.softAP(ssid_AP, password_AP);
  if(result){
    Serial.println("Ready");
    Serial.println(String("Soft-AP IP address = ") + WiFi.softAPIP().toString());
    Serial.println(String("MAC address = ") + WiFi.softAPmacAddress().c_str());
  }else{
    Serial.println("Failed!");
  }

  Serial.println("\nSetting Station configuration ... ");
  WiFi.begin(ssid_Router, password_Router);
  Serial.println(String("Connecting to ")+ ssid_Router);
  while (WiFi.status() != WL_CONNECTED){
    delay(500);
    Serial.print(".");
  }
  Serial.println("\nConnected, IP address: ");
  Serial.println(WiFi.localIP());
  Serial.println("Setup End");
}

void loop() {
}
//**********************************************************************************

4. Project Observation:
After confirming that the program code has been modified correctly, compile and upload the code to the ESP32 board. After the upload is successful, open the serial monitor and set the baud rate to 115200. Then the serial monitor window will display as follows: (If after opening the serial monitor and setting the baud rate to 115200, the serial monitor window does not show the following information, you can press the reset key of the ESP32 )
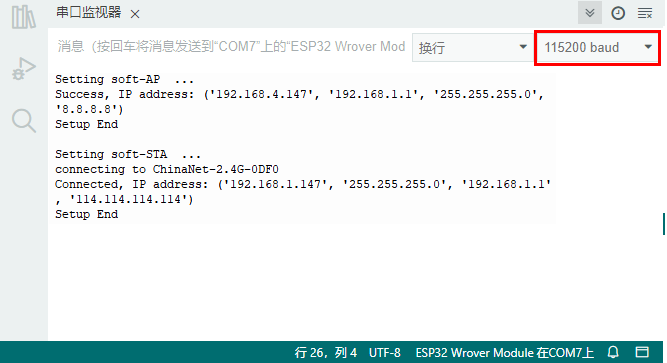
Open the WiFi search function of the mobile phone, and you can see that the ssid_AP is called on the ESP32.
Project 37 WiFi Test
1. Experiment Introduction:
In this experiment, we first use the WiFi Station mode of the ESP32 to read the WiFi IP address, and then connect to WiFi through the APP to read the characters sent by the function buttons on the APP.
2. Experiment Components:
|
|
|
|---|---|---|
| ESP32*1 | USB Cable*1 | Smartphone/Tablet (self-provided)*1 |
3. Experiment Wiring:
Use a USB cable to connect the ESP32 board to the USB port on the computer.
4. Modify the Code
You need to first change the user WiFi name and user WiFi password in the code  to your own WiFi name and WiFi password.
5. Upload the Code
Upload the code and open the serial monitor (baud rate 115200) -> press the EN key on the board to restart -> check the device IP
After the esp32 uploads the code, it will automatically connect to the WiFi defined in the code.

6. Open the Browser:
Enter the IP address in the serial log in the browser on the computer or mobile phone, and the following interface will be displayed.

This is a web service provided by the esp32.
Special note:Ensure that the computer network, the mobile phone/tablet network, the ESP32 board, the router, and the WiFi name and password entered in the code must all be under the same LAN (WiFi).
6. Experiment Observation
Click the function buttons on the browser, and the serial monitor will print the received corresponding characters.

Note: If after opening the serial monitor and setting the baud rate to 115200, the serial monitor window does not show the following information, you can press the reset key of the ESP32
Project 38 WiFi Smart Home
1. Experiment Description:
In the previous experiments, we have learned about the ESP32's WiFi Station mode, WiFi AP mode, and WiFi AP+Station mode. So in this chapter's experiment, we will use the ESP32's WiFi Station mode to connect to WiFi through the APP to control multiple sensors/modules, achieving the effect of a WiFi smart home.
2. Experiment Equipment:
|
|
|
|
|---|---|---|---|
| ESP32*1 | Breadboard*1 | 130 DC Motor Module*1 | Relay Module*1 |
|
|
|
|
| Servo*1 | Temperature and Humidity Sensor*1 | Ultrasonic Sensor*1 | Dupont Wires several |
|
|
|
|
| Smartphone/Tablet (self-provided)*1 | Breadboard Power Supply Module*1 | 6-cell AA Battery Holder*1 | Fan Blade*1 |
|
|
|
|
| AA Battery (self-provided)*6 | MicroUSB Cable*1 | Jumper Wires several |
3. Experiment Wiring Diagram:
| Relay | ESP32 Board | Temperature and Humidity Sensor | ESP32 Board |
|---|---|---|---|
| Gnd | Gnd | - | G |
| Vcc | 3.3V | + | 5V |
| IN | IO32 | out | IO15 |
| Ultrasonic Sensor | ESP32 Board | 130 Fan Module | ESP32 Board |
|---|---|---|---|
| Vcc | 5V | G | G |
| Trig | IO14 | V | 5V |
| Echo | IO27 | INA | IO18 |
| Gnd | GND | INB | IO19 |
| Servo | ESP32 Board |
|---|---|
| Red wire | 5V |
| Brown wire | G |
| Orange wire | IO4 |

4. Add the xht11 and ESP32Servo Libraries:
The code in this project uses libraries named "dht11" and "ESP32Servo". If you have not added them yet, please add them before learning.
These two open-source libraries are provided by third parties, which make it convenient for us to read the data of the temperature and humidity module and control the servo. If implemented entirely by ourselves, we would need to write a lot of code that may not be as efficient as others'.
Therefore, when actually doing projects, we focus more energy on the business, without unnecessarily reinventing the wheel.
Add the DHT11 and ESP32Servo libraries separately:

5. Project Code:
See the sample source code in the compressed package for details.
Special note: You need to first change the user WiFi name and user WiFi password in the experiment code to your own WiFi name and WiFi password.
6. Experiment Observation:
Special note:Ensure that the computer network, the mobile phone/tablet network, the ESP32 board, the router, and the WiFi name and password entered in the code must all be under the same LAN (WiFi).
After confirming that the WiFi name and WiFi password in the program code are modified correctly, compile and upload the code to the ESP32 board.
Open the serial monitor and set the baud rate to 115200, so that the serial monitor prints the detected WiFi IP address. (Note: If after opening the serial monitor and setting the baud rate to 115200, the serial monitor window does not show the following information, you can press the reset key of the ESP32

Open the browser on the mobile phone or computer and enter the device IP address in the serial monitor to open the control panel.
You can see the details in "Wifi Smart Home" in the video tutorial.
Project 39 MQTT Internet of Things
1. Experiment Description:
In the previous experiments, we have mastered the basic knowledge of WiFi, and built a prototype of a smart home project within the LAN.
This lesson will focus on the related knowledge of the Internet of Things, and on this basis further improve the smart home project, finally realizing a remote anti-theft alarm system that supports cross-network-segment remote control.
2. Internet of Things Knowledge:
IoT technology is currently widely used in industry, healthcare, daily life, and other fields, mainly reflected in the ability of terminals such as mobile phones and computers to obtain and control various devices in real time. In addition to the main board and various sensors we have been in contact with in the course, it also involves a communication technology: MQTT. This lesson will use MQTT communication technology to achieve real-time interaction between the mobile phone and the PIR motion sensor.
The core of the Internet of Things is to enable mobile phones, computers, and hardware devices to communicate with each other.
In this tutorial, we can understand the whole process as a "message delivery link":
Mobile App → MQTT Server → ESP32 Development Board → LED / Relay / Sensor
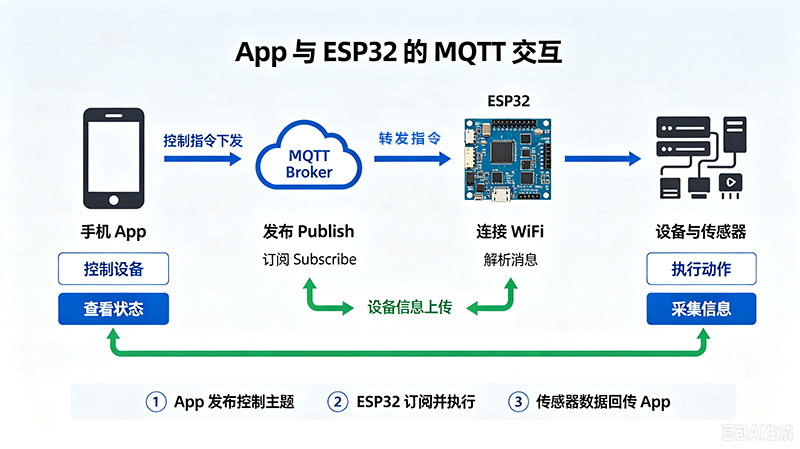
The MQTT server is a free test server provided by Qiguopai, deployed on the Internet. Both the app and the esp32 board connect to this server through WiFi.
You can understand it as a "message transfer station":
-
The App and the Esp32 agree on an identification number;
-
The App sends the identification number + message to the MQTT server;
-
The server then forwards the message to the Esp32 board with this identification number;
2. Experiment Equipment:
|
|
|
|---|---|---|
| ESP32*1 | Breadboard*1 | PIR Motion Sensor*1 |
|
|
|
| LED Bulb*1 | 220Ω or 1K Resistor | |
|
|
|
| Smartphone/Tablet (self-provided)*1 | Dupont Wires several | Jumper Wires several |
3. Experiment Wiring Diagram:
| PIR Motion Sensor | ESP32 Board |
|---|---|
| + | 3.3V |
| - | GND |
| OUT | IO35 |
| LED Bulb | ESP32 Board |
|---|---|
| Negative | GND |
| Positive | IO23 |
3. Experiment Code:
Open the code in the project materials package, then install the IoT protocol library PubSubClient. The code analysis can be seen in the video explanation.
If you want to learn app development, you can download the following source code. If you learn microcontroller development, you only need to download the installation package.
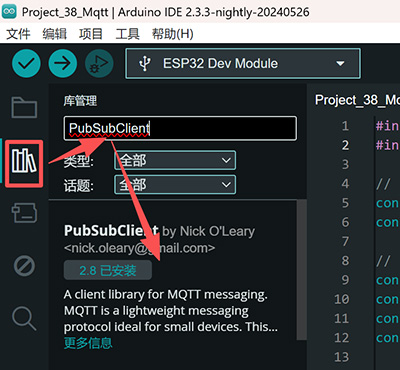
#include <WiFi.h>
#include <PubSubClient.h>

// ==================== 1. WiFi configuration (to be modified later) ====================
const char* WIFI_SSID     = "Niangao";
const char* WIFI_PASSWORD = "12345ssdlh";

// ==================== 2. MQTT configuration (to be modified later) ====================
const char* MQTT_SERVER   = "121.40.244.99";  // MQTT server address
const uint16_t MQTT_PORT  = 1883;             // MQTT port
const char* MQTT_USER     = "test_esp";               // Username, leave empty if none
const char* MQTT_PASSWORD = "12345678";               // Password, leave empty if none

// ==================== Hardware pins ====================
const int PIN_LED_BOARD = 2;   // On-board LED (warning switch indicator)
const int PIN_LED_ALARM = 23;   // External LED lit when a human body is detected
const int PIN_PIR       = 35;   // PIR motion sensor output pin

const unsigned long ALARM_HOLD_MS = 5000;  // Warning light duration (milliseconds)

// ==================== Topics and state ====================
String subTopic;               // Subscription topic (MAC last 4 digits appended)
String pubTopic;               // Publish topic (MAC last 4 digits appended)
bool   alertEnabled = false;   // Warning switch state
bool   alarmActive  = false;   // Whether currently in the warning hold period
unsigned long alarmEndTime = 0; // End time of the warning hold (millis)

WiFiClient   espClient;
PubSubClient mqttClient(espClient);

String getMacSuffix() {
  String mac = WiFi.macAddress();      // "AA:BB:CC:DD:EE:FF"
  mac.replace(":", "");
  mac.toLowerCase();
  return mac.substring(mac.length() - 4);
}

void connectWiFi() {
  Serial.print("连接 WiFi: ");
  Serial.println(WIFI_SSID);
  WiFi.begin(WIFI_SSID, WIFI_PASSWORD);
  while (WiFi.status() != WL_CONNECTED) {
    delay(500);
    Serial.print(".");
  }
  Serial.println();
  Serial.print("WiFi 已连接,IP: ");
  Serial.println(WiFi.localIP());
}

void mqttCallback(char* topic, byte* payload, unsigned int length) {
  String msg;
  for (unsigned int i = 0; i < length; i++) {
    msg += (char)payload[i];
  }
  msg.trim();
  msg.toLowerCase();

  Serial.print("收到订阅消息 [");
  Serial.print(topic);
  Serial.print("]: ");
  Serial.println(msg);

  if (msg == "on" || msg == "1") {
    alertEnabled = true;
    digitalWrite(PIN_LED_BOARD, HIGH);
    Serial.println("预警已开启");
  } else if (msg == "off" || msg == "0") {
    alertEnabled = false;
    alarmActive = false;
    digitalWrite(PIN_LED_BOARD, LOW);
    digitalWrite(PIN_LED_ALARM, LOW);
    Serial.println("预警已关闭");
  }
}

void connectMQTT() {
  while (!mqttClient.connected()) {
    Serial.print("连接 MQTT...");
    String clientId = "ESP32-" + getMacSuffix();
    if (mqttClient.connect(clientId.c_str(), MQTT_USER, MQTT_PASSWORD)) {
      Serial.println("已连接");
      mqttClient.subscribe(subTopic.c_str());
      Serial.print("已订阅主题: ");
      Serial.println(subTopic);
    } else {
      Serial.print("失败, rc=");
      Serial.print(mqttClient.state());
      Serial.println(",2 秒后重试");
      delay(2000);
    }
  }
}

void setup()
{
  Serial.begin(115200);
  delay(300);

  pinMode(PIN_LED_BOARD, OUTPUT);
  pinMode(PIN_LED_ALARM, OUTPUT);
  pinMode(PIN_PIR, INPUT);
  digitalWrite(PIN_LED_BOARD, LOW);
  digitalWrite(PIN_LED_ALARM, LOW);

  WiFi.mode(WIFI_STA);
  delay(100);
  String macSuffix = getMacSuffix();

  Serial.print("ESP32 MAC 地址: ");
  Serial.println(WiFi.macAddress());
  Serial.print("MAC 后 4 位: ");
  Serial.println(macSuffix);

  subTopic = "esp32/alert/set/" + macSuffix;
  pubTopic = "esp32/alert/detect/" + macSuffix;

  Serial.print("订阅主题: ");
  Serial.println(subTopic);
  Serial.print("发布主题: ");
  Serial.println(pubTopic);

  connectWiFi();

  mqttClient.setServer(MQTT_SERVER, MQTT_PORT);
  mqttClient.setCallback(mqttCallback);
  connectMQTT();
}

void loop()
{
  if (WiFi.status() != WL_CONNECTED) {
    connectWiFi();
  }
  if (!mqttClient.connected()) {
    connectMQTT();
  }
  mqttClient.loop();

  unsigned long now = millis();

  if (alertEnabled && !alarmActive && digitalRead(PIN_PIR) == HIGH) {
    alarmActive = true;
    alarmEndTime = now + ALARM_HOLD_MS;
    digitalWrite(PIN_LED_ALARM, HIGH);
    mqttClient.publish(pubTopic.c_str(), "motion detected");
    Serial.println("检测到人体,预警灯点亮 5 秒,已发布预警消息");
  }

  if (alarmActive && now >= alarmEndTime) {
    alarmActive = false;
    digitalWrite(PIN_LED_ALARM, LOW);
    Serial.println("预警保持结束,预警灯已熄灭");
  }

  delay(50);
}
When someone enters the detection range of the PIR motion sensor, the LED will light up, and the data will be sent to the mobile APP.
For the complete demonstration, refer to the video tutorial.
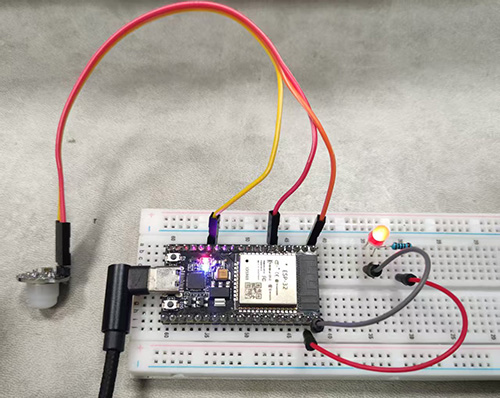
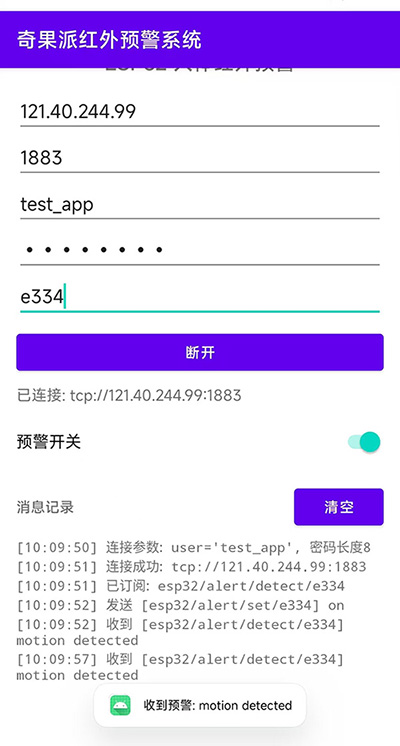
5. Extended Thinking:
-
Can more sensors be connected? For example, a gas sensor can detect in real time whether there is a gas leak in the kitchen;
-
Connect an external 6V power adapter to solve the long-term power supply problem;
-
3D print a storage box, so that it has a beautiful appearance and looks more like a commercialized product.
Project 40 XiaoZhi Voice AI
This project is not a standard product. Therefore, if the kit you purchased does not have a special note, it does not contain the voice accessories.
1. Experiment Introduction:
This project is based on the ESP32 development board and breadboard, building a local AI voice conversation assistant—XiaoZhi. By connecting peripherals such as a microphone, speaker, OLED display, and so on, and leveraging the Wi-Fi networking capability of the Espressif ESP32, you can have voice conversations with XiaoZhi and experience the charm of on-device AI interaction.
The entire production process requires no soldering. All components are connected through the breadboard and jumper wires, which is very suitable for hardware enthusiasts with zero foundation to get started.
2. Experiment Equipment:
|
|
|
|---|---|---|
| ESP32*1 | Breadboard*1 | 130 DC Motor Module*1 |
|
|
|
| 220Ω Resistor*1 | LED*1 | Jumper Wires several |
|
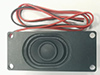 |
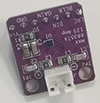 |
| USB Cable*1 | 3W Speaker*1 | Audio Amplifier Module*1 |
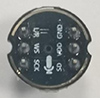 |
|
|
| Omnidirectional Microphone Module*1 | OLED Screen*1 |
3. Wiring Description:
| Microphone Pin | ESP32 Board |
|---|---|
| WS | G25 |
| SCK | G26 |
| SD (DIN) | G32 |
| L/R | GND |
| VDD | VCC 3.3V |
| GND | GND |
| Speaker | ESP32 Board |
|---|---|
| DIN | G33 |
| BCLK | G14 |
| LRCK | G27 |
| GAIN | Not connected |
| SE | Not connected |
| Vin | VCC 3.3V |
| GND | GND |
| OLED Pin | ESP32 Board |
|---|---|
| GND | GND |
| VCC | VCC 3.3V |
| SCL | G15 |
| SDA | G4 |
| Button | ESP32 Board |
|---|---|
| Conversation mode button | G5 (single-click to wake up / interrupt the chat) |
| Bulb | ESP32 Board |
|---|---|
| G18 | LED positive (long leg) |
| LED negative (short leg) | 220Ω Resistor |
| 220Ω Resistor | GND |
Conversation mode button: G5 single-click to wake up, or interrupt the chat
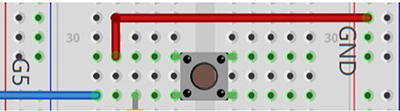
Light switch test pin: G18---+LED----220Ω---GND
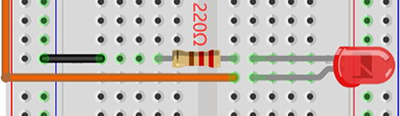
Finished product
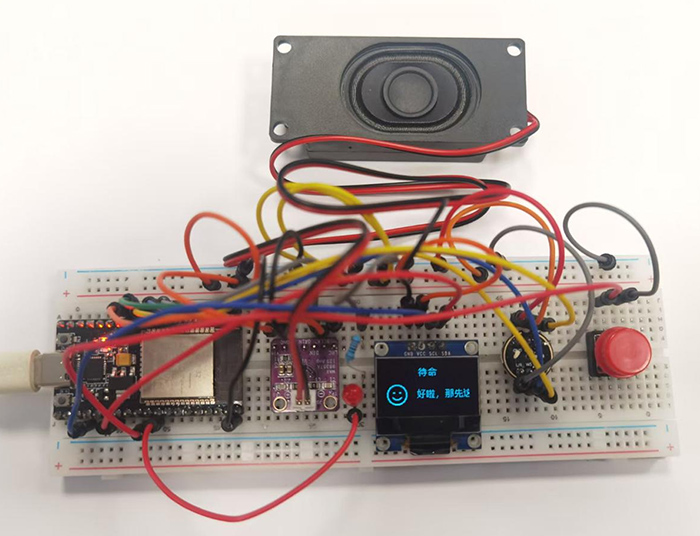
4. Flash the Firmware:
Flash download tool:
Operation steps:
Open the official firmware flashing software flash_download_tool_X.X.X, select our device name. Here we select Develop, and select OK.
Select the firmware we need, address 0x0.
The default firmware file name is: ai_voice_display_oled_esp32.bin, Click to download the firmware.
We can click ERASE to erase the previous firmware.
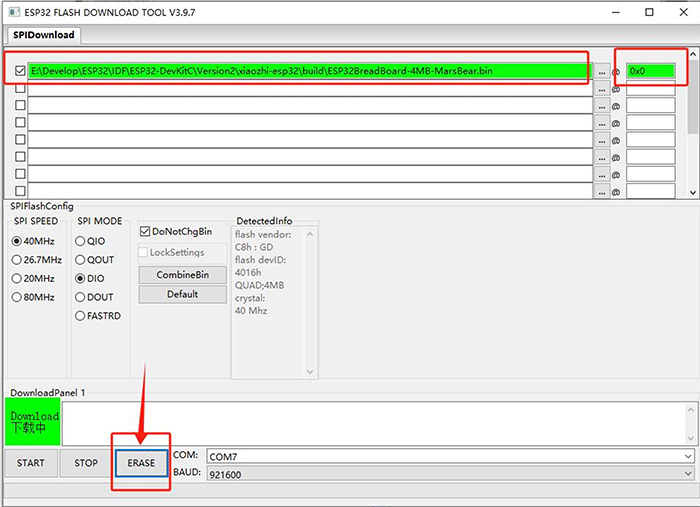
We click START to begin uploading the firmware.
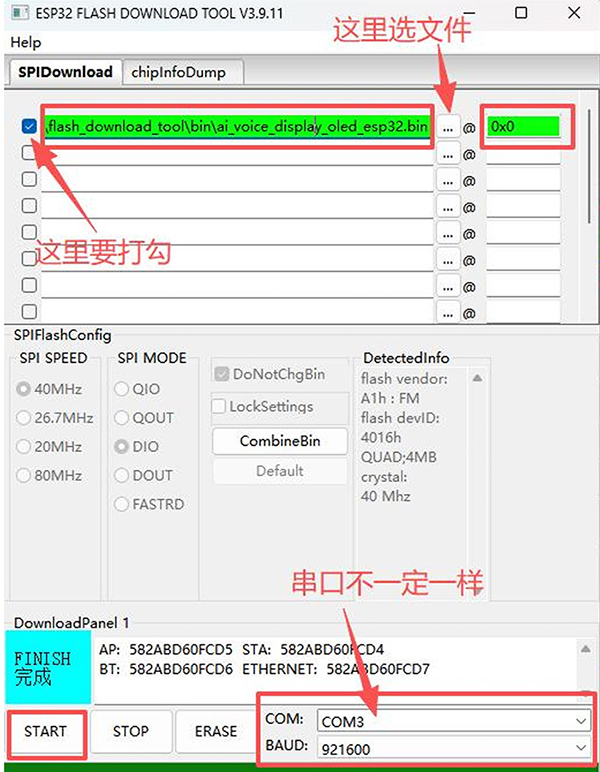
5. Network Configuration:
The default firmware supports one-key network configuration, supporting WeChat network configuration and APP network configuration. WeChat network configuration is recommended.
When the device is powered on for the first time and the network is not configured, it will automatically enter the network configuration mode and wait for network configuration.
If the device has saved the Wi-Fi account and password (stored in the NVS partition), the next startup will directly connect to the network and will not automatically enter the network configuration mode. If you need to reconfigure the network, please follow the steps below:
-
After the device is powered on, after hearing the first prompt sound and before the device successfully connects to the network, immediately press the wake-up button.
-
The device will enter the network configuration mode again.
Supplementary explanation
-
Wake-up button definition: the external button.
-
Precautions: After successful reconfiguration, the previously connected Wi-Fi information of the device will be deleted.
ESPTouch APP Network Configuration
ESPTouch is a one-key network configuration tool developed by Espressif Systems for smart devices (such as ESP32/ESP8266). The download links are as follows. Please download and install them yourself.
Preparation before network configuration
Before starting network configuration, please ensure the following conditions are met:
-
The mobile phone is connected to 2.4GHz Wi-Fi: ensure that your smartphone is connected to the 2.4GHz band Wi-Fi network to be configured (ESP32/ESP32-S3 devices do not support the 5GHz band).
-
Turn on the mobile phone location service: For Android phones, it is usually necessary to turn on GPS or location service so that the App can obtain the currently connected Wi-Fi SSID information (this is a limitation of many operating systems for security reasons).
-
The device enters the network configuration mode, refer to the device network configuration mode description.
WeChat Mini Program Network Configuration
Before starting network configuration, please ensure the following conditions are met:
-
The mobile phone is connected to 2.4GHz Wi-Fi: ensure that your smartphone is connected to the 2.4GHz band Wi-Fi network to be configured (ESP32/ESP32-S3 devices do not support the 5GHz band).
-
Turn on the mobile phone location service: For Android phones, it is usually necessary to turn on GPS or location service so that the App can obtain the currently connected Wi-Fi SSID information (this is a limitation of many operating systems for security reasons).
-
The device enters the network configuration mode, refer to the device network configuration mode description.
Search for and follow the service account "乐鑫信息科技" (Espressif) on WeChat, as shown in the figure below:
Enter the Espressif service account, and click "产品资源" (Product Resources) → "Airkiss设备" (Airkiss Device) in turn to enter the network configuration page, as shown in the figure below.
Enter the Wi-Fi information.
The mini program will automatically recognize the SSID of the 2.4GHz Wi-Fi currently connected to the mobile phone. Please check it carefully.
In the password input box, accurately enter the password of the Wi-Fi network. Please be sure to check carefully, as a wrong password is the most common cause of network configuration failure.
Start network configuration: click the "确认" (Confirm) or "连接" (Connect) button.
Wait for the network configuration result:
- Keep the mobile phone screen on, and the mini program running in the foreground.
- The network configuration process usually takes dozens of seconds. After success, the mini program interface will display a success prompt.
If the App does not respond for a long time or shows a network configuration failure, please first return to the main page of the App and restart the network configuration process.
-
Carefully check again whether the Wi-Fi password is correct
-
Try restarting the ESP32 device and making it enter the network configuration mode again
6. XiaoZhi Connects to the Agent
Open the webpage https://xiaozhi.me
Register your own account
During the XiaoZhi AI network configuration stage, a device verification code will be provided. Just enter the 6-digit device verification code.
After the device is connected successfully, press the button on the breadboard, and you can chat.
For more configuration functions of XiaoZhi, you can check the official documentation of XiaoZhi yourself.
If you need the source code, click to jump to Baidu Cloud Disk to download