MotorShield Motor Driver – Arduino
This is a perfect solution for developing motion robots based on Arduino. This motor driver is powerful enough to drive 4 DC motors or 2 stepper motors, and additionally provides 8 full-speed PWM controls for 8 servos. It supports PS2 wireless controllers, fully utilizing the powerful features of the PS2 controller.
Arduino MotorShiled Graphical Programming
For Mixly-based graphical programming, please visit the link above
Library Download: Arduino Motor Shield Library V5.5 (Legacy)
Library Download: Arduino Motor Shield Library V5.6 (Latest)
1. Overview
This is a perfect solution for developing motion robots based on Arduino. This motor driver is powerful enough to drive 4 DC motors or 2 stepper motors, and additionally provides 8 full-speed PWM controls for 8 servos. It supports PS2 wireless controllers, fully utilizing the powerful features of the PS2 controller.
It minimizes the use of Arduino pins by using a dedicated PWM driver chip (PCA9685) based on I2C communication to control motor speed and direction. Only 2 IO pins (SDA&SCL) are needed to drive multiple motors, and multiple drivers can be stacked (cascadable) without interfering with other I2C devices.
Supports ultrasonic sensors, making it easy to interface with smart cars or other motor control applications.
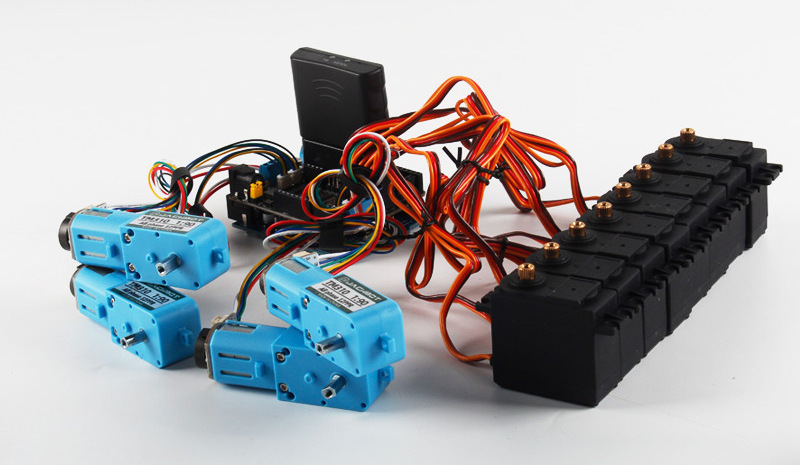
V5.5 Motor Driver
2. Interfaces and Wiring
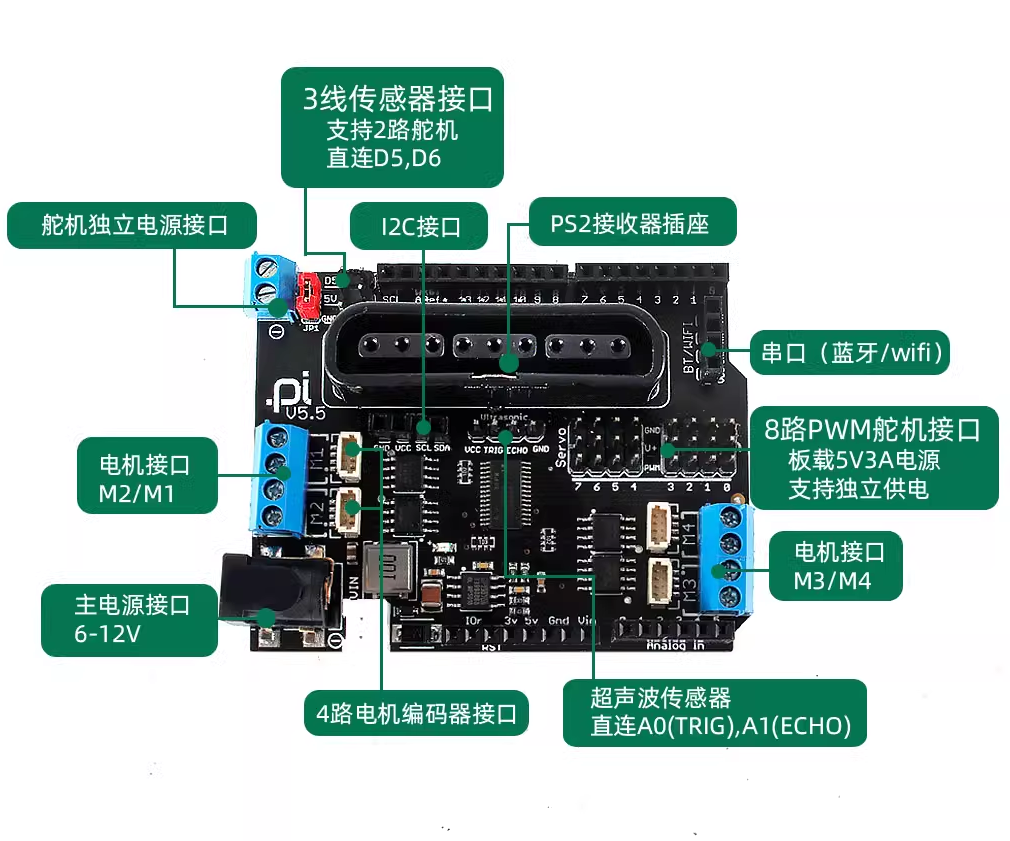
Standard V5.5 Interface Diagram
Specifications:
- High-performance driver chip providing 2.2A (3.6A peak) output per channel, supporting 4.5-13.5V DC motors;
- Can drive 4 DC motors or 2 stepper motors;
- Additional 8 PWM outputs for controlling 8 servos;
- Supports PS2 wireless controller;
- Supports Bluetooth module and ultrasonic sensor;
- Customizable I2C address, supporting multiple driver stacking;
- Complete code library and rich example programs, supporting graphical programming, easy to use.
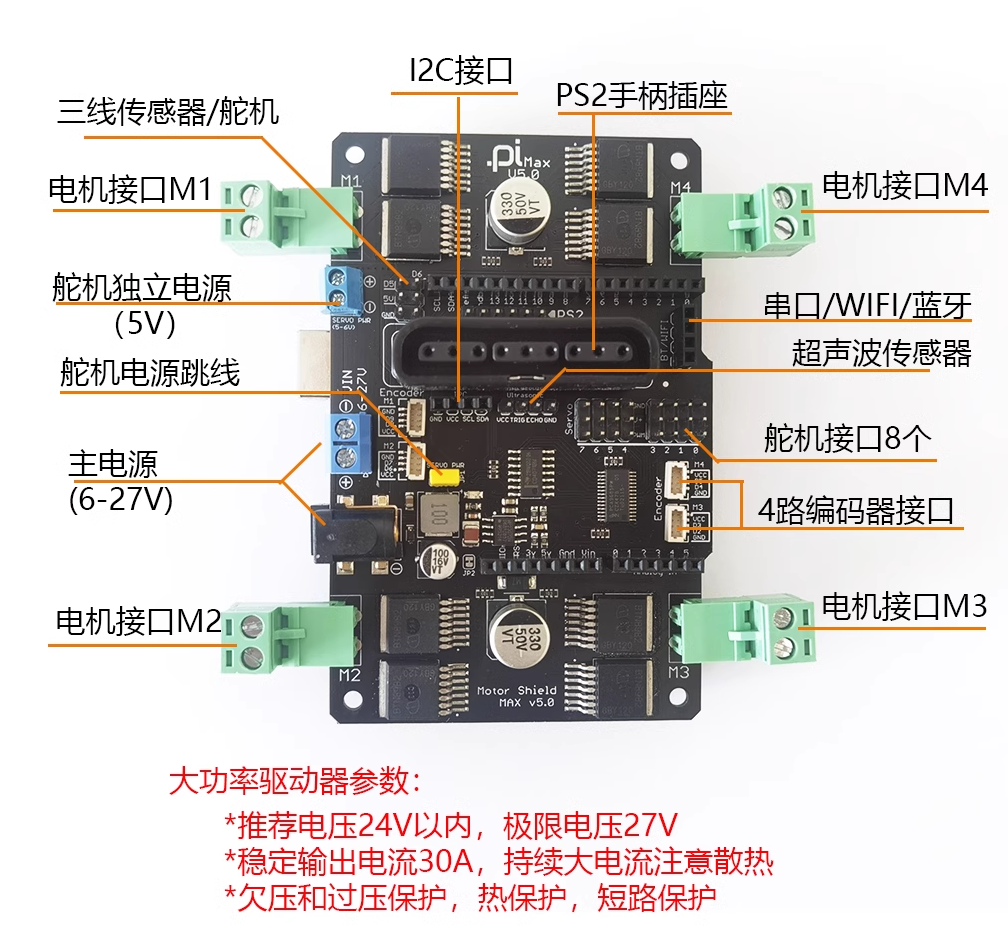
High-Power Motor Driver Version Max V5.0
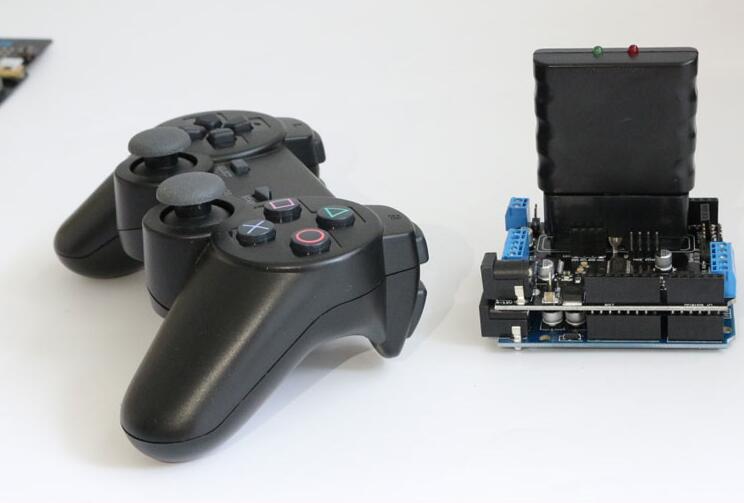
PS2 Wireless Controller Connection
The driver has a built-in PS2 receiver socket. Simply insert the receiver directly.
PS2 controller is not hot-swappable. In practical projects, reconnection detection needs to be programmed. If the device cannot be found, please restart the Arduino controller.
The controller will automatically sleep after a period of inactivity. Press start or analog to wake it up.
3. Power Supply
Power Supply Options
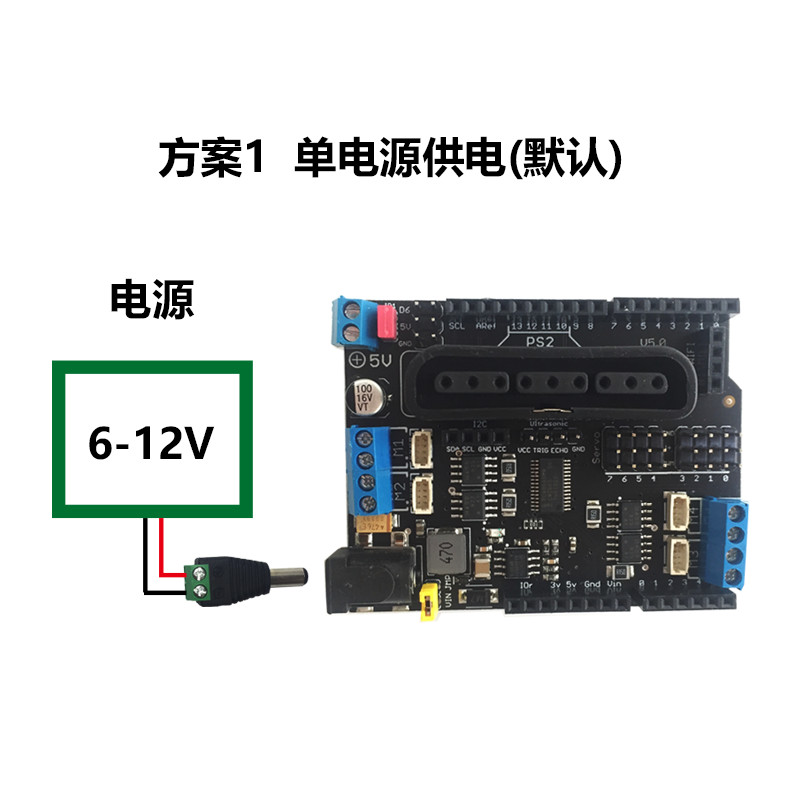
Single Power Supply Features:
- Single power supply can power both the driver and development board simultaneously
- Built-in 5V voltage regulator on board, providing 5V3A power for servo ports
- Power output (discharge current) must be large enough, otherwise it will affect stability
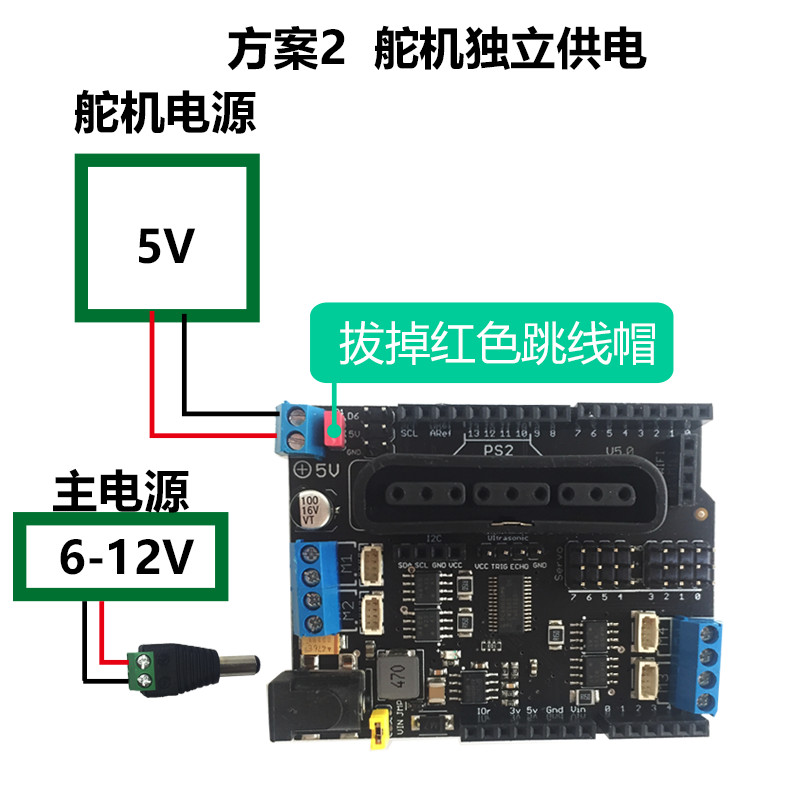
Independent Servo Power Supply
When multiple servos or high-power servos need to be connected, please choose this power supply option
- First remove the jumper cap at the top left corner to disconnect the on-board power supply
- Connect a power supply matching the servo voltage. Note the matching parameters. Most servos have a voltage rating of 5-6V. Too high voltage will burn out the servo
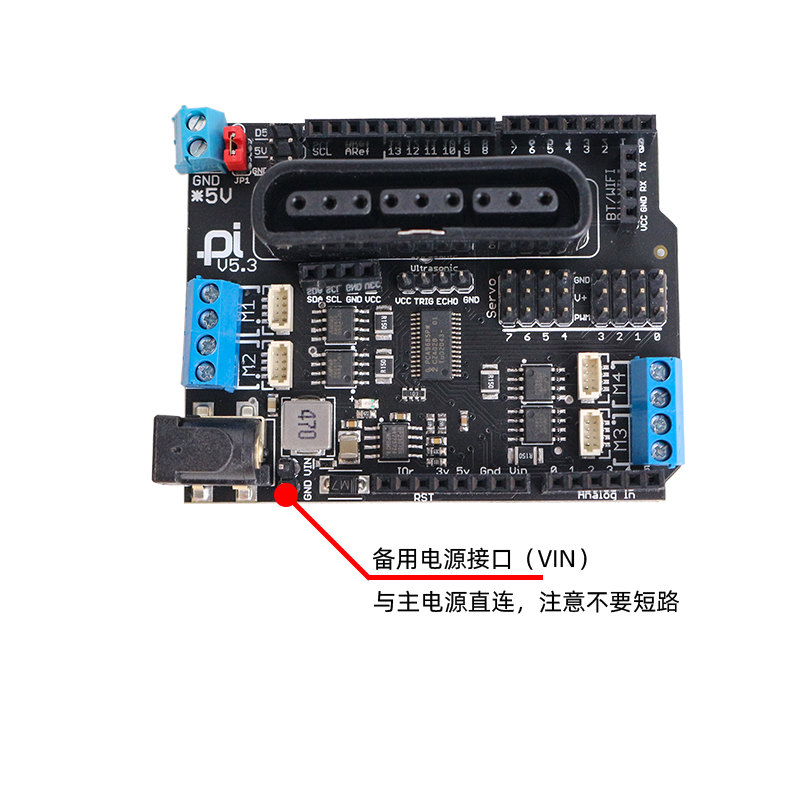
Backup Power Interface
V5.3 version changed the original yellow jumper to a backup power interface. This interface is directly connected to the DC power interface. It can be used for power extraction or power expansion with different interfaces.
Do not insert jumpers or short circuit!
Power Selection
The main power supply voltage for the motor driver is 6-12V, which needs to match the connected motor. Power selection is important; insufficient power supply will cause the system to work unstable. It is recommended to use power batteries. Power batteries have larger discharge current and stronger instantaneous output power.
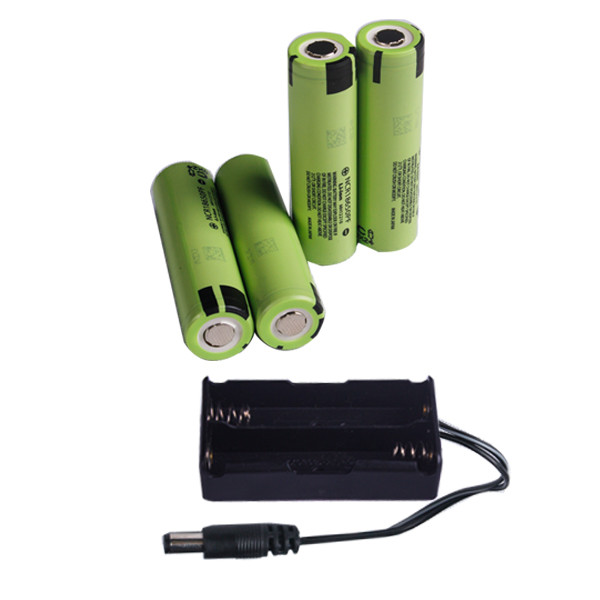
18650 Battery
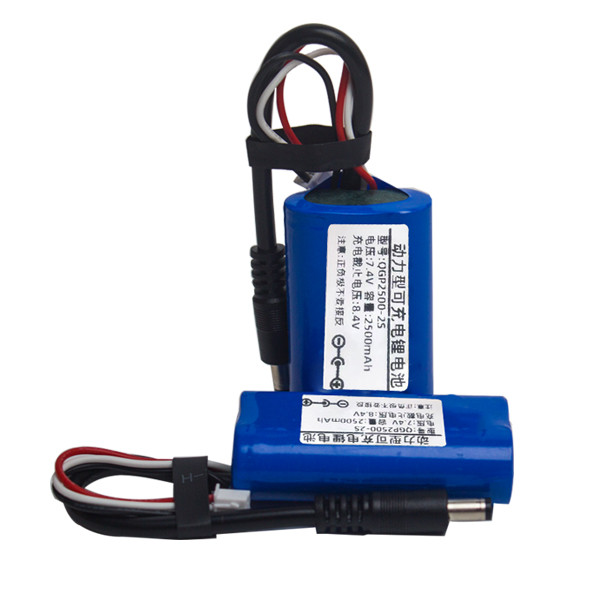
Power Battery Pack (2S)
4. Software Library Details
We provide Arduino libraries and related example code. It includes two sets of library files: PS2X_Lib and Motor_Shield_Library examples.
If the library is not found, please configure the relevant library files or copy them directly to the current project directory.
1. DC Motor Control
a) Connecting Motors
The driver has 4 sets of motor terminals: M1, M2, M3, and M4.
Note: Please check the motor parameters carefully. Oversized motors (too much power) will overload the driver and cause damage. (370 motors are tested and working)
b) DC Motor Example
#include <Wire.h>
#include "QGPMaker_MotorShield.h"

QGPMaker_MotorShield AFMS = QGPMaker_MotorShield();

QGPMaker_DCMotor *DCMotor_3 = AFMS.getMotor(3);

void setup(){
  AFMS.begin(50);
}

void loop(){
  DCMotor_3->setSpeed(200);
  DCMotor_3->run(FORWARD);
  delay(3000);
  DCMotor_3->setSpeed(0);
  DCMotor_3->run(RELEASE);
  delay(2000);
  DCMotor_3->setSpeed(200);
  DCMotor_3->run(BACKWARD);
  delay(3000);
  DCMotor_3->setSpeed(0);
  DCMotor_3->run(RELEASE);
  delay(2000);
}
Create a MotorShield object:
QGPMaker_MotorShield AFMS = QGPMaker_MotorShield();
Create a DCMotor object from MotorShield, corresponding to the motor on port M3:
QGPMaker_DCMotor *myMotor = AFMS.getMotor(3);
getMotor(port#)
port#: 1~4, corresponding to M1~M4 terminals
Add initialization code in the setup() function:
AFMS.begin();
Set motor speed:
myMotor->setSpeed(100);
setSpeed(speed)
speed: 0 (stopped) ~255 (full speed).
Speed is a relative value. The output controls the voltage level, where the maximum voltage equals the supply voltage. Higher supply voltage means faster speed at the same speed value.
Start motor (forward, reverse, stop):
myMotor->run(FORWARD);
run(direction)
direction: FORWARD, BACKWARD, BRAKE, or RELEASE.
*Note: Motor rotation direction depends on wiring. If the direction is incorrect, swap the motor's positive and negative terminals.
BRAKE vs RELEASE: V5.0 added the BRAKE option, which shorts the motor's positive and negative terminals for limited emergency stop. Use with caution for high-power motors as it may damage the driver chip. RELEASE disconnects the motor power for natural stop (with inertia).
2. Servo Control
The driver's servo control is implemented through the dedicated PWM chip PCA9685, with corresponding ports 0-7.
The driver has a built-in voltage regulator that can output 5V, 3A current to power servos. Avoid servo stalling or overloading to prevent affecting system stability or damaging the servo.
Note: For high-power servos (power requirements exceeding 5V3A), please remove the red jumper cap and use a power supply matching the servo through the "Servo Auxiliary Power" interface for independent power supply.
There are 2 sensor interfaces on the top right of the driver board, which can accept 3-wire sensors or servos. These interfaces correspond to Arduino D5, D6 pins.
Servo Code Example (requires library import)
#include <Wire.h>
#include "QGPMaker_MotorShield.h"

QGPMaker_MotorShield AFMS = QGPMaker_MotorShield();
QGPMaker_Servo *Servo3 = AFMS.getServo(3);

void setup(){
  AFMS.begin(50);
}

void loop(){
  Servo3->writeServo(10);
  delay(1000);
  Servo3->writeServo(120);
  delay(1000);

  int deg=Servo3->readDegrees();
}
3. Encoder Motor
This feature only supports Arduino UNO. Mega2560 and other boards do not support this encoder function.
#include <Wire.h>
#include "QGPMaker_MotorShield.h"
#include "QGPMaker_Encoder.h"

QGPMaker_MotorShield AFMS = QGPMaker_MotorShield();
QGPMaker_DCMotor *DCMotor_3 = AFMS.getMotor(3);
QGPMaker_Encoder Encoder3(3);

void setup(){
  AFMS.begin(50);
  Serial.begin(9600);

  DCMotor_3->setSpeed(200);
  DCMotor_3->run(FORWARD);
}

void loop(){
  Serial.println(Encoder3.read());
}
4. Stepper Motor
Not recommended. Please use a dedicated stepper motor driver.
#include <Arduino.h>
#include "QGPMaker_MotorShield.h"

QGPMaker_MotorShield JFMS = QGPMaker_MotorShield();

const int stepsPerRevolution = 200;

QGPMaker_StepperMotor *stepper1 = JFMS.getStepper(stepsPerRevolution, 1);
QGPMaker_StepperMotor *stepper2 = JFMS.getStepper(stepsPerRevolution, 2);

void setup() {
  Serial.begin(9600);
  JFMS.begin();
  stepper1->setSpeed(60);
  stepper2->setSpeed(6);
}

void loop() {
  stepper1->step(200, FORWARD,DOUBLE);
  stepper2->step(200, FORWARD, MICROSTEP);
  delay(1000);
  stepper1->step(200, BACKWARD,DOUBLE);
  stepper2->step(200, BACKWARD, MICROSTEP);
  delay(1000);
}
5. Wireless Controller Control
#include "PS2X_lib.h"

PS2X ps2x;
int error;

void setup() {
  do {
    error = ps2x.config_gamepad(13, 11, 10, 12, true, true);
    if (error == 0) { break; }
    else { delay(100); }
  } while (1);
}

void loop(){
  ps2x.read_gamepad(false, 0);

  if (ps2x.Button(PSB_PAD_UP)) {}
  if (ps2x.Analog(PSS_RY) > 240) {}
  delay(10);
}
6. Electronic Switch/Relay Control
#include <Wire.h>
#include "QGPMaker_MotorShield.h"

QGPMaker_MotorShield AFMS = QGPMaker_MotorShield();

void setup(){
  AFMS.begin(50);
}

void loop(){
  AFMS.setPin(2,HIGH);
  AFMS.setPWM(3,4000);
}
5. Schematic
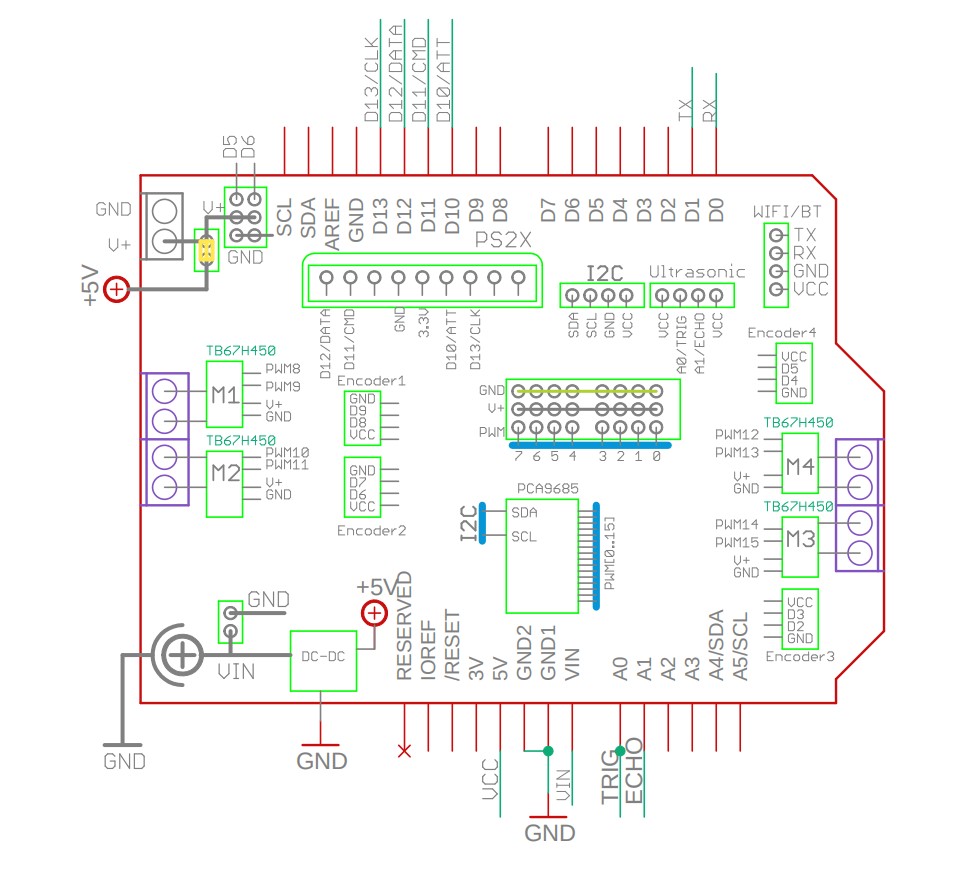
MotorShield V5.3 Schematic
Arduino UNO R3 Official Schematic: Download
6. Demo Projects and Example Code
Program Download: Arduino Motor Shield Library V5.2 Package
1. 4WD Car
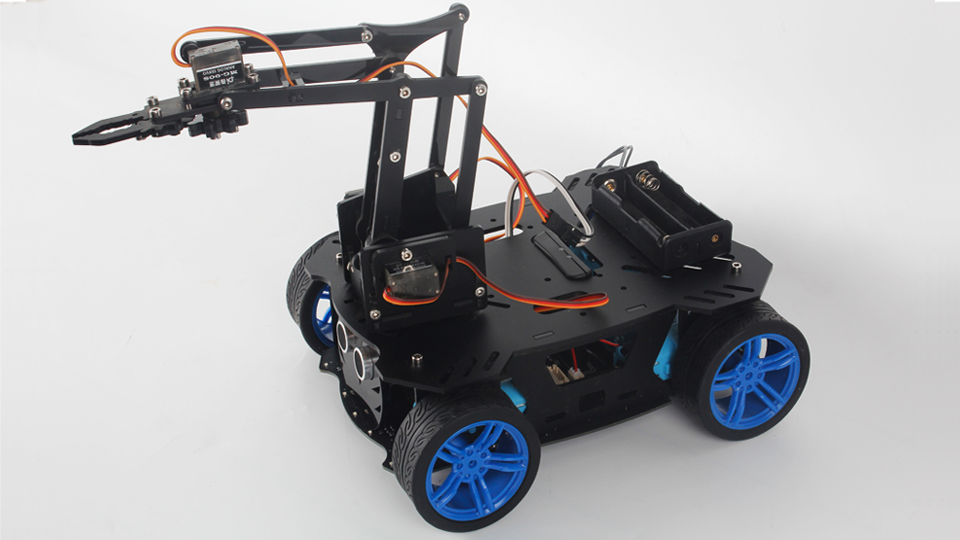
V2 4WD Robotic Arm Car
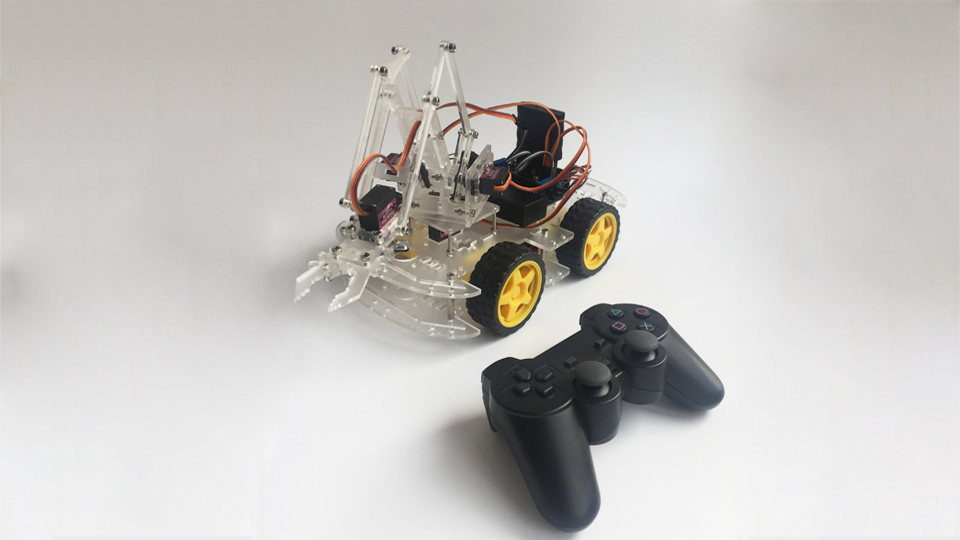
Classic 4WD Car
2. Mecanum Wheel Car
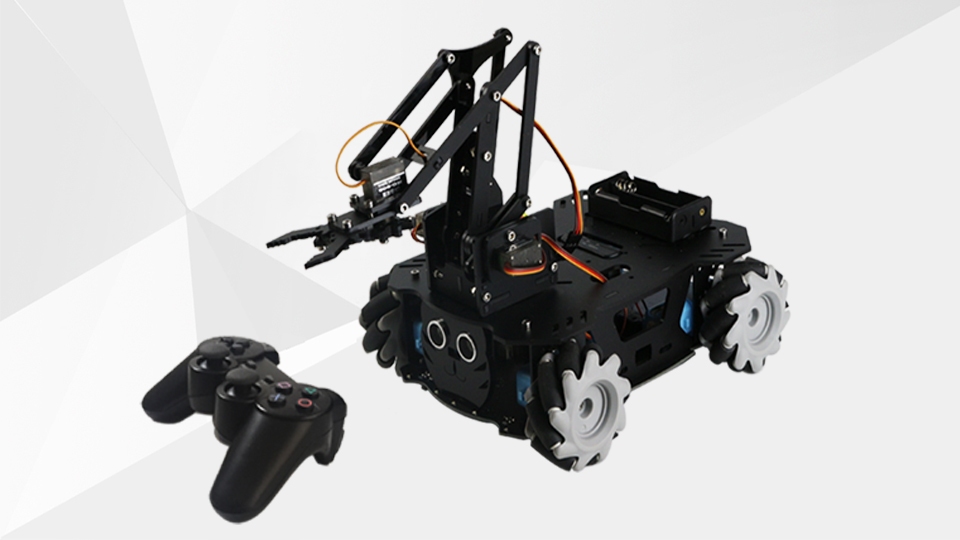
Mecanum Wheel V2 Robotic Car
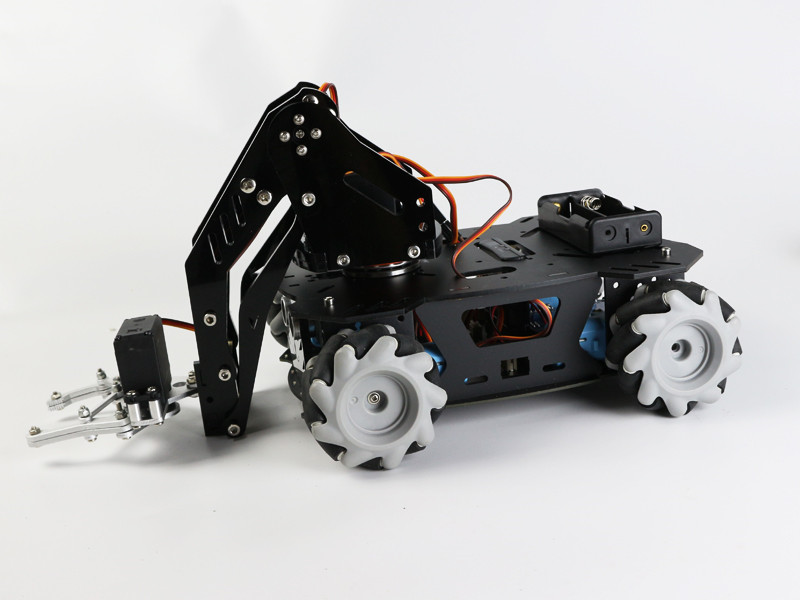
Mecanum Wheel Large Robotic Arm Transport Vehicle