Environment Setup
Download Software
Readers can download the Mixly development environment from the Mixly website https://mixly.cn
If you are using a Windows system, we recommend downloading our version with the plugins already installed --> Click to download Mixly
After downloading, just extract it and it is ready to use, no need to read the tutorial below.
If you are not using a Windows version, you can follow the tutorial below to download version 3.0 from the official website.
Click the link in the red box in the image below to enter the Baidu cloud disk main interface.
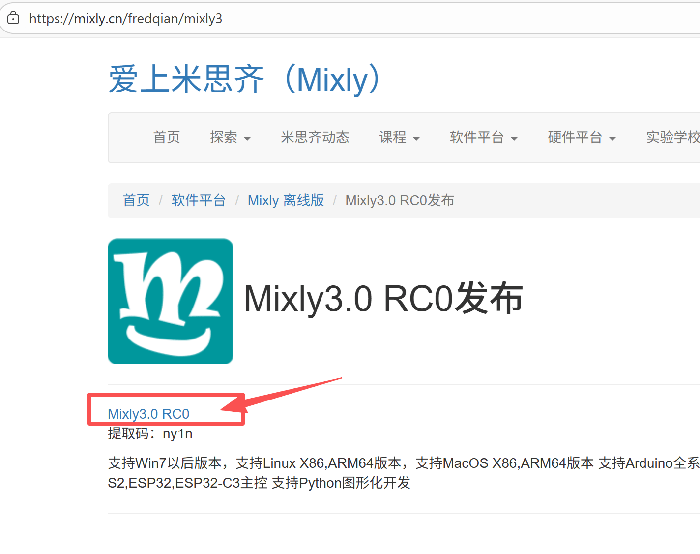
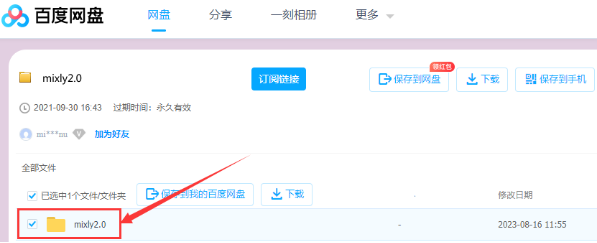
Mixly For Windows:

Mixly For Mac (select according to your system):

Install Software
- Windows version installation:
It is recommended to download the latest version. This case takes the complete version of mixly3.0-win32-x64-rc4 as an example. After downloading, rename it to mixly3.0, right-click and extract it to a local disk.
Special reminder:
(1) It is recommended to extract to the root directory of the hard disk; the path must not contain Chinese characters or special characters (such as: . _ ( ), etc.).
(2) The recommended installation path is like D:mixly3.0
Because Mixly is a green, installation-free software, the "Mixly3.0-win32-x64-rc4 complete version" can be used directly after extraction. If you download the "One-click Update version.7z" compressed package, after extracting the archive, you need to double-click "One-click Update.bat" and update Mixly according to the prompts.
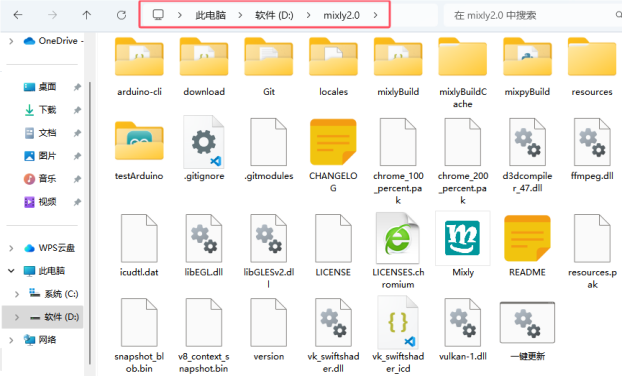
The contents of the complete Mixly folder are shown in the figure below:
Start the software:
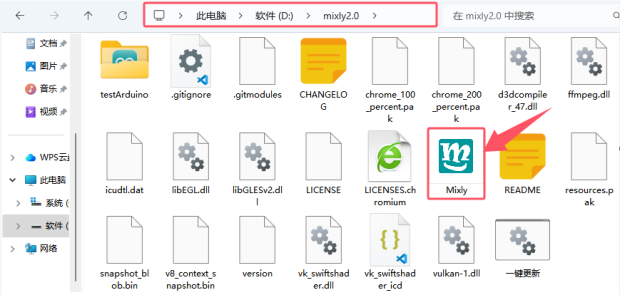
Here, double-click "Mixly.exe" to open the Mixly software, as shown in the figure below:
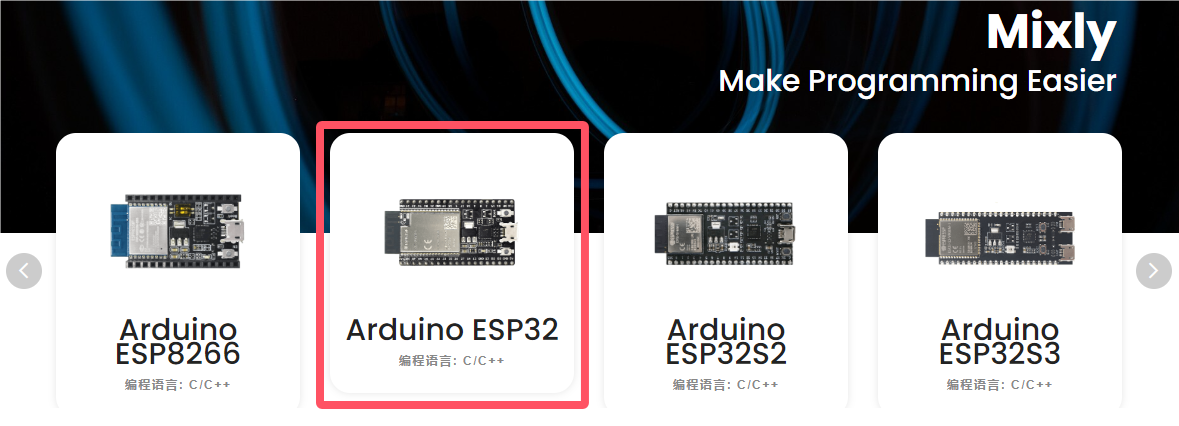
After opening the Mixly software, find and click " Arduino ESP32 " to enter the Mixly programming interface. The software interface is shown in the figure below:
- Mac version installation:
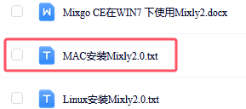
Here is the MAC installation instructions in the Mixly3.0.txt file.
Interface introduction:
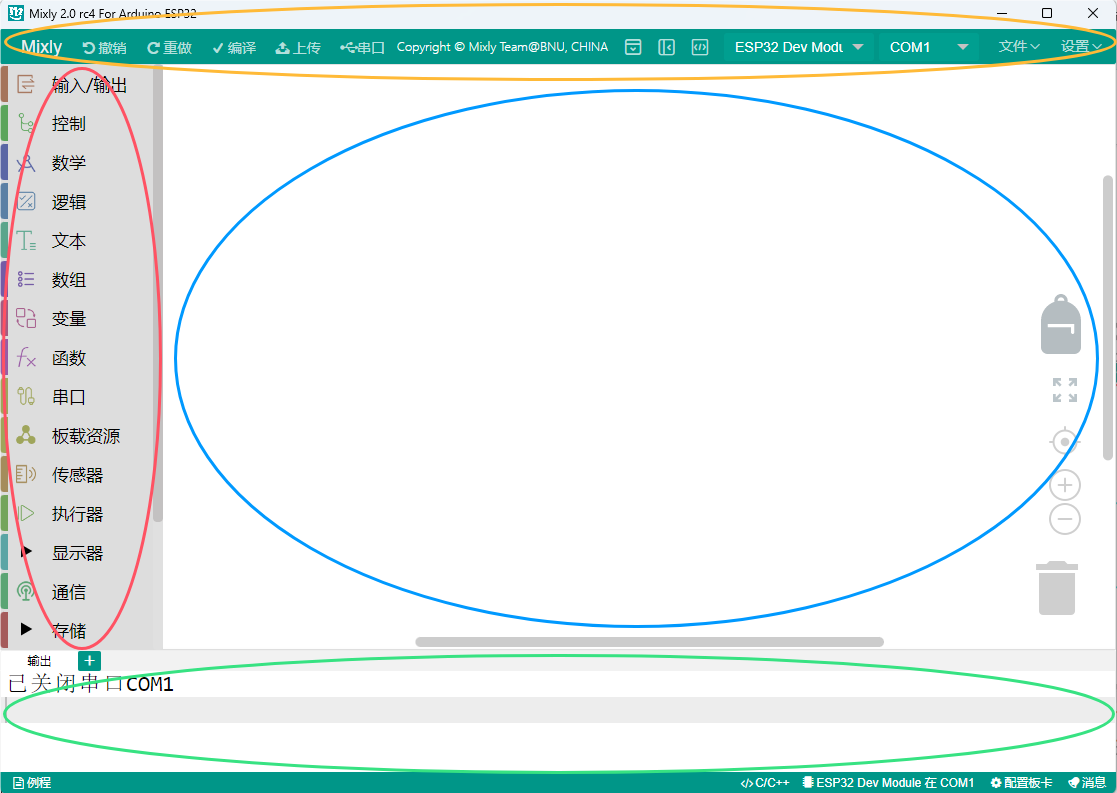
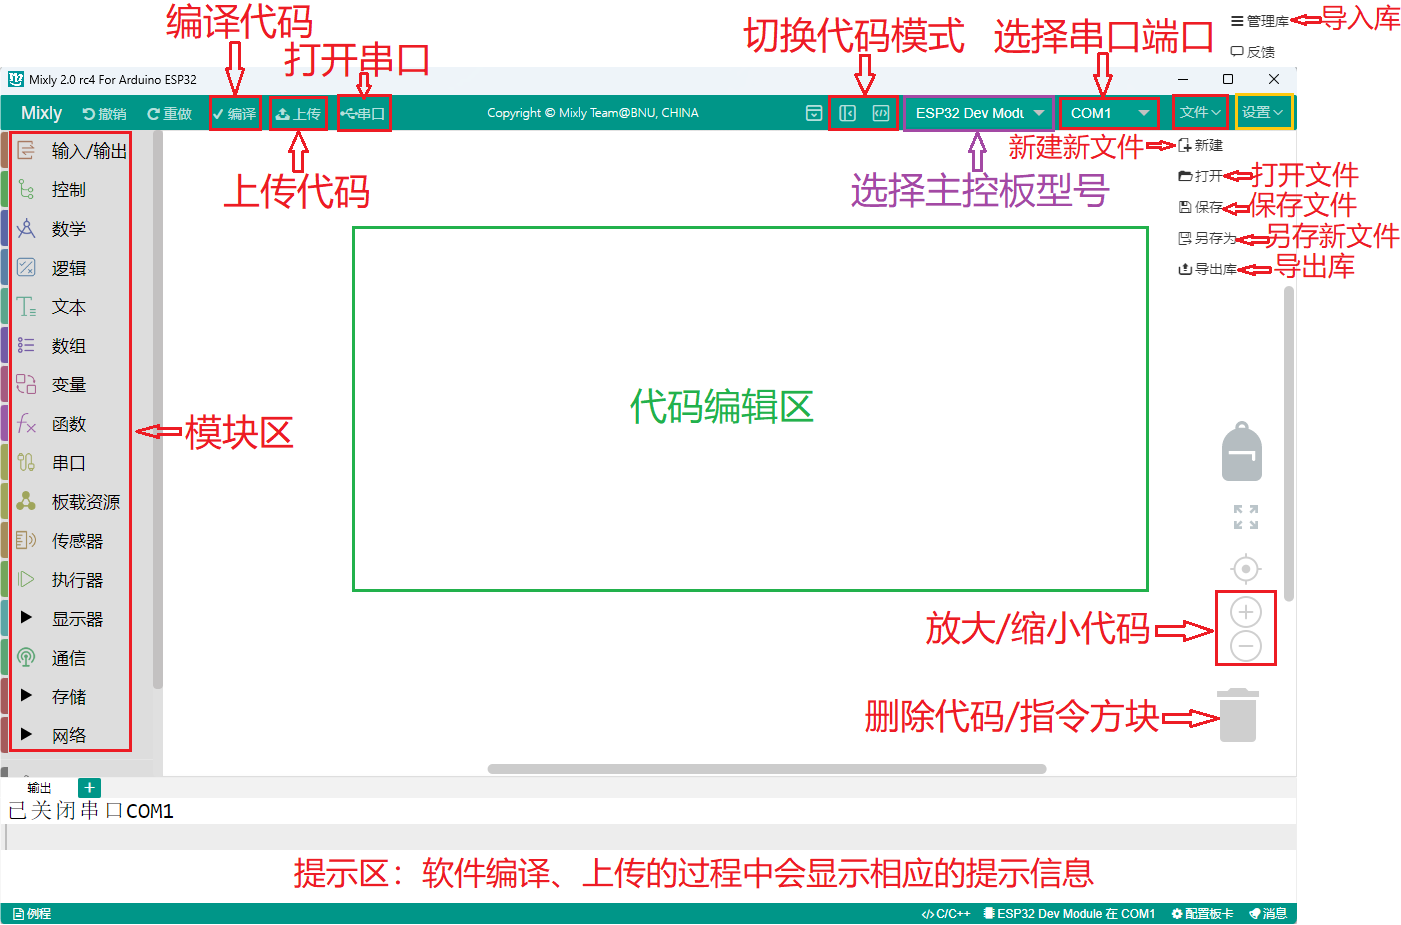
Overall, the Mixly software interface is divided into 4 parts.
-
The left side of the interface is the module area, which contains all the program modules that can be used in Mixly. According to different functions, they are roughly divided into the following categories: "Input/Output", "Control", "Math", "Logic", "Text", "Arrays", "Variables", "Functions", "Serial Port", "Sensors", "Actuators", "Display", "Communication", "Storage", "Network". Each type of module is represented by a different colored block, and the modules in each category are introduced in detail in Appendix A.
-
To the right of the module area is the program building area. Modules from the module area can be dragged to the program building area with the mouse, and the dragged modules will be combined here into a program block with a certain logical relationship. This area is somewhat similar to the place where code is written in a code program editing software. In the lower-right corner of this area there is a trash can. When we want to delete a module, we need to drag the module to the trash can. Above the trash can there are three circular buttons that can zoom in, zoom out, and center the program building area.
-
Above the module area and the program building area is the basic function area, similar to the menu area of ordinary software. It not only contains the buttons common to all software such as "New", "Open", "Save", "Save As", "Export Library" and "Manage Library", but also the buttons used in hardware programming software such as "Compile", "Upload", "Board Selection", "Serial Port", and "Serial".
-
The bottom of the interface is the prompt area, where corresponding prompt information is displayed during the process of software compilation and upload. We can use the prompt information to solve some problems that occur during compilation and upload.
Finally, two more points to add:
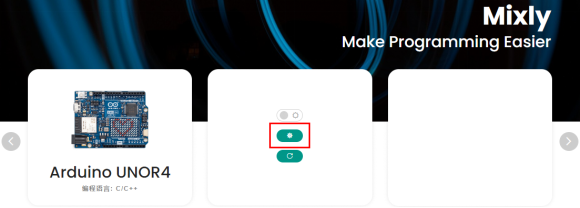
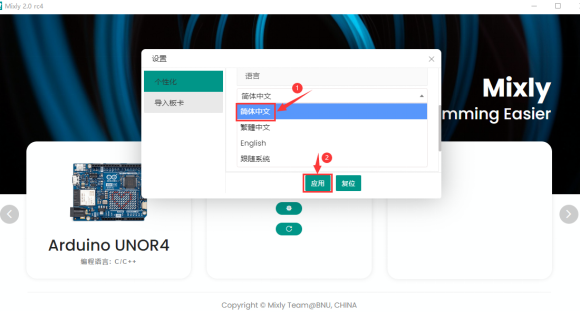
The first point is that Mixly supports multiple languages. We can find and click  through the following interface to enter the personalization settings page, find the Simplified Chinese drop-down menu under Language, and select a different language version. At this time, this drop-down menu shows Simplified Chinese, as shown in the figure below:
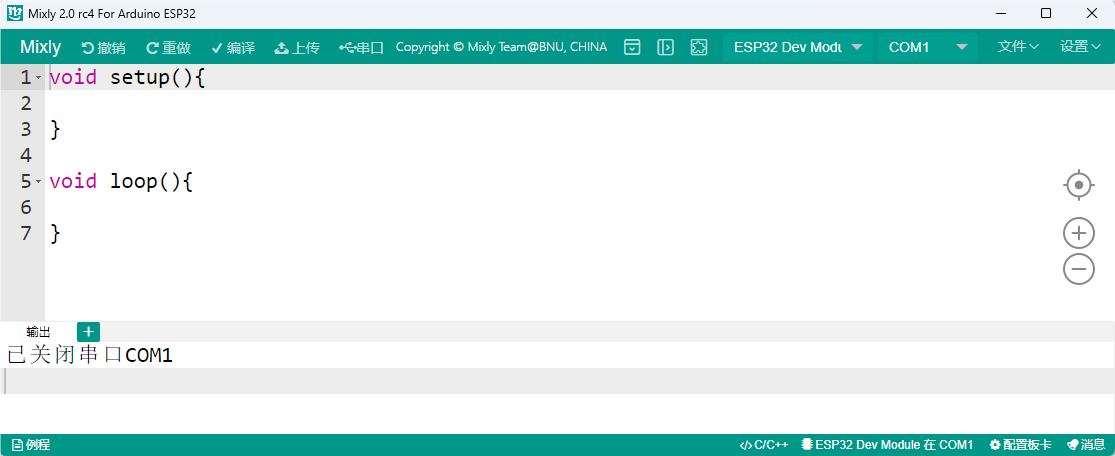
The second point is that there is a  button on the right side of the top of the interface. Clicking this button will enter pure code mode, as shown in the figure below:
Mixly is a development environment that integrates graphical programming and code programming. If it could only display code or graphical program blocks separately, that would certainly not be good enough. In Mixly, the code and graphical program blocks can be presented on the screen together. This function can be realized through a button on the right side of the top of the interface. After clicking this  button, it looks like the figure below:
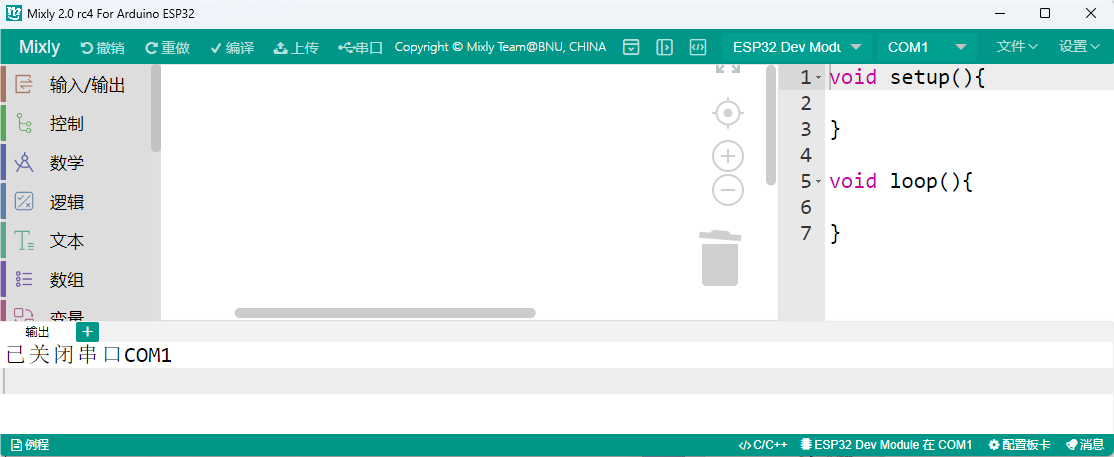
At this time, the corresponding code will be displayed on the right side of the program building area. This code corresponds to the program block composed of the modules in the program building area, and will change as the modules change. However, the code in this area is not editable. At the same time, the left-pointing arrow button on the far right of the interface changes to a right-pointing arrow.
Note: To learn more about Mixly, please click the link:https://mixly.readthedocs.io/zh-cn/latest/ .
ESP32 Main Control Board Driver Installation:
For the ESP32 main control board driver installation method, please refer to the previous "Arduino C Tutorial Windows System" section, which will not be repeated here. If the driver has already been installed, skip this step.
Add Library Files
If you downloaded Mixly from the Mixly official website, you need to install the library files.
Special reminder: The library files are provided at the Materials Download section above. Please download and install the library files.
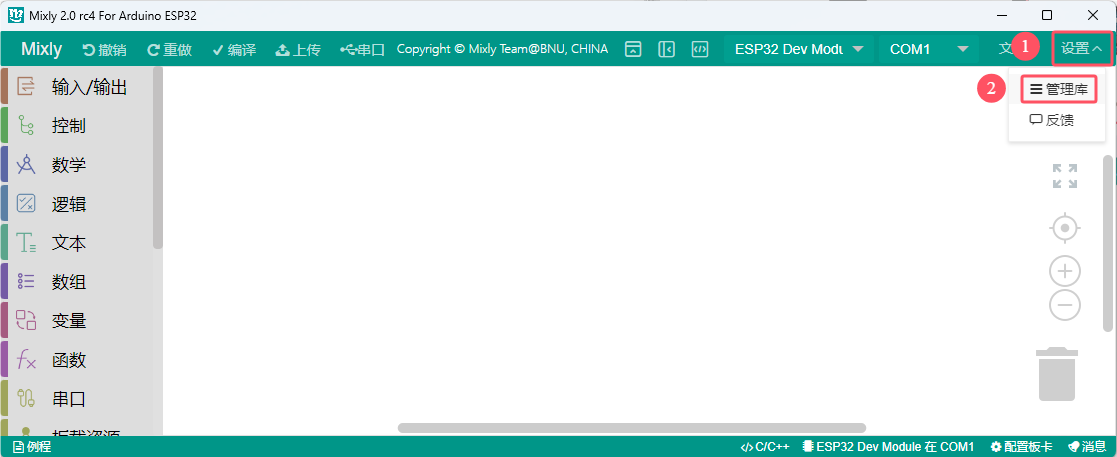
After the Mixly software is downloaded and installed, click Arduino ESP32 to enter the code editor. First click "Settings" in the upper-right corner, then click "Manage Library" to enter the library file adding interface, as shown in the figure below:
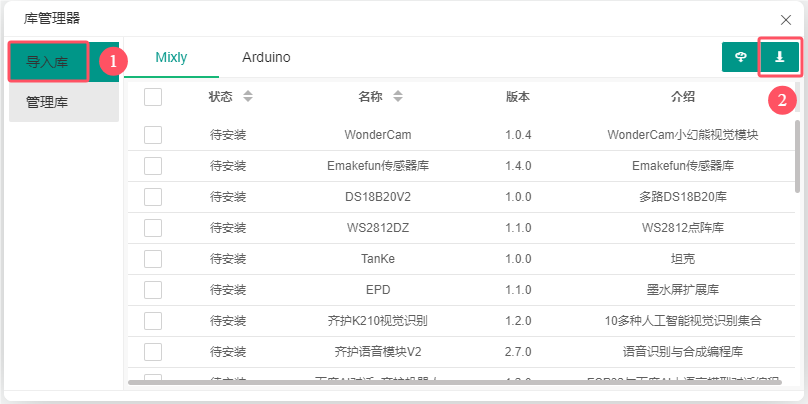
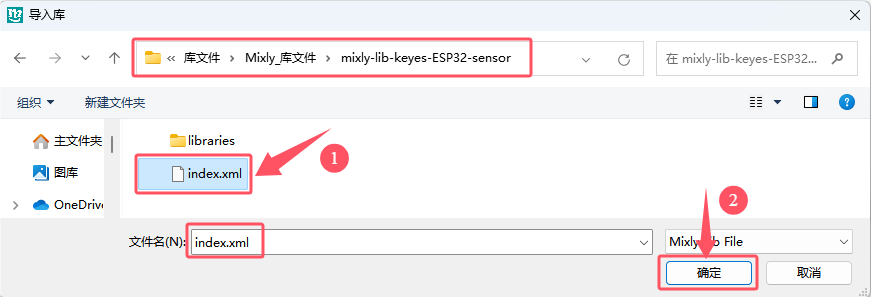
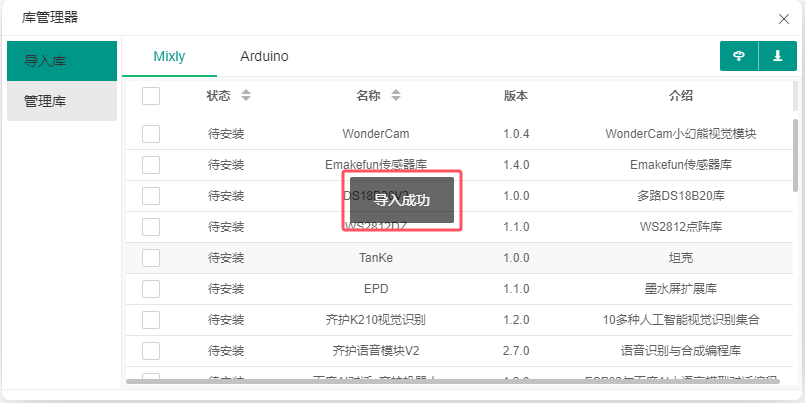
First click "Import Library", then click  to enter the location where the library file is stored, find and select the index.xml library file, and then click "OK". After that, you can see that the library file is being imported, and after a while the words "Import Successful" will appear, indicating that the library file has been imported successfully, as shown in the figure below:
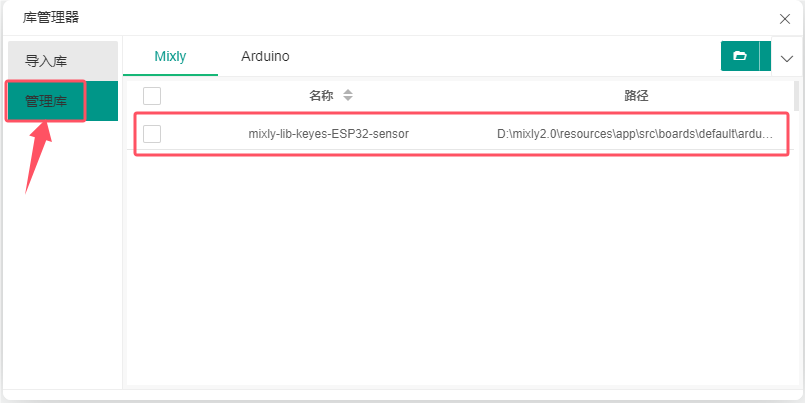
Click "Manage Library" and you can see the successfully added library file, as shown in the figure below:
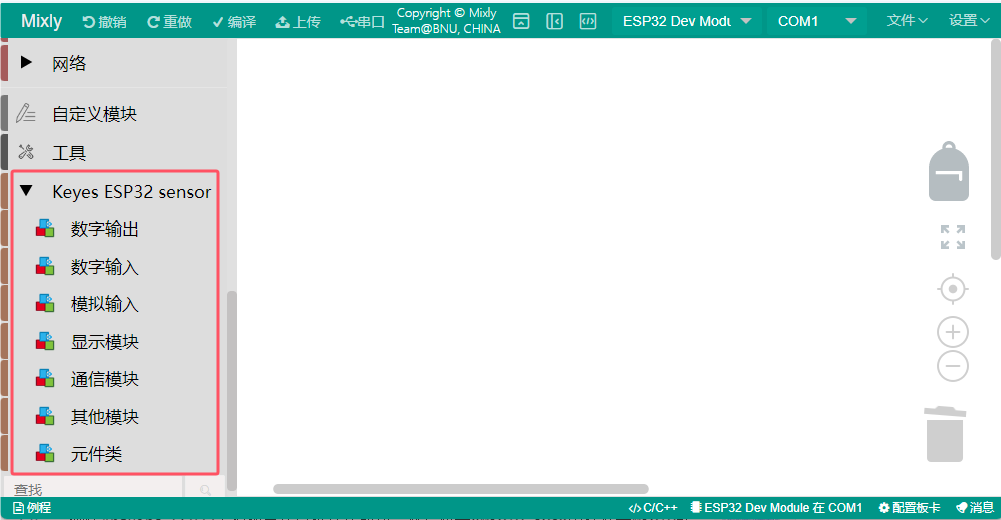
Close the window interface for adding library files, and you can see the added library file on the left side of the code editor, as shown in the figure below:
Write Code and Upload to the ESP32 Main Control Board: (The steps for uploading project code later are the same, i.e., same as below.)
Make sure the ESP32 main control board is successfully connected to the computer, then double-click the " Mixly.exe " icon to open the Mixly software.
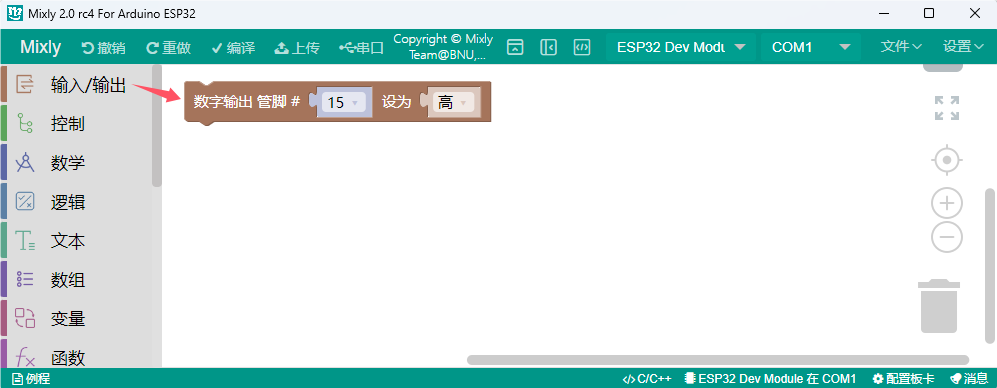
Method ①: Write code by dragging code blocks directly to the program building area. Use pin IO15, as shown in the figure below:
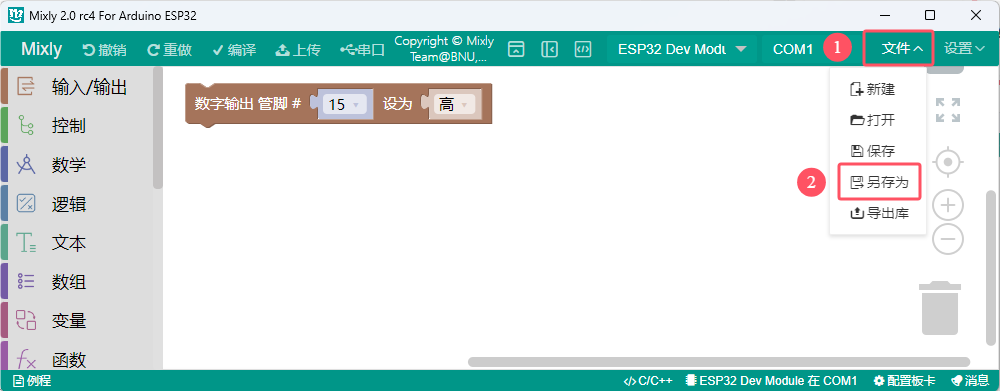
After writing, save it to the computer. Click "File" --> "Save As", as shown in the figure below:
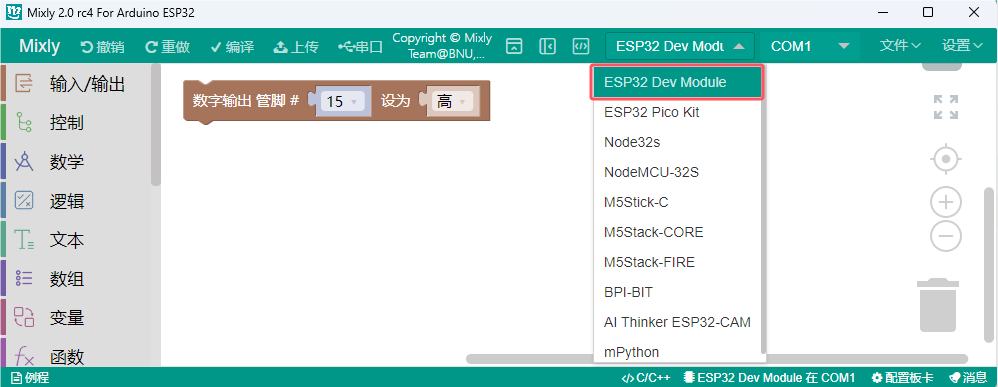
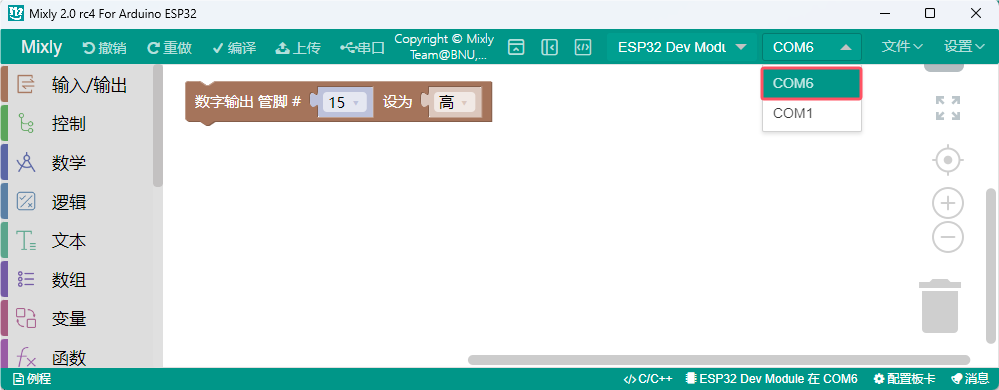
Select the board type of the ESP32 main control board "ESP32 Dev Moduel" and the serial port (COM6) (Tip: Different computers have different serial ports), (Note: The corresponding port can only be seen after connecting the ESP32 main board to the computer via a USB cable.), as shown in the figure below:
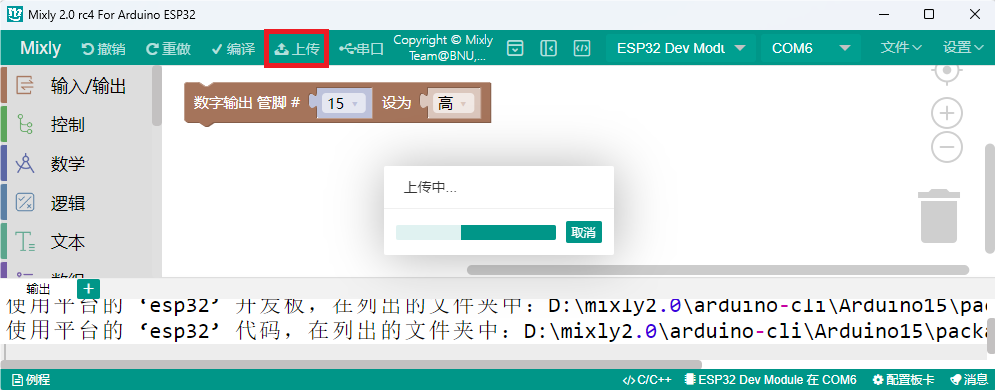
Click  to upload the code to the ESP32 main control board, as shown in the figure below:
Method ②: Open the already-written code from the computer
Extract the code file archive we provide, and save the extracted code folder to a convenient location.
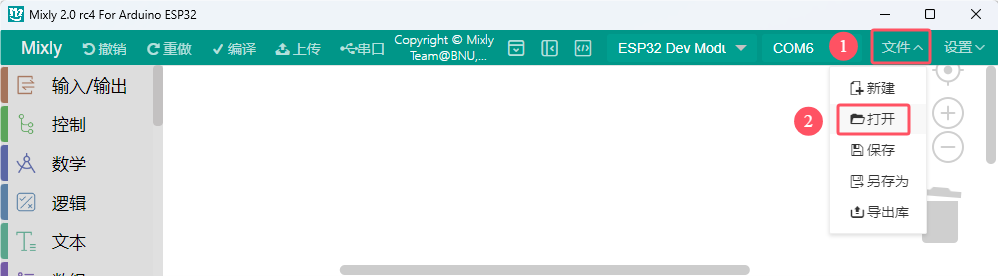
"File" --> "Open", then select the path where the code is saved, select the code file and open it, as shown in the figure below:
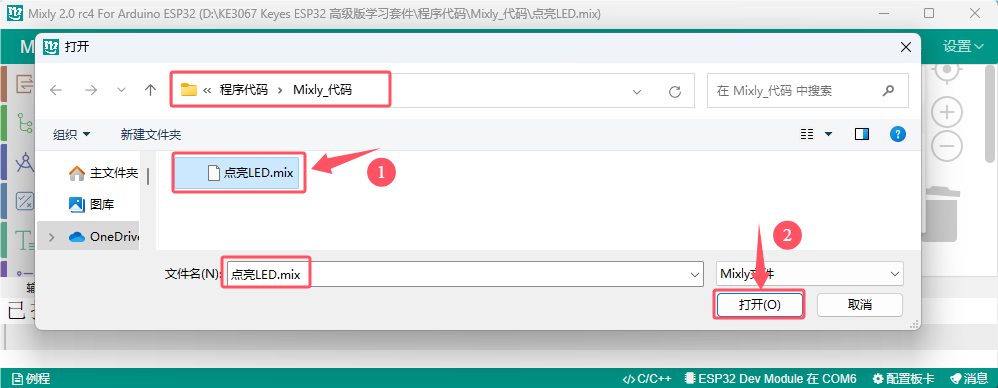
After the code file is opened, you need to manually select the board type of the ESP32 main control board "ESP32 Dev Moduel" and the serial port (COM6) (Tip: Different computers have different serial ports), (Note: The corresponding port can only be seen after connecting the ESP32 main board to the computer via a USB cable.), as shown in the figure below:
Click  to upload the code to the ESP32 main control board, as shown in the figure below: