Environment Setup
1. Windows System
1.1. Download and install the Arduino software:
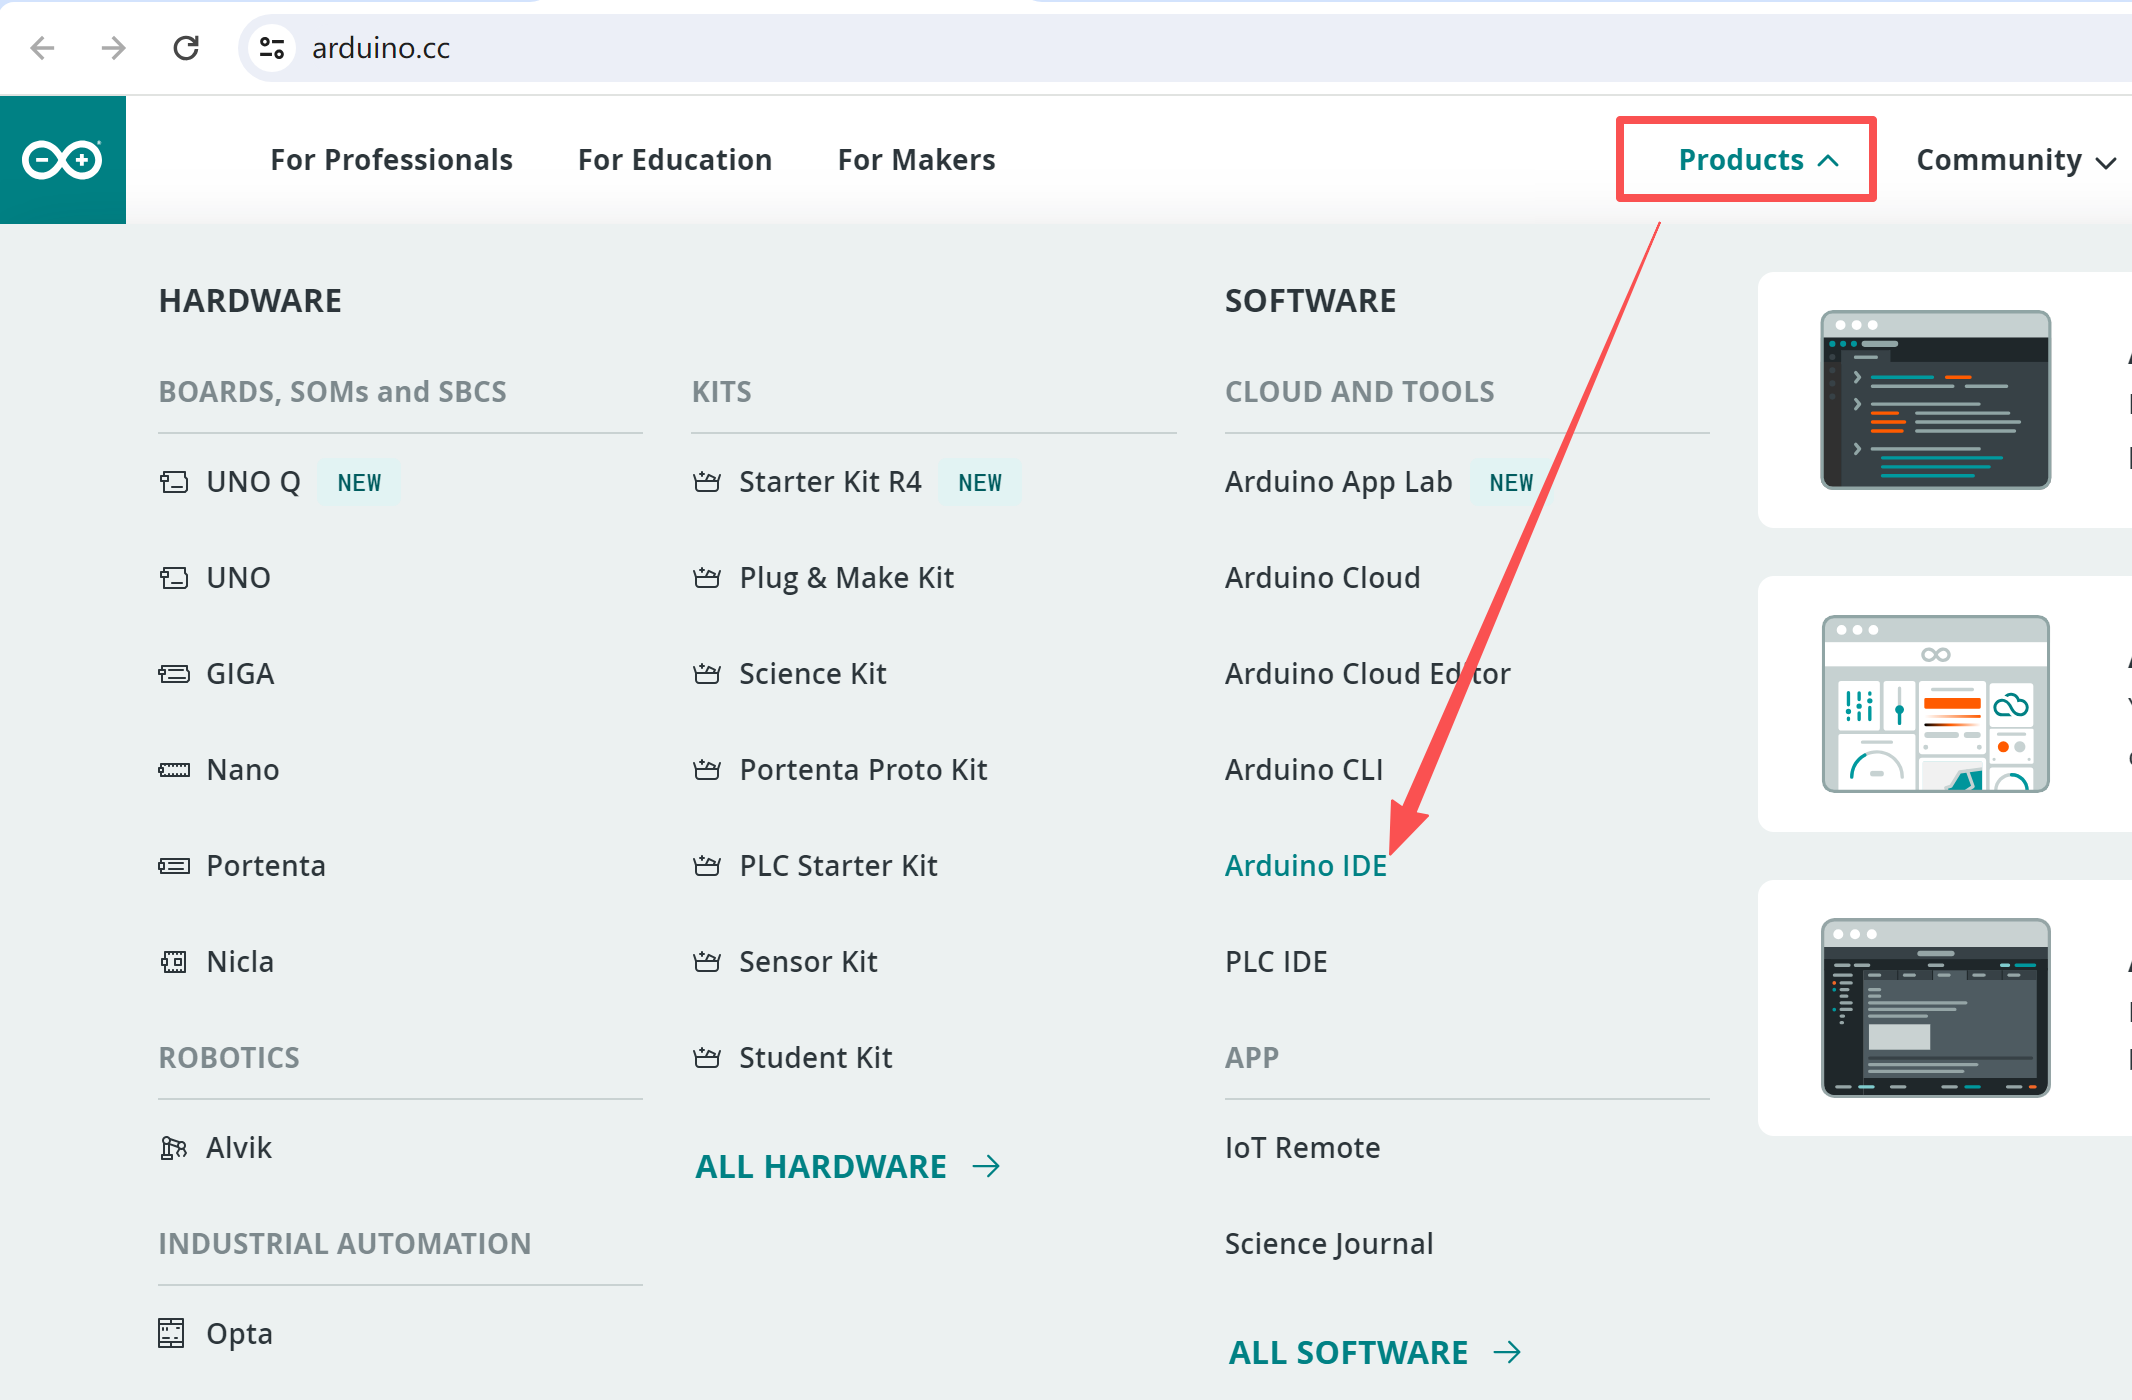
(1) First, go to the official Arduino website: https://www.arduino.cc/ and click "SOFTWARE" to enter the download page, as shown in the figure below:
(2) Then, select and download the corresponding installer according to your operating system. If you are a Windows user, please choose to install the Arduino IDE version 2.0.3. When you click "Windows Win10 and newer, 64bits" or "Windows MSI installer", it means downloading the installation file (.exe), which requires manual installation; when you click "Windows ZIP file", it means directly downloading the Arduino IDE version 2.0.3, which is a compressed file. You can unzip it and use it directly without installation.
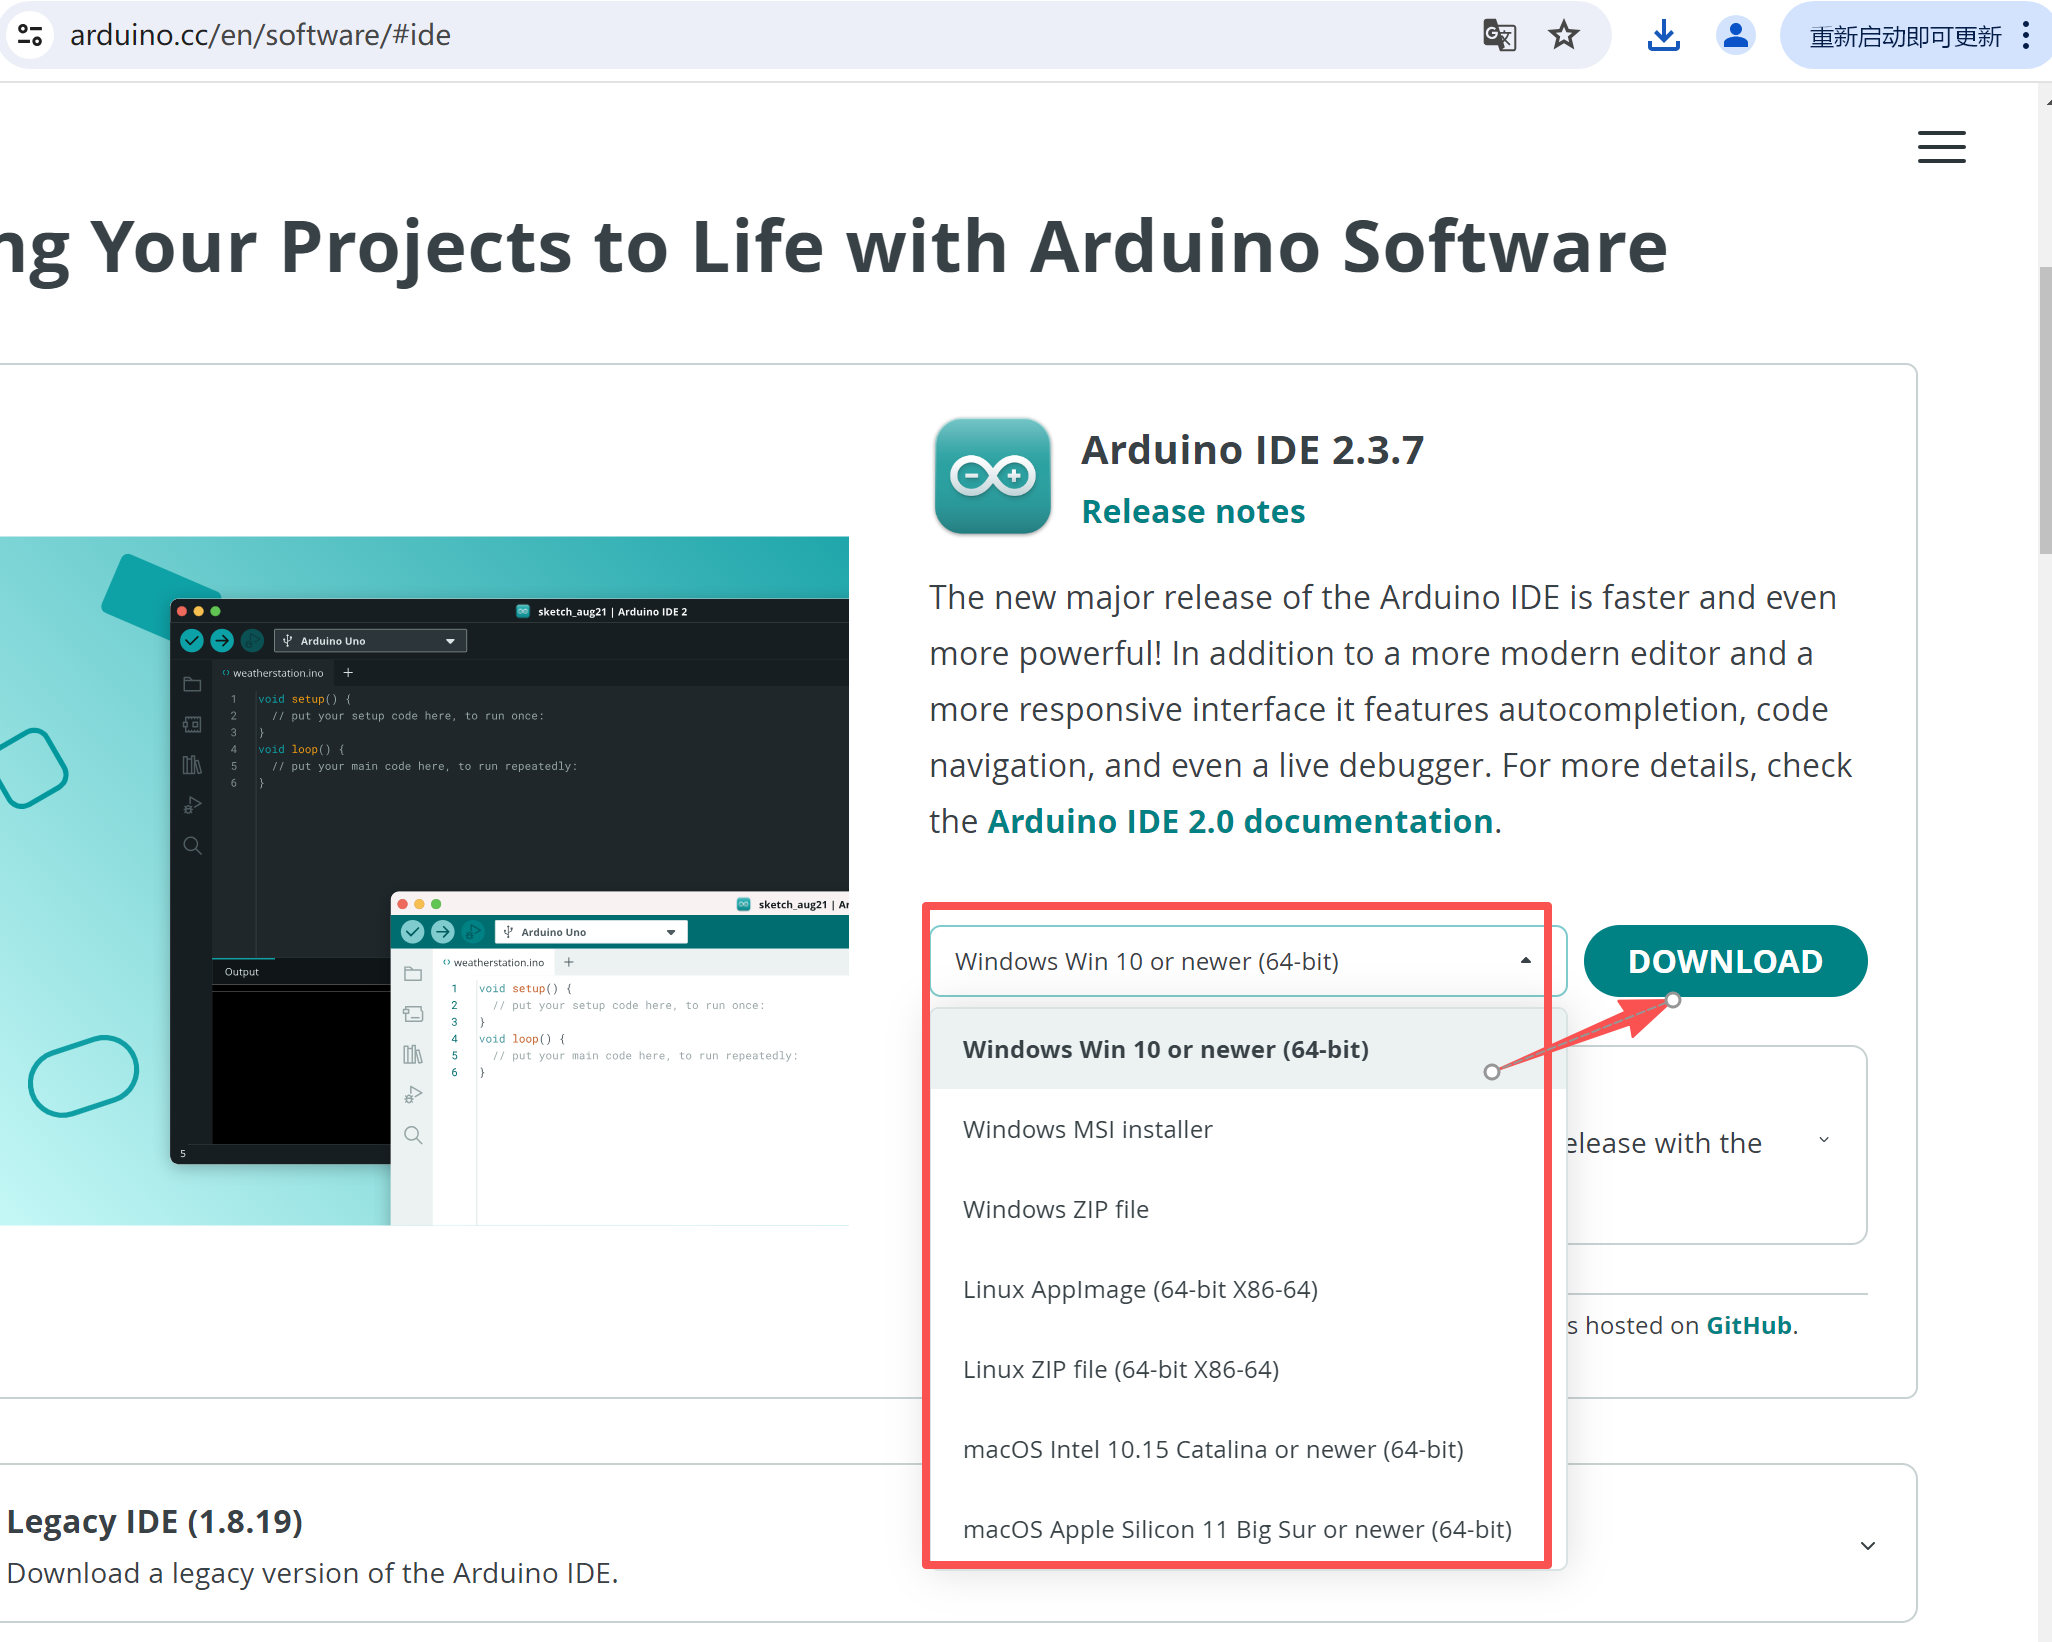
Click the DOWNLOAD icon and you can directly install the Arduino IDE. Please note: the version when we wrote this document was the 2.x version. If the Arduino IDE has been updated when you download it, please download the latest version.
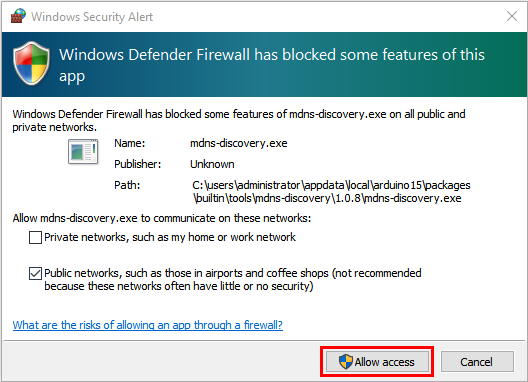
(3) After the Arduino software download is complete, if you downloaded the (.exe) file "arduino-ide_x.x.x_Windows_64bit.exe" by clicking "Windows Win10 and newer, 64bits" or "Windows MSI installer", you need to double-click the (.exe) file to continue the installation. When you receive a warning from the operating system, please click "Allow access" to allow the driver installation. First click "I Agree", then select "Anyone who uses this computer (all users)" and click Next.
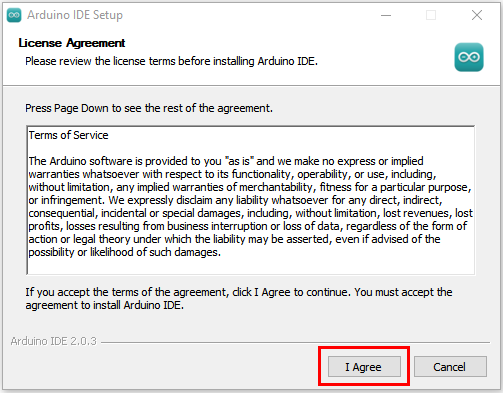
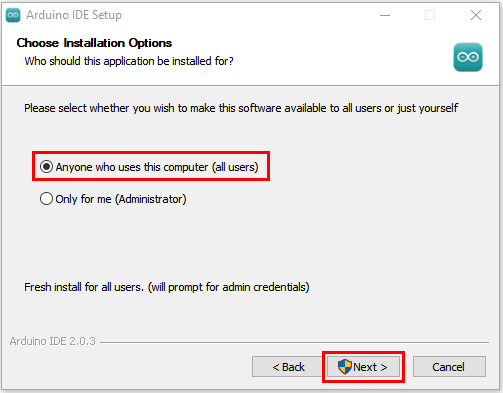
(4) After clicking "Next", if the following page appears again, click "I Agree".
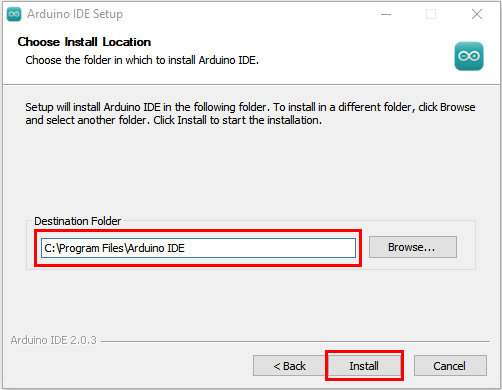
(5) Select the installation directory (we recommend keeping the default directory), then click "Install".
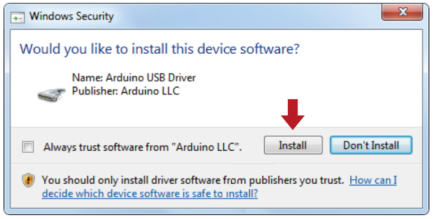
(6) If the following interface appears, you should select "Install".
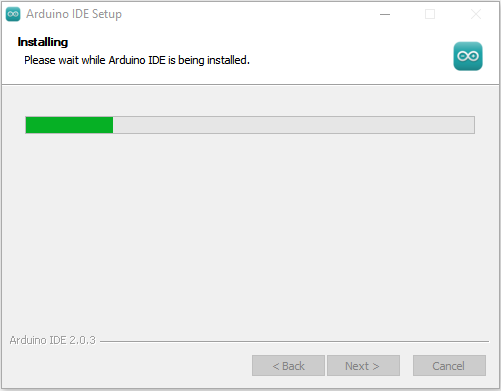
This process will extract and install all the required files to correctly run the Arduino software (IDE).
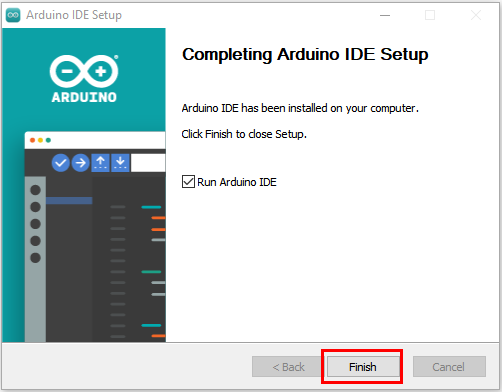
(7) After the installation is complete, an Arduino IDE software shortcut will be generated on the desktop.

1.2. Install the driver on Windows:
(Note: If the driver is already installed on the computer, there is no need to install it again; if not, the following operations are required) Before using the ESP32 board, the driver must be installed, otherwise the ESP32 board will not be able to communicate with the computer. Connect the main control board to the computer with a USB cable. Generally, computers running MacOS and Windows 10 will install the driver automatically. If it cannot be installed automatically, you need to install the driver manually.
(1)Check whether the computer has automatically installed the driver:
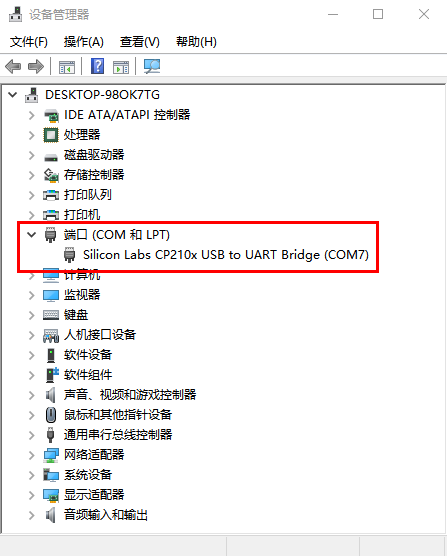
Click "Computer"--"Properties"--"Device Manager". The display shown below indicates that the installation was successful:
(2)If it cannot be installed automatically, install it manually. The steps are as follows:
We provide the serial port driver in the downloaded materials.
Driver download for Windows 10 and above: Windows driver - click to download
Driver download for Windows 7: Windows 7 driver - click to download
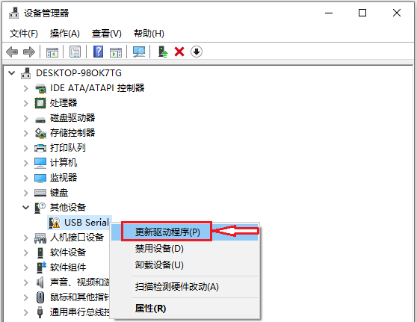
Right-click "USB Serial", select "Update Driver (P)" and click it.
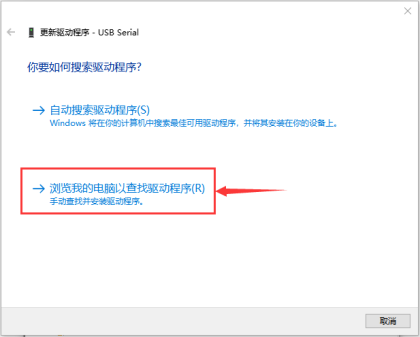
Jump to the following page, select "Browse my computer for drivers (R)" and click it.
We also provide the driver files for the CP210X series chips in the corresponding folder, as shown below:
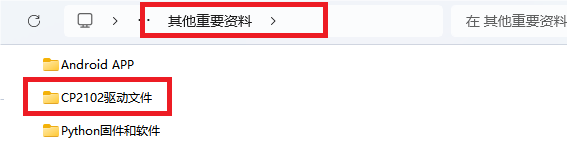
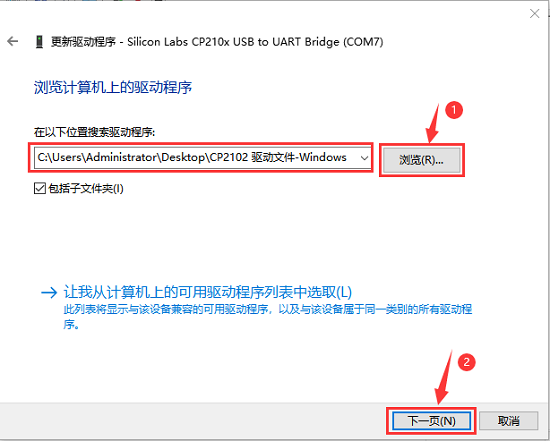
You can first copy the driver files to the computer desktop, then click "Browse (R)...", select the driver for the CP210X series chips, and finally click "Next".
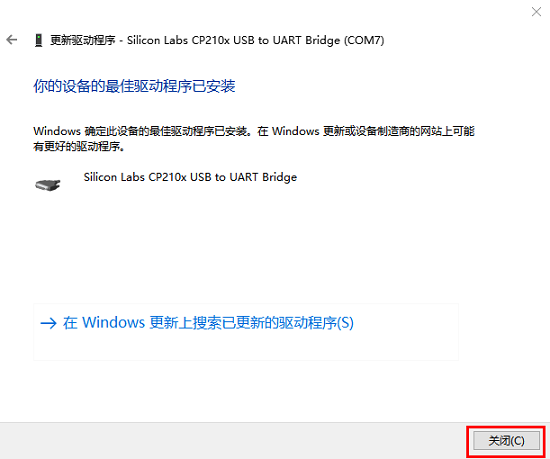
After a while, the driver installation is successful.
At this time, open the computer Device Manager again, and you can see that the CP2102 driver has been installed successfully, and the yellow exclamation mark just now is gone.
1.3. Introduction to the Arduino IDE toolbar:
Click the icon on the computer desktop  to open the Arduino IDE.
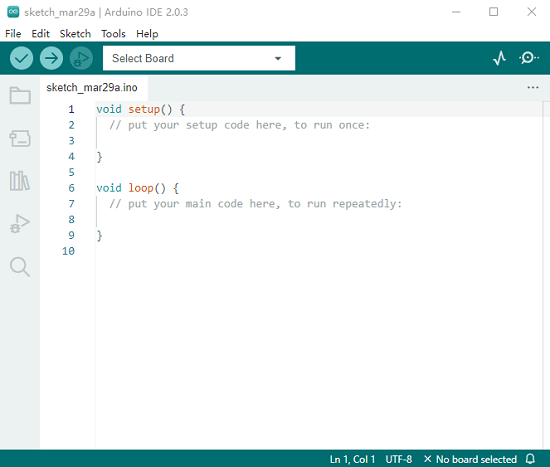
 -- Used to check whether there are any compilation errors.
 -- Used to upload the program to the Arduino board.
 -- Used for single-step debugging when writing programs.
 -- The serial monitor used to receive serial data from the board and send serial data to the board.
 -- Used to convert the data received from the serial port into a dynamic curve chart.
 -- Used to open the most recently saved example sketch.
 -- Used to manually install the development board.
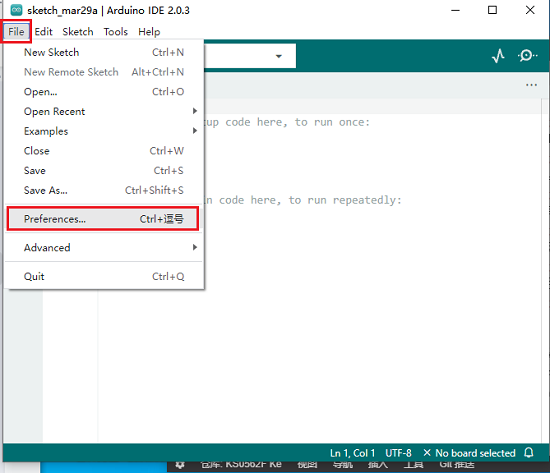
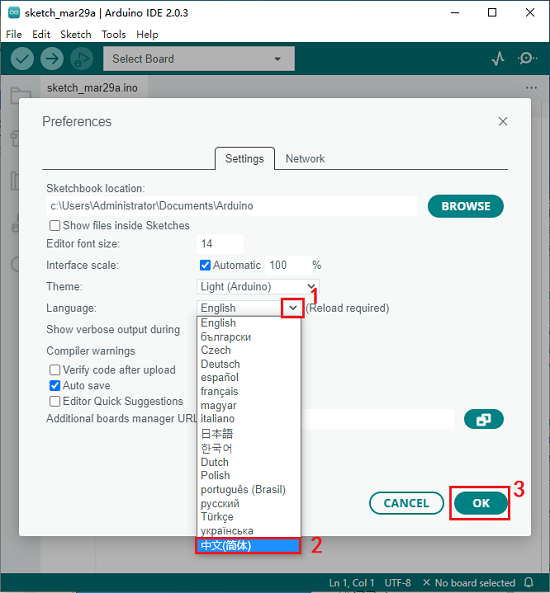
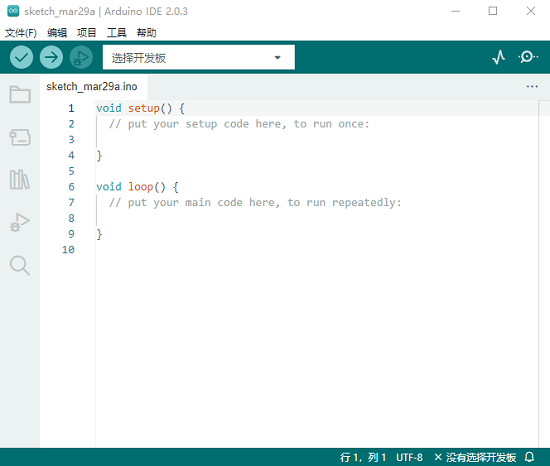
Language switching function:
(1)Click "File" → "Preferences", switch the language "English" to "简体中文" on the Preferences page, and click "OK".
1.4. Install ESP32 on the Arduino IDE:
We have already learned how to download the Arduino IDE and how to install the driver above. Next, we need to install ESP32 on the Arduino IDE. Please perform the following steps:
(1) Click the icon on the computer desktop to open the Arduino IDE.
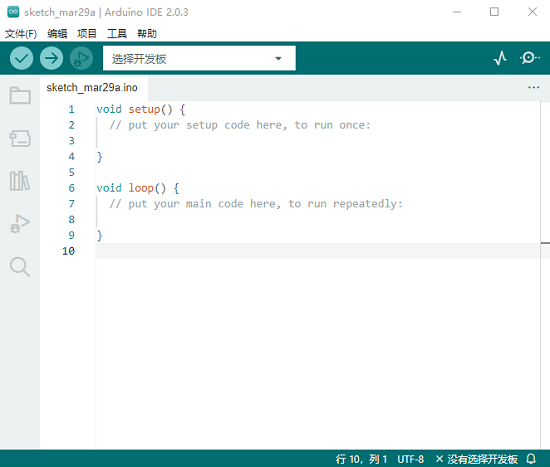
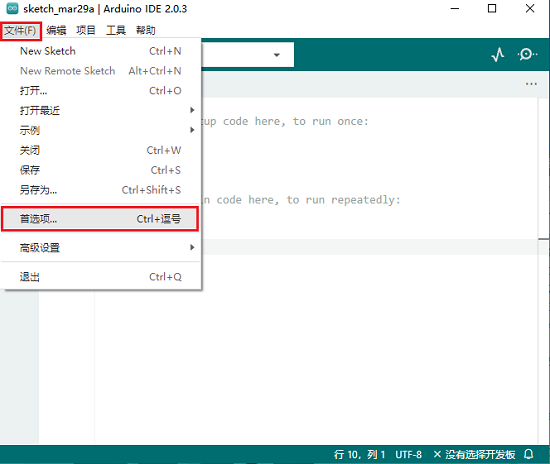
(2) Click "File" → "Preferences", as shown below:
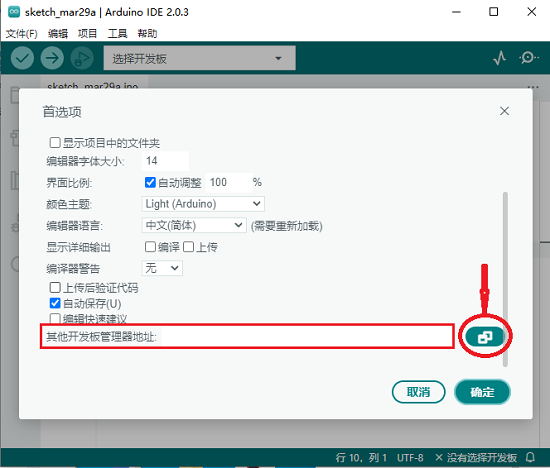
(3) Open the button shown in the figure below.
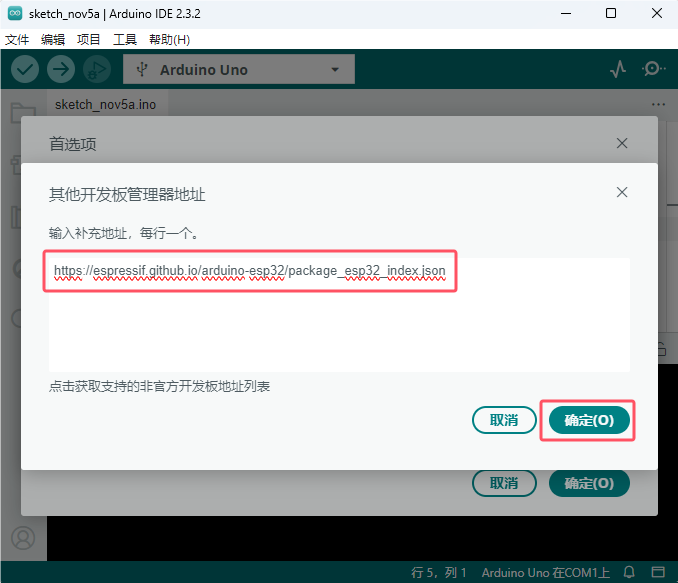
(4) Copy this address:
https://jihulab.com/esp-mirror/espressif/arduino-esp32/-/raw/gh-pages/package_esp32_index_cn.json
and paste it inside, then click "OK" to save this address, as shown below:
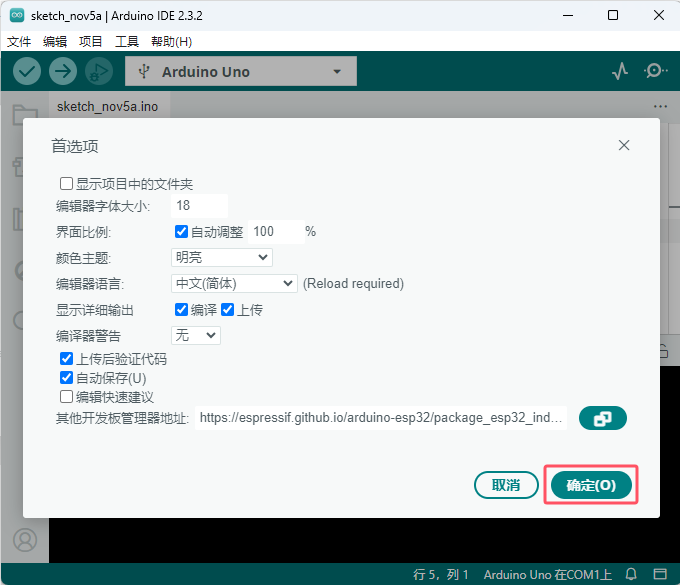
(5) Then click "OK" again.
(6)First click "Tools" → "Board:", and then click "Boards Manager..." to enter the "Boards Manager" page, enter "esp32" in the text box, select the 2.xcn or 3.xcn version to install, and click "Install" to start installing the related installation packages. As shown below: (Special reminder: select the domestic version ending in cn, otherwise you may not be able to access the foreign servers.)
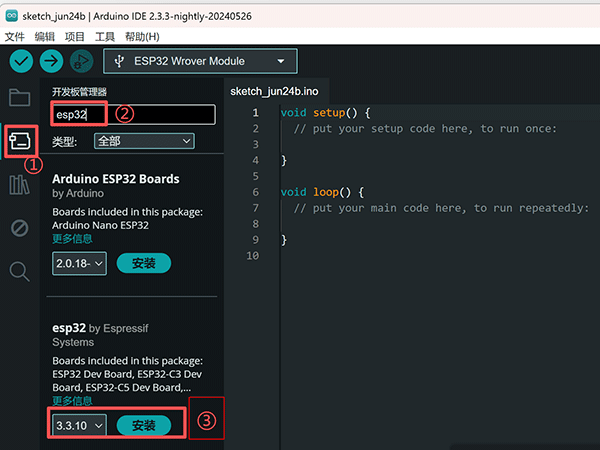
Select the installation package ending in cn
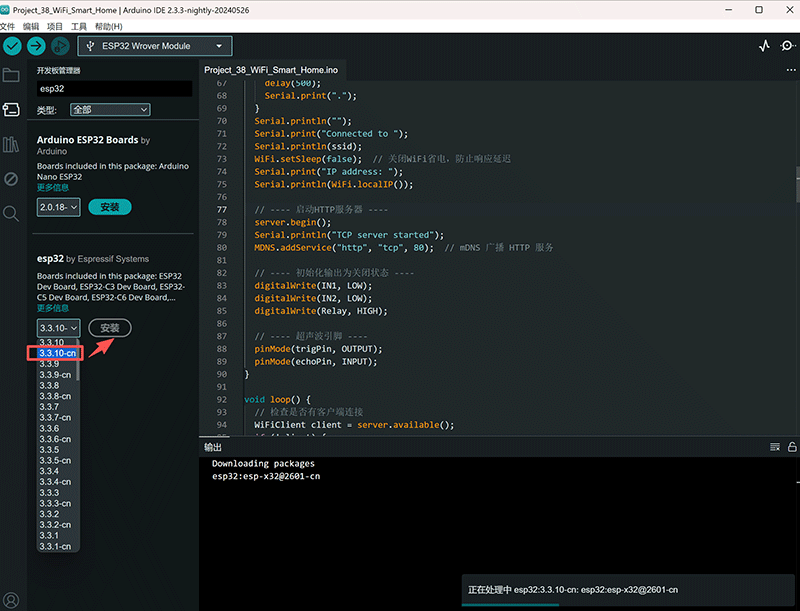
If it still cannot be installed, you can choose to download the offline installation package. Close the Arduino IDE, install it directly, and then open the Arduino IDE again, and it will already be installed.
esp32 board offline installation package: Cloud drive download
(7)Click "Tools" → "Board:", and you can see the installed ESP32 Arduino. You can view various models of ESP32 development boards in it, and select the corresponding ESP32 development board model.
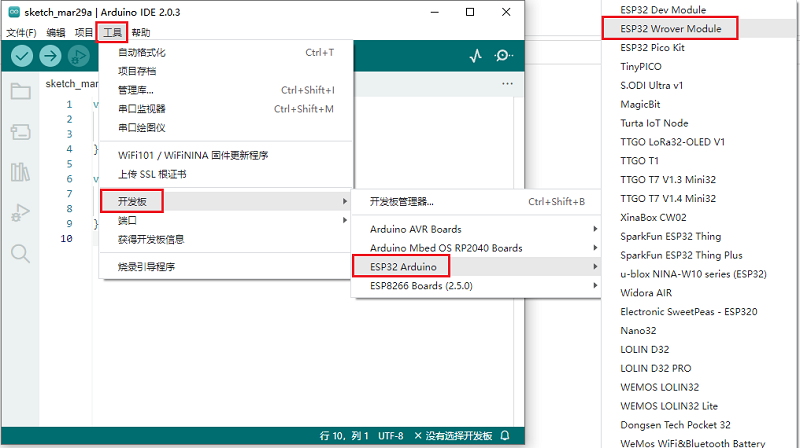
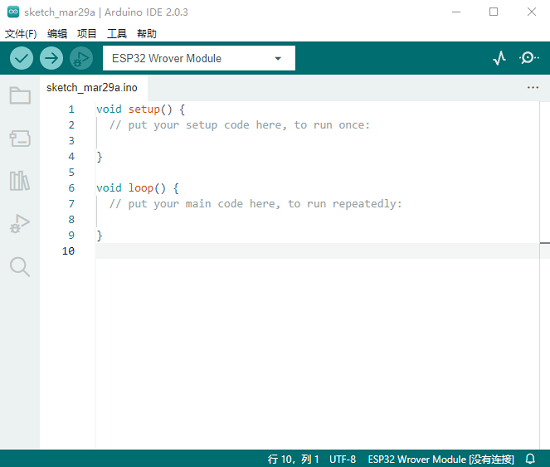
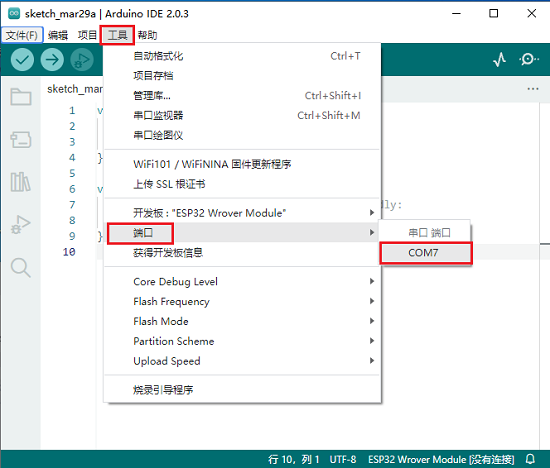
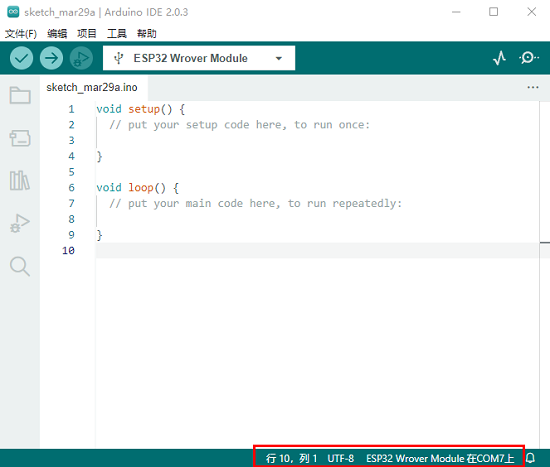
(8)After setting the board type, select the correct COM port (you can see the corresponding COM port after the driver is installed successfully). The settings are as shown below.
2. Mac System

2.1. Download and install the Arduino IDE:
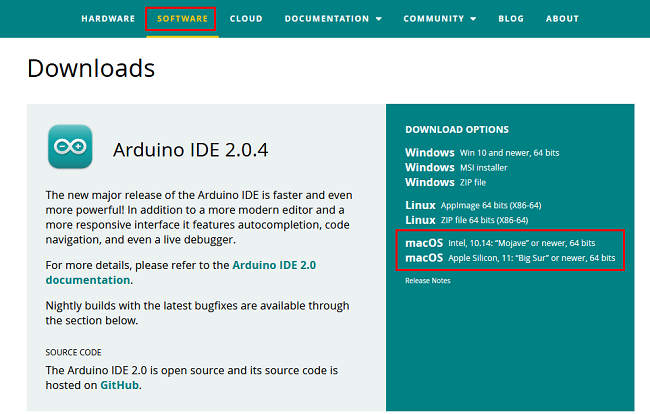
Go to the official Arduino website: https://www.arduino.cc/ and click "SOFTWARE" to enter the download page, as shown in the figure below:
2.2. How to install the CP2102 driver:
(Note:If the driver is already installed, there is no need to install it again; if not, the following operations are required)
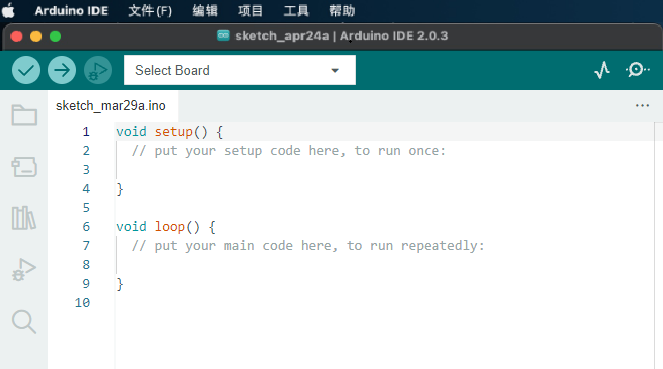
(1)Use a USB cable to connect the ESP32 board to your MacOS computer and open the Arduino IDE.
(2)CP2102 driver download link: https://cn.silabs.com/developers/usb-to-uart-bridge-vcp-drivers?tab=downloads
(3)Click to download the MacOS version.
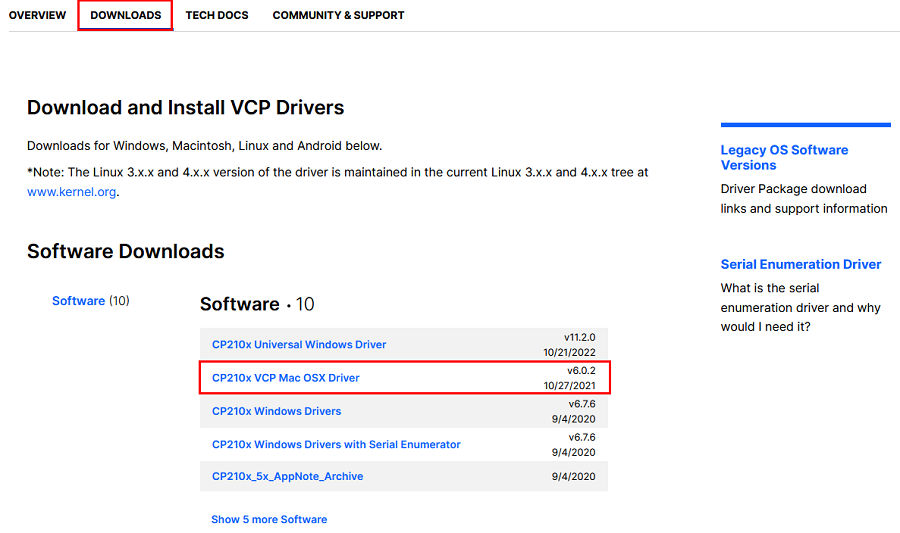
(4)Unzip the downloaded archive.
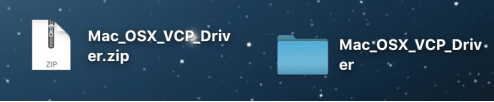
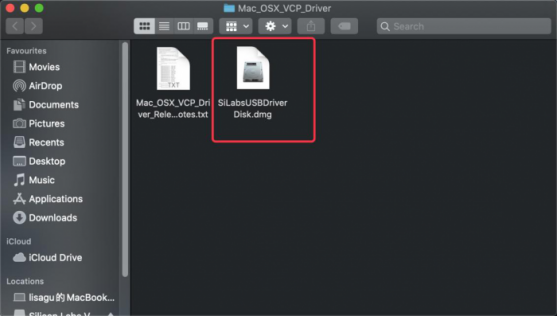
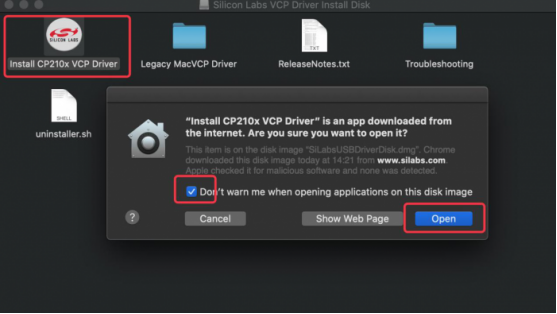
(5)Open the folder and double-click the "SiLabsUSBDriverDisk.dmg" file.
You can see the following files.
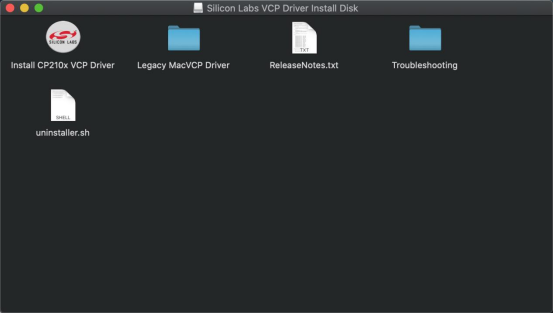
(6)Double-click "Install CP210x VCP Driver", check "Don't warn me when opening application on this disk image" and click "Open".
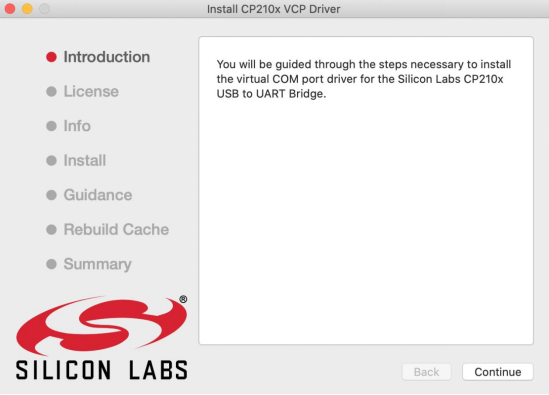
(7)Click "Continue".
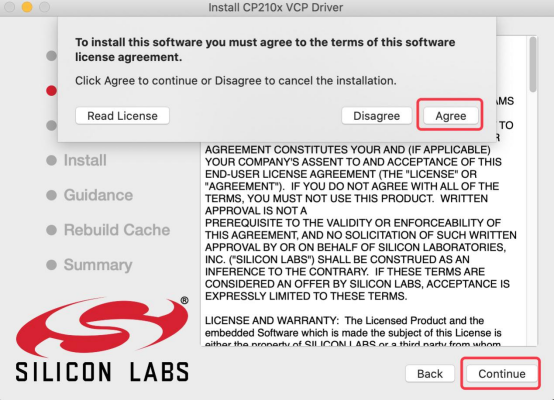
(8)First click "Agree", then click "Continue".
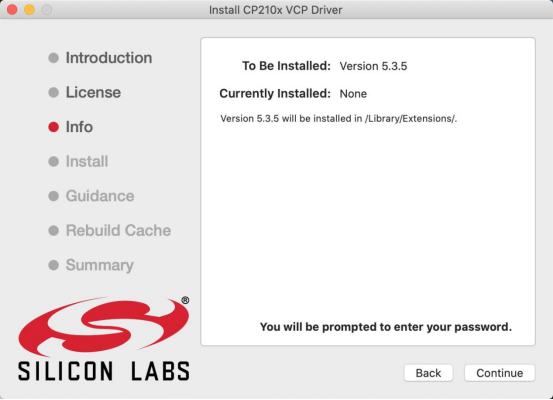
(9)Continue to click "Continue", then enter your user password.
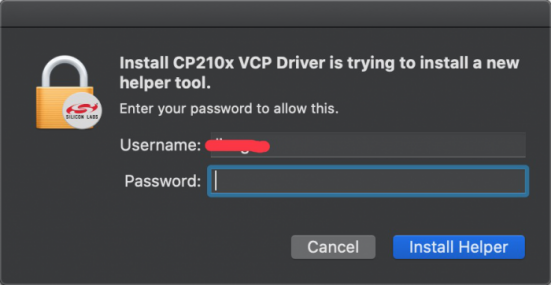
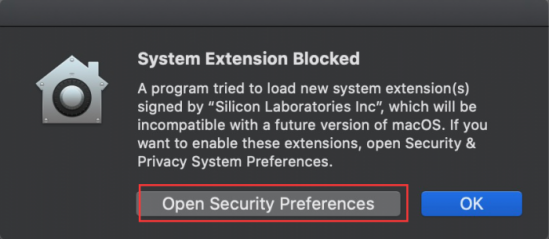
(10)Select "Open Security Preferences".
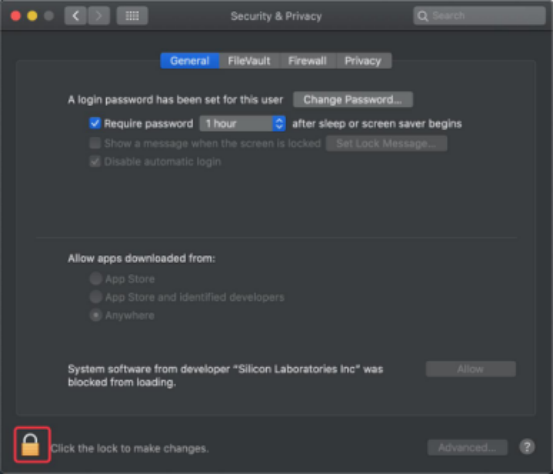
(11)Click the security lock and enter your user password to authorize.
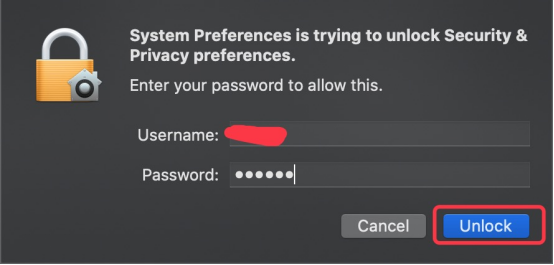
(12)After seeing that the lock is open, click "Allow".
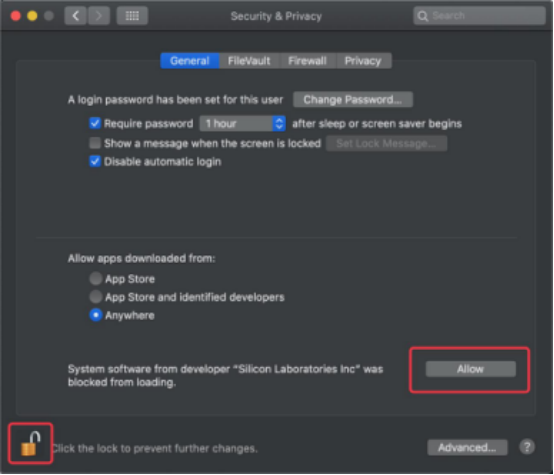
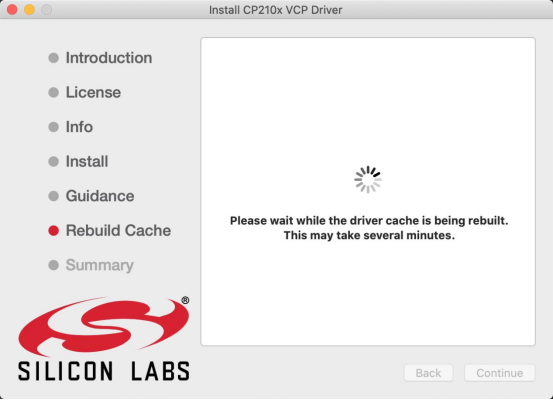
(13)Return to the installation interface and wait for the installation according to the prompts.
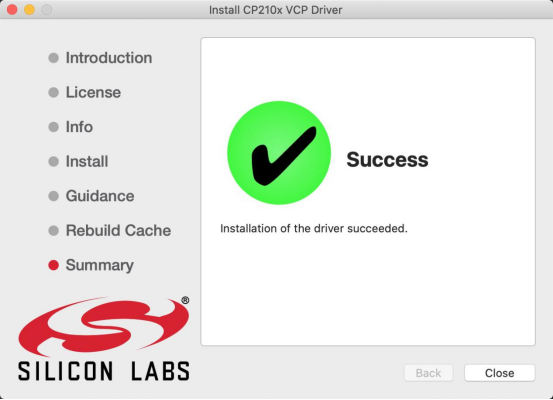
(14)Installation successful
2.3. Install ESP32 on the Arduino IDE:
We have already learned how to download the Arduino IDE and how to install the driver above. Next, we need to install ESP32 on the Arduino IDE. Please perform the following steps:
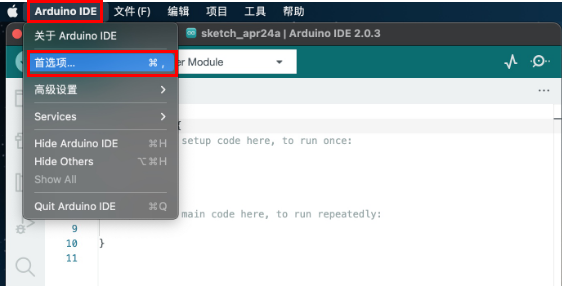
(1) Click the icon on the computer desktop to open the Arduino IDE. Click "Arduino IDE" → "Preferences", as shown below:
(2) Open the button shown in the figure below.
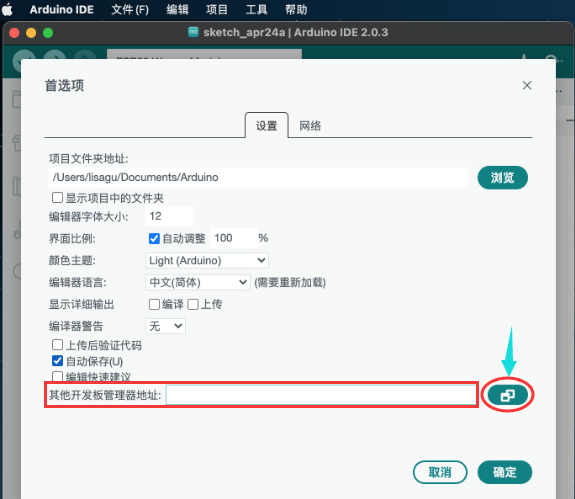
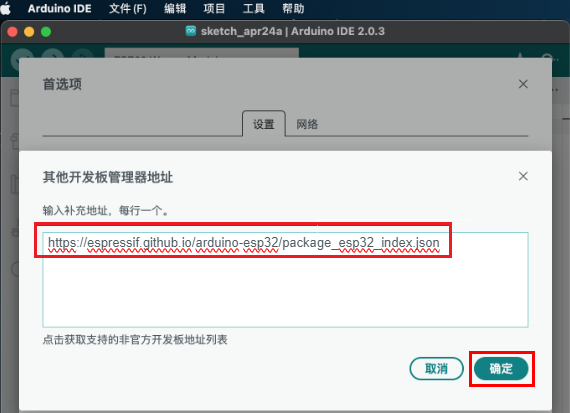
(3) Copy this address: https://jihulab.com/esp-mirror/espressif/arduino-esp32/-/raw/gh-pages/package_esp32_index_cn.json and paste it inside, then click "OK" to save this address, as shown below:
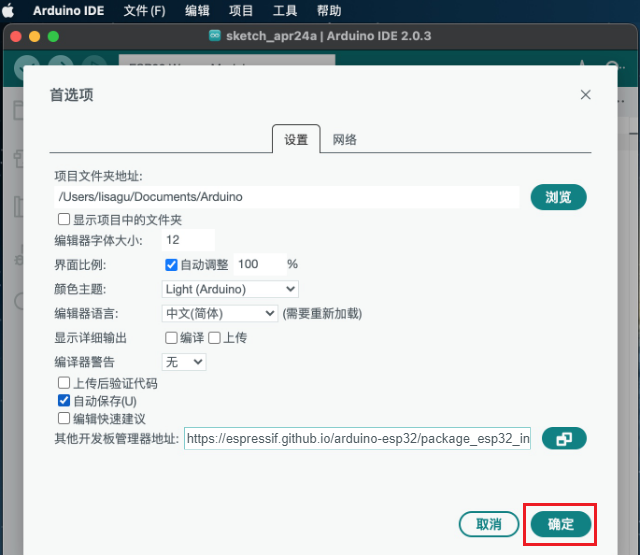
(4) Then click "OK" again.
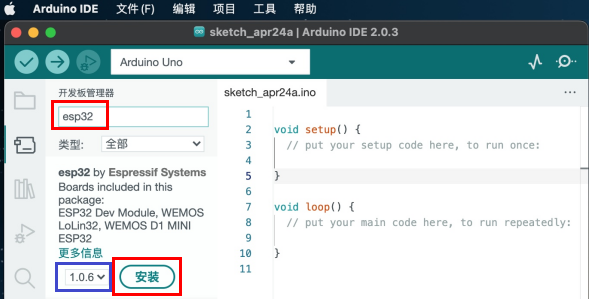
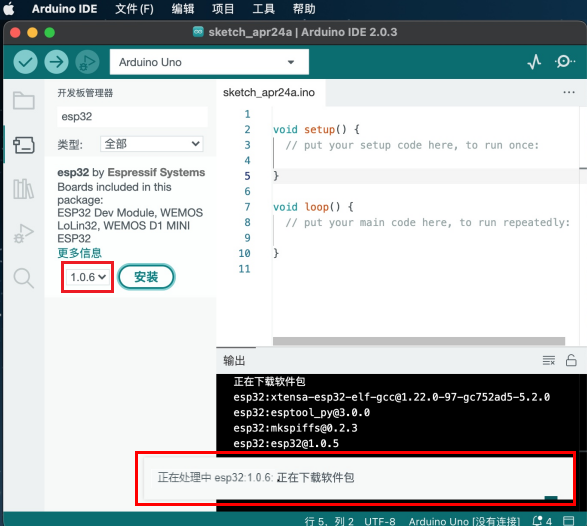
(5)First click "Tools" → "Board:", then click "Boards Manager..." to enter the "Boards Manager" page, enter "esp32" in the text box, select the 2.x-cn or 3.x-cn version to install. The installation package is not large. Click "Install" to start installing the related installation packages. As shown below: (Special reminder: select the domestic version ending in cn, otherwise you may not be able to access the foreign servers.)
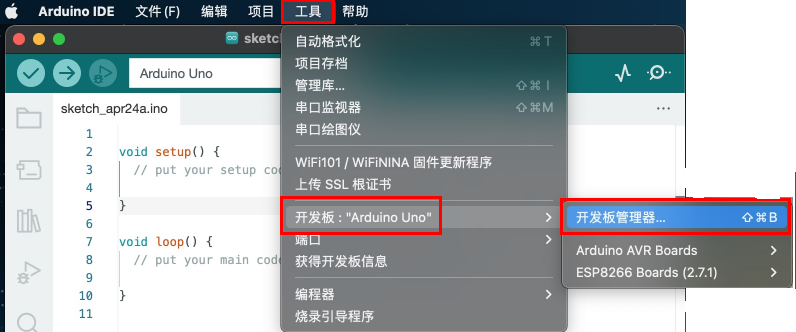
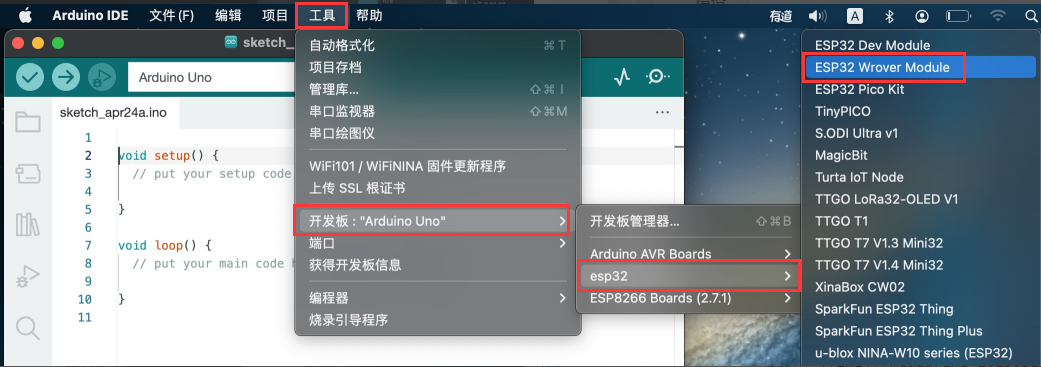
(6)Click "Tools" → "Board:", and you can see the installed ESP32 Arduino. You can view various models of ESP32 development boards in it, and select the corresponding ESP32 development board model.
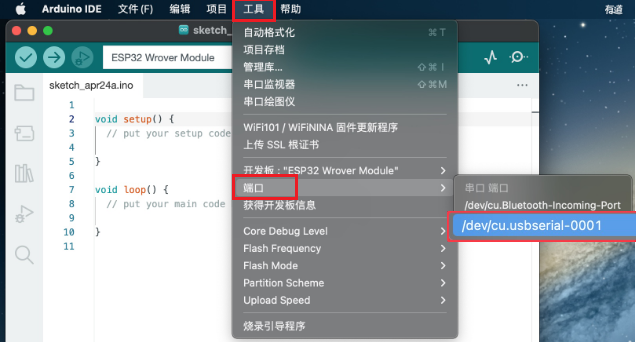
(7)After setting the board type, select the correct COM port (you can see the corresponding COM port after the driver is installed successfully). The settings are as shown below.
3. Add Arduino library files
Special reminder: The library files are provided in the Materials Download section above. Please download and install the library files.
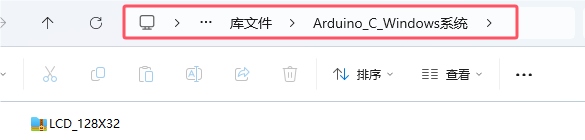
The path of the Arduino library files we provide: ..\library-files\arduino-c-windows. As shown below:
3.1. Method for adding library files on Windows:
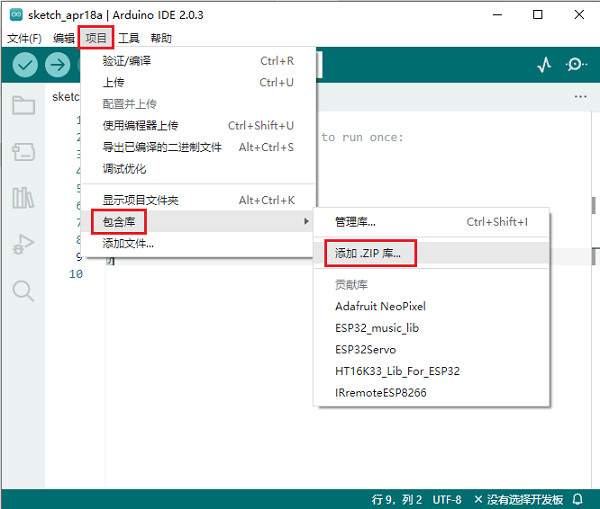
(1)Open the Arduino IDE  , and in the Arduino IDE interface click "Sketch" → "Include Library" → "Add .ZIP Library...".
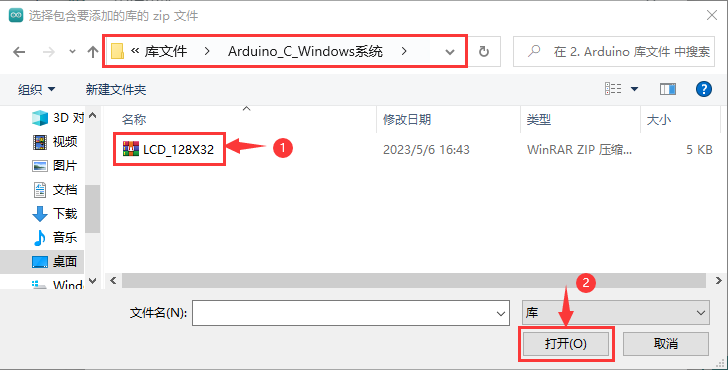
(2)Find the location where the library files are stored, select the corresponding library file, and click "Open" to add it. Library files can only be added one by one. (Note: The library files need to be compressed into .ZIP format; here "LCD_128X32.ZIP" is used as a demonstration, and the method for adding other library files is the same.)
3.2. Method for adding library files on MacOS:
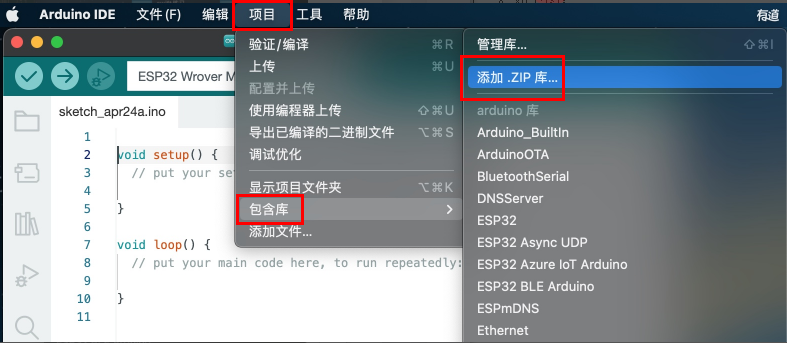
(1)In the Arduino IDE interface, select "Sketch" > "Include Library" > "Add .ZIP Library...".
(2)Find the location where the library files are stored, select the corresponding library file, and click "Open" to add it. Library files can only be added one by one. (Here, adding the "LCD_128X32.ZIP" library file is used as an example, and the method for adding other library files is the same), as shown below:
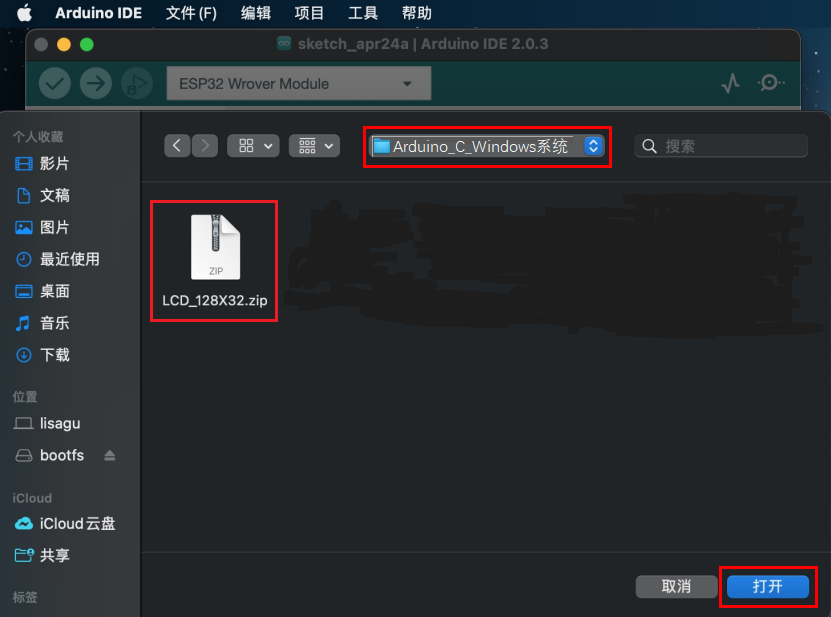
At this point, it should normally be installed successfully.