MotorShield Motor Driver – Mixly/Mind+ Graphical Programming
This article introduces how to download, install, and use the Mixly graphical programming plugin.
Mixly Plugin and Examples Download: Graphical Programming Plugin V5.6
Mind+ Plugin Download: Mind+ Graphical Plugin V5.5
1. Download Mixly
For the latest version, please visit the official Mixly website: Mixly Official Site
Windows version: Cloud Download Mixly 3.0 (with plugin pre-installed)
Interface Introduction
Mixly is mainly divided into: graphical program selection area, graphical program editing area, code preview area, system menu area, and system message area.
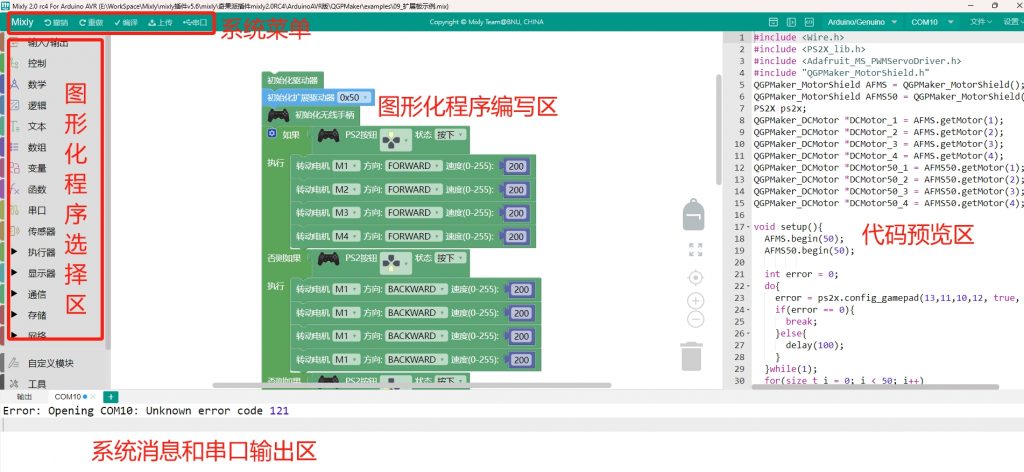
For more about Mixly, please visit the official website: http://mixly.org/
2. Install Mixly Plugin
Mixly Plugin and Examples Download (for rc4): Motor Driver Graphical Programming Plugin V5.6 The examples directory contains example programs.
Download and extract the plugin.
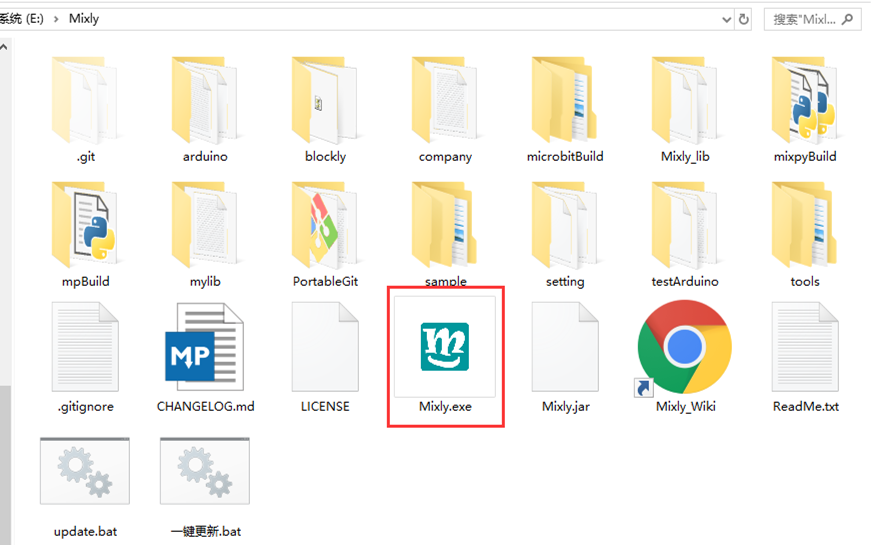
Step 1: Double-click the icon to open the main program:
Step 2: Open the interface
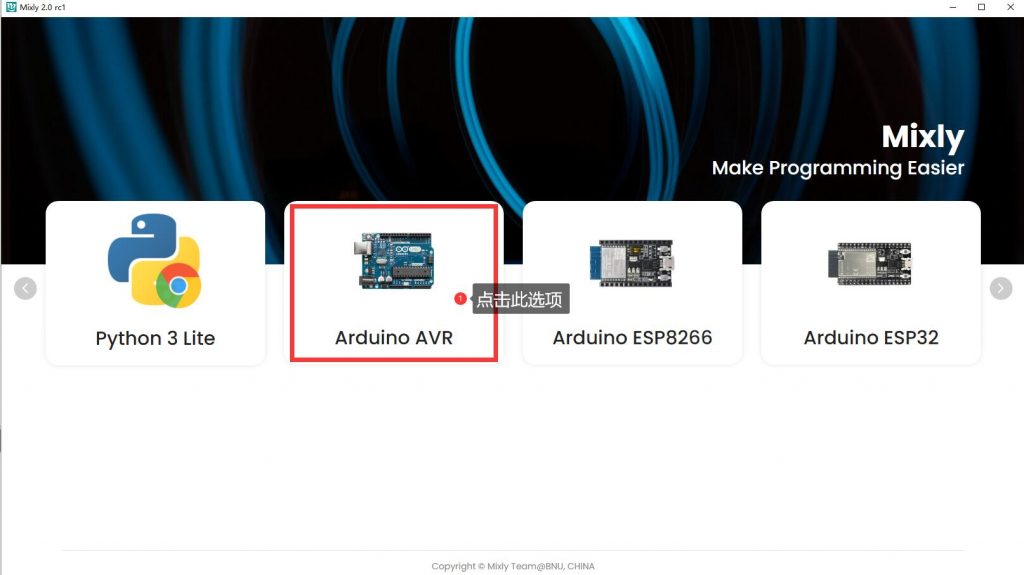
If the development board is ESP32, please select the Arduino ESP32 option.
Step 3: Click "Import Library"
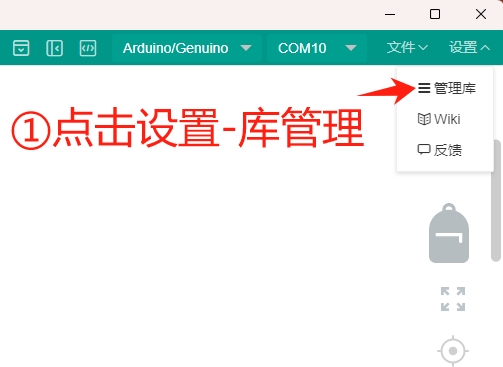
Mixly 2.x: Go to "Settings" in the top left corner
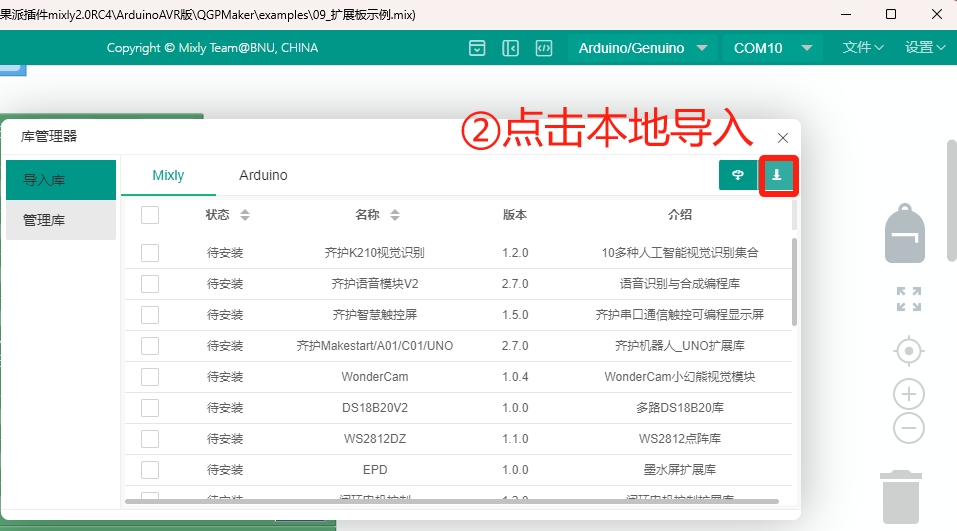
Select local import
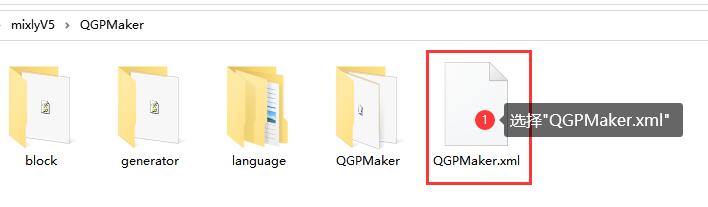
Select the extracted plugin folder and choose the XML file (QGPMaker directory):
Note: The extracted plugin has two directories: ArduinoAVR version and Esp32 version. Please select the corresponding folder based on Step 2.
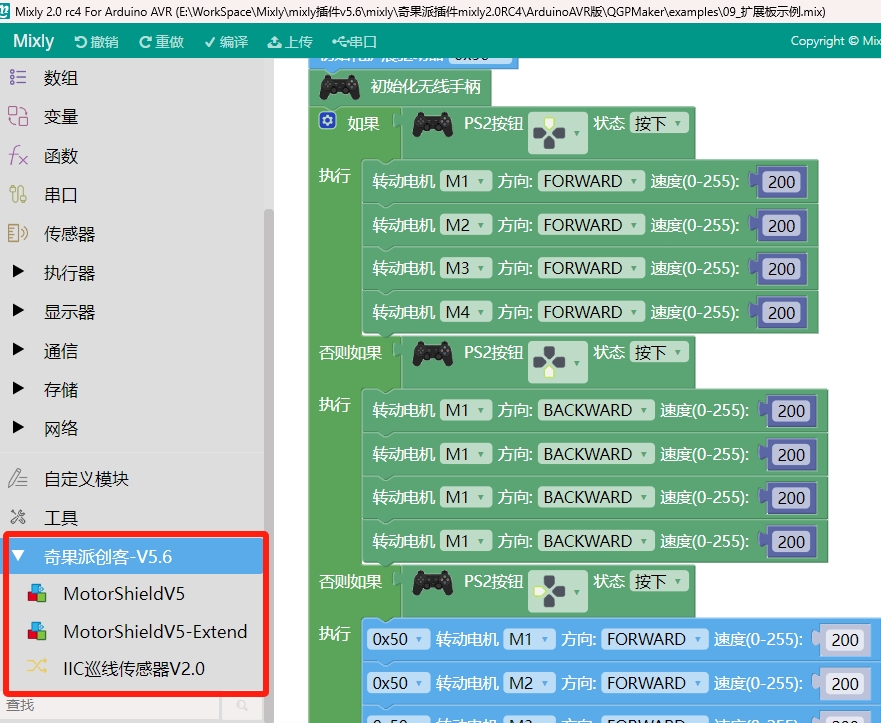
After successful installation, you can see the plugin directory at the bottom left:
Step 4: Open Example Programs
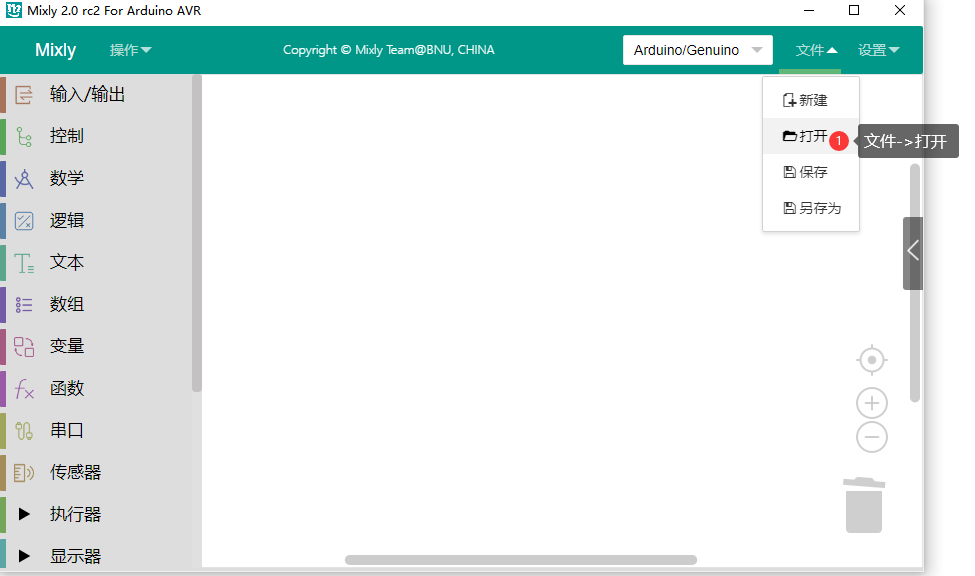
File menu, select "Open"
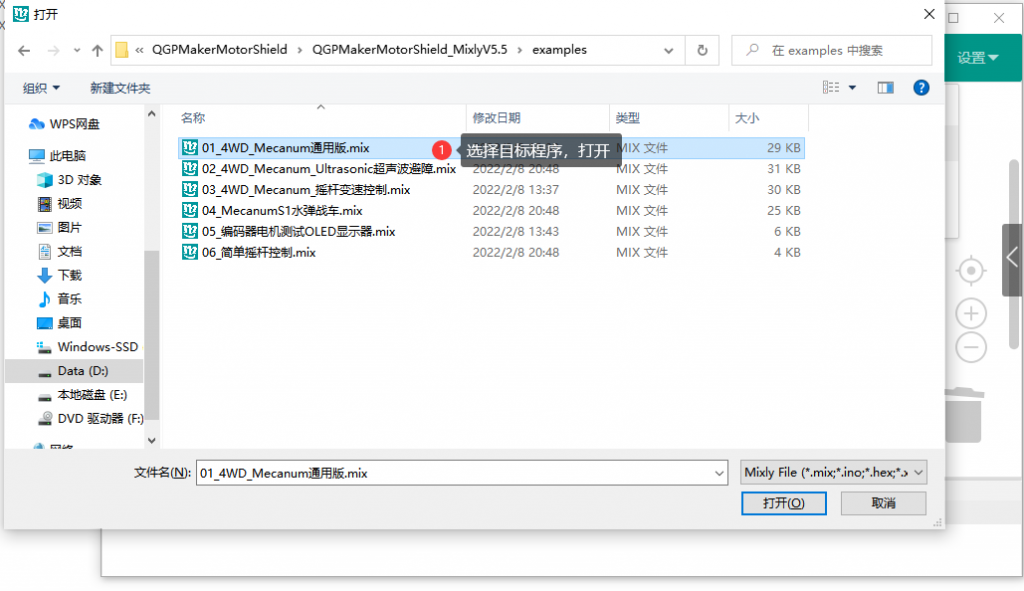
Select the desired program example
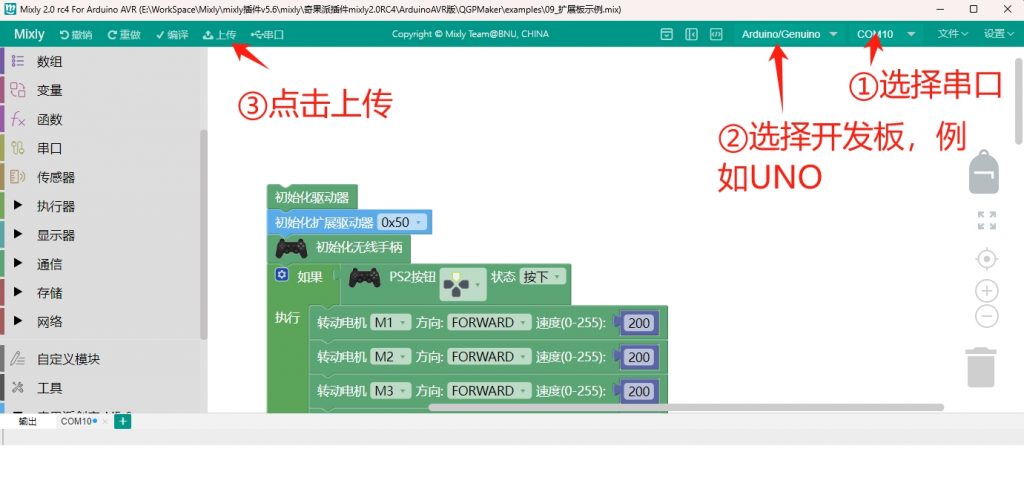
Select the board type, select the serial port, click upload to complete the program upload
If the program upload fails, please check the complete error message (see "FAQ" at the end of this article for common errors)
3. Programming and Debugging
Mixly programming is similar to Scratch. For Mixly usage and introductory knowledge, please visit the official website: http://mixly.org/
The following examples demonstrate the functionality of the Mixly plugin.
Example 1: Initialize the driver and make the M1 motor rotate.
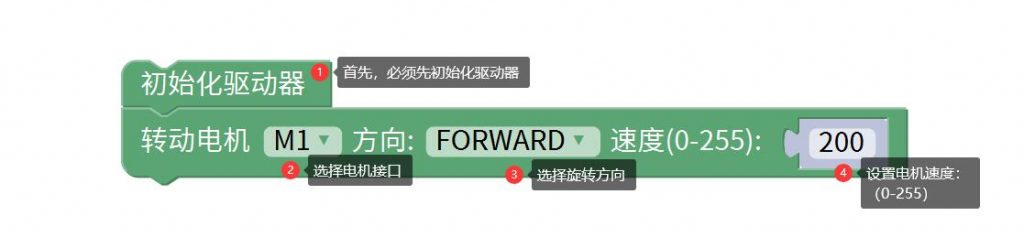
The above code makes the motor connected to the M1 port rotate forward at a relative speed of 200.
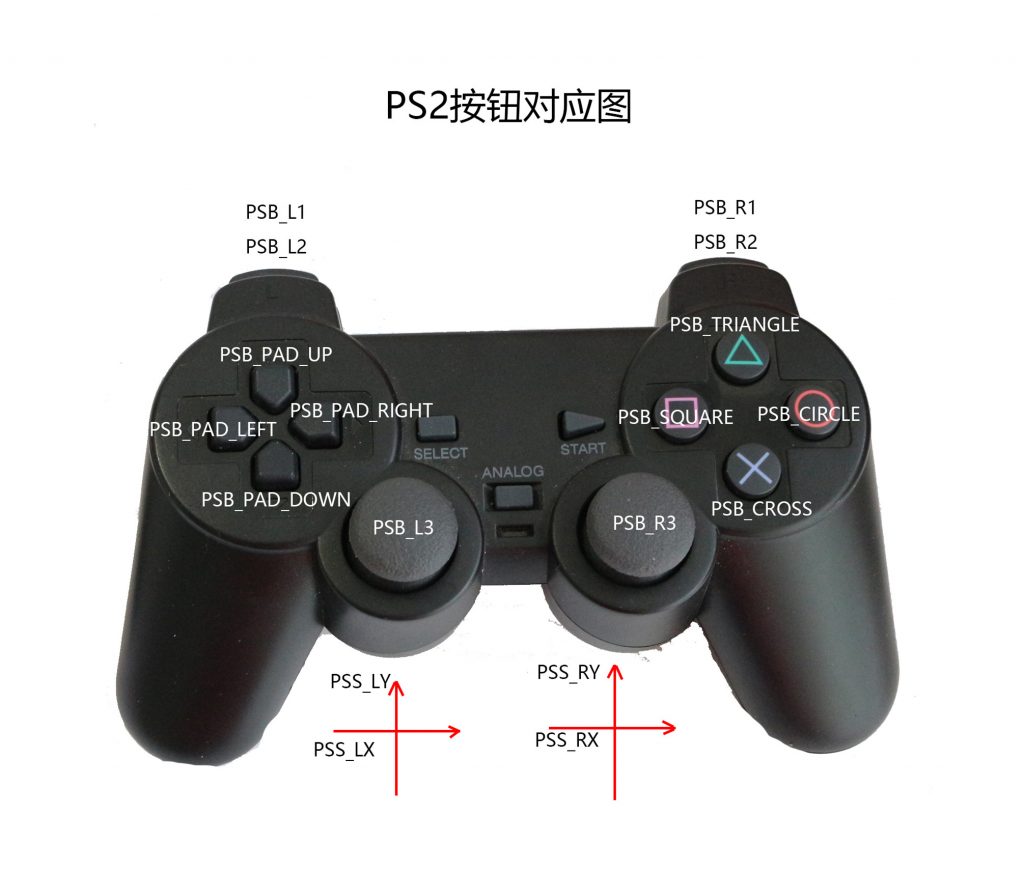
Example 2: Wireless controller controls M1 motor
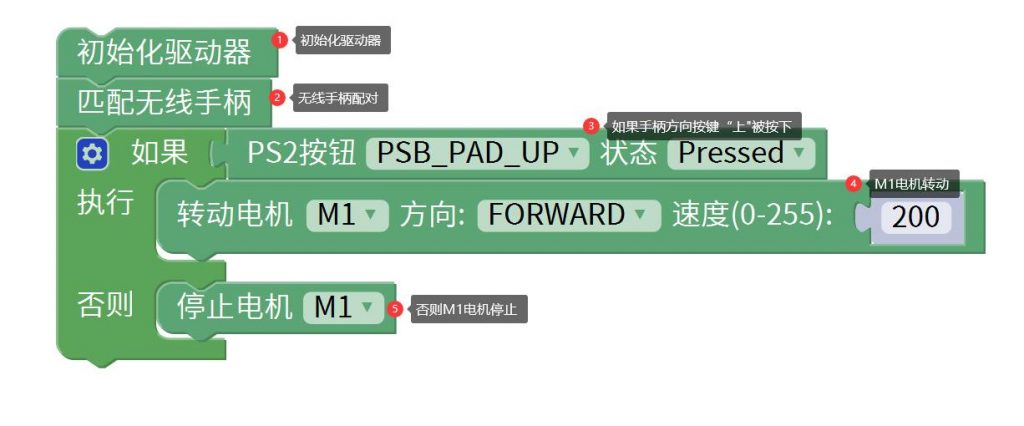
When the controller's "Up" direction button is pressed, the motor rotates; when released, the motor stops.
Example 3: Ultrasonic obstacle avoidance demo
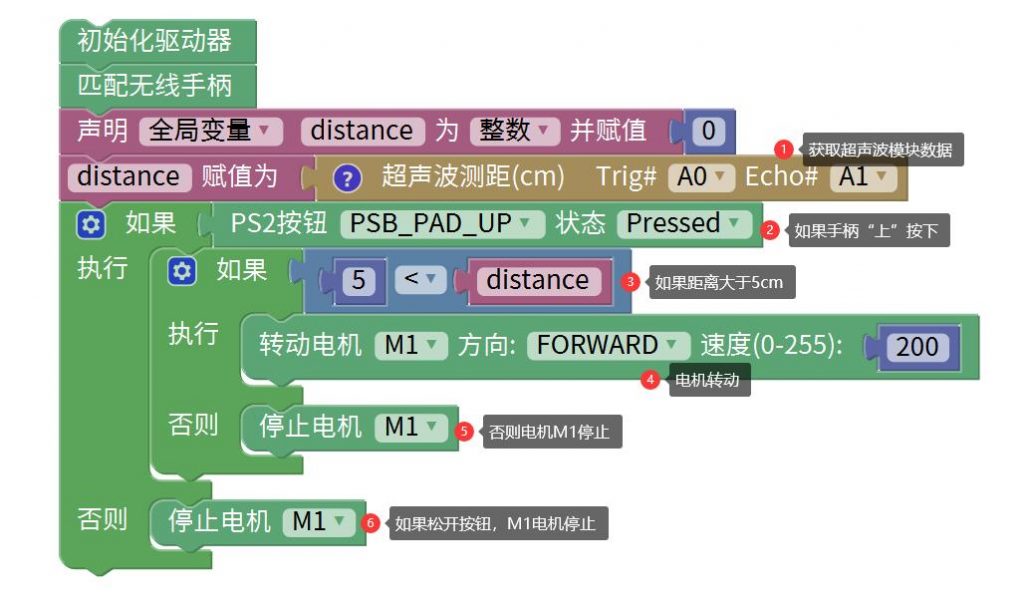
Ultrasonic distance measurement (obstacle avoidance): when distance > 5cm, M3 motor starts; otherwise it stops.
The driver's ultrasonic distance measurement module corresponds to driver pins A0, A1
Example 4: Wireless controller left joystick controls servo
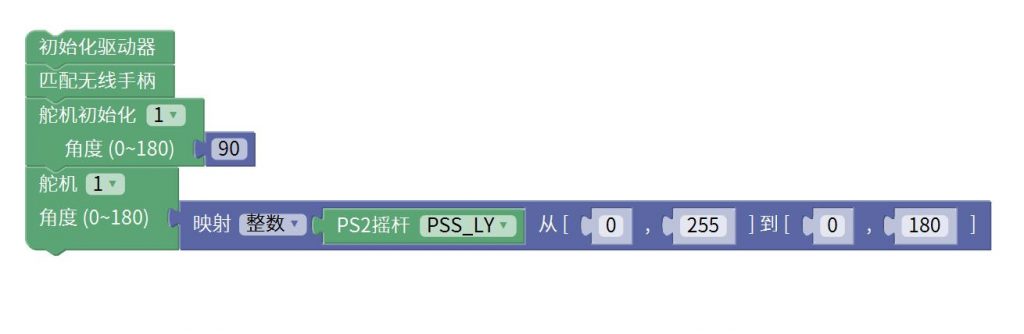
Servo connected to port #1
Example 5: Electronic switch and PWM output
Servo ports #0~#7 can not only connect servos but also electronic switches (relays) or other PWM-controlled components, such as LED brightness adjustment, motor speed control, etc. (corresponding modules required)
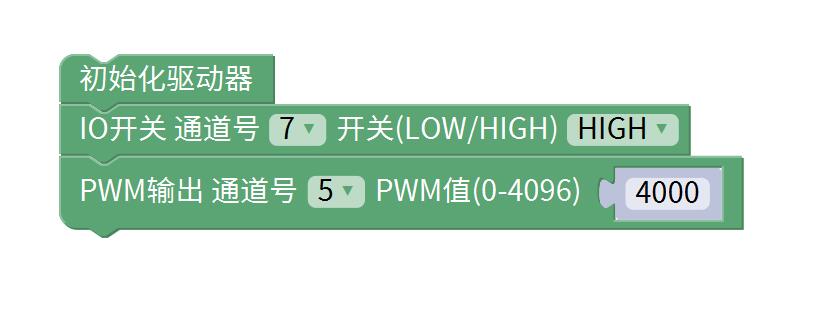
Port 7 outputs high level (on), port 5 outputs PWM value 4000
Example 6: Read motor encoder speed (RPM)
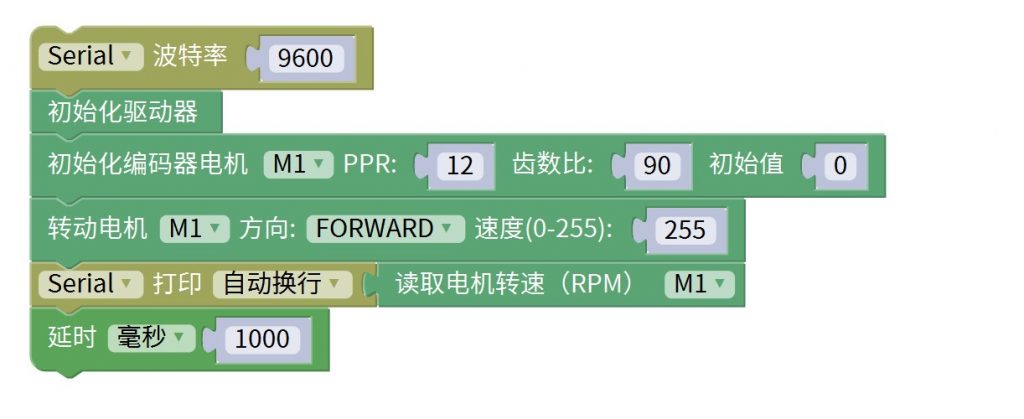
Simple speed measurement example
- First initialize the driver, then initialize the encoder motor
- PPR: The motor's base pulse number (magnetic pole pairs of the magnetic ring)
- Gear ratio: The number of motor rotations per wheel rotation
- Motor speed is read in RPM (revolutions per minute)
- This feature is suitable for AB phase encoder motors, using 4x frequency multiplication algorithm
4. FAQ
1. Missing Library Files

If Mixly 2.0 shows this prompt, it means library files are missing. Solution:
Open the following directory
[mixly installation directory]\resources\app\board\arduino_avr\libraries\ThirdParty\QGPMaker\libraries
Copy all files from this folder to:
[mixly installation directory]\resources\app\board\arduino_avr\libraries\myLib
2. For Mixly versions before RC4 (such as RC3 or Mixly 1.0), please use the following plugins
Arduino AVR Plugin: V5.5 Download
ESP32 Plugin: Download
5. Mixly Plugin Historical Versions
Mixly Plugin and Examples Download: Graphical Programming Plugin V5.5 (Compatible)