V3 Arduino Car
1. Introduction
The v3 remote control car uses a metal body, an Arduino main controller, and encoder motors, enabling precise control with a large load capacity. It has the following advantages:
-
The aluminum alloy body has high load-bearing strength and is easy to drill for installing expansion modules;
-
Arduino architecture: we provide rich example code and hardware interfaces for easy secondary development;
-
The factory code has been optimized, so it works right out of the box.
2. Initial Configuration
① Please assemble according to the video above: the wheels are left-right specific; if the wheels are not assembled as shown in the video, driving will be affected.
② For the first pairing of the remote controller, hold the X key and then short-press the Home key to power on; the No. 4 light staying on indicates it is connected;
③ Ensure the wiring order of the 4 motors:
Front-left wheel to M1, front-right wheel to M4

Rear-left wheel to M2, rear-right wheel to M3
④ Press the left forward key; all 4 wheels should rotate forward. If not, swap the positive and negative terminals of that motor's power cable until all 4 wheels rotate forward;
⑤ The configuration is now complete; you can control the car according to the remote controller instructions at the bottom of this document.
3. Load Capacity Notes
The maximum tested load of 25 kg is measured with a full battery and motors with a 1:90 gear ratio. For long-term use, to extend the service life of the motors and tires, please reduce the load as appropriate:
-
1:90 motor: recommended within 15 kg
-
1:30 motor: recommended within 8 kg
4. Remote Controller Instructions
The factory default simple code uses the following PS2 gamepad control logic:
-
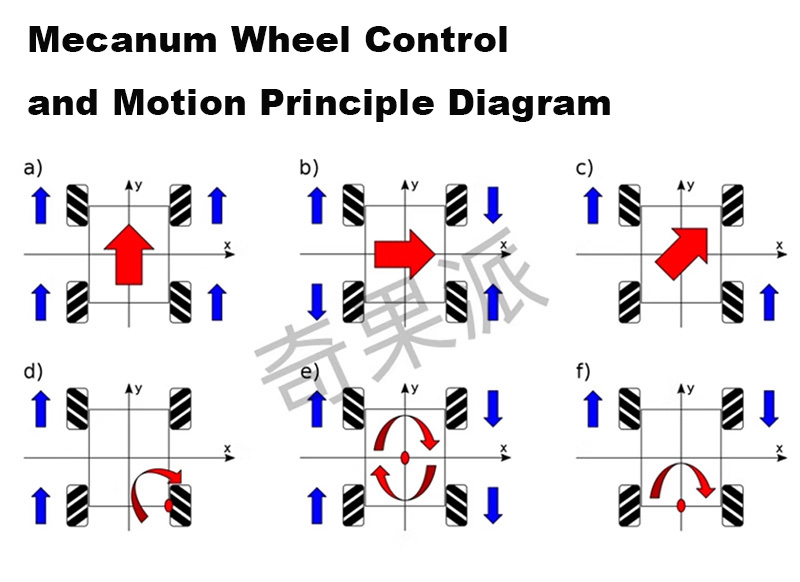
Directional pad: controls the car's forward/backward movement and left/right turning
-
Left index-finger key 1: lateral movement to the left
-
Right index-finger key 1: lateral movement to the right
-
Left index-finger key 2 + forward: the car moves diagonally to the left
-
Right index-finger key 2 + forward: the car moves diagonally to the right
-
Two joysticks: control the rotation of the 2 servos respectively
If the vehicle's control performance is not good, you can download the factory source code below; it includes encoder closed-loop control code.
Or use the flashing tool we provide to upload it: Flashing Tool Download. Select UNO as the board and Universal Program as the program.
- Mode key: connect the device
- Select key: switch between Mecanum wheel mode and rubber wheel mode
- Start key: trigger self-check
- Mecanum wheel mode by default
- Left joystick: calculates the speed based on the joystick's tilt — forward/backward and lateral movement
- Right joystick: left/right turning
- Rubber wheel mode
- Left joystick: calculates the speed based on the joystick's tilt — forward/backward and left/right turning
- Right joystick: idle
- Upper row of index-finger keys controls the maximum speed: the left key decreases it by 5%, the right key increases it by 5%
- Lower row of index-finger keys: controls servo No. 4
- Button Y: pulls pin 45 high; button A: pulls pin 45 low
- Buttons X and B: control servo No. 3
- Directional pad: controls servos No. 1 and No. 2
- Left joystick button: engage the parking brake; right joystick button: release the parking brake