Environment Setup
Setting Up the Development Environment
Before starting to build the project, you need to make some preparations first. This is very important and cannot be skipped.
1. Installing Thonny (Important)
Thonny is a free, open-source software platform with a small size, a simple interface, and rich features, making it a Python IDE suitable for beginners. In this tutorial, we use this IDE to develop ESP32 throughout the whole process. Thonny supports multiple operating systems, including Windows, Mac OS, and Linux.
1. Download the Thonny software:
It is recommended to click the links below to download and install directly according to your system.
| Operating System | Download Link/Method |
|---|---|
| Windows: | Click to download the Windows installer |
| MAC OS: | Click to download the Mac installer |
| Linux: | Latest version: (as follows) |
|
|
| Thonny's open-source code repository: https://github.com/thonny/thonny/releases/ |
2. Installing Thonny on Windows:
A. The downloaded Thonny icon is as follows.
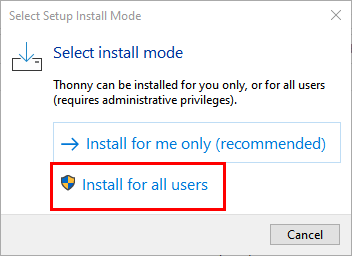
B. Double-click "thonny-4.0.2.exe", and the following dialog box will appear. Here I choose " " to operate. You can also choose "
 " to operate.
C. If you are not familiar with installing computer software, you can keep clicking "Next" until the installation is complete.
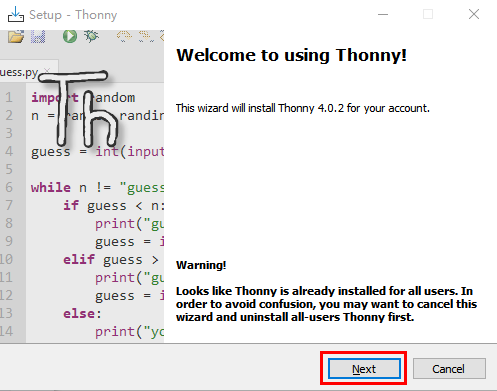
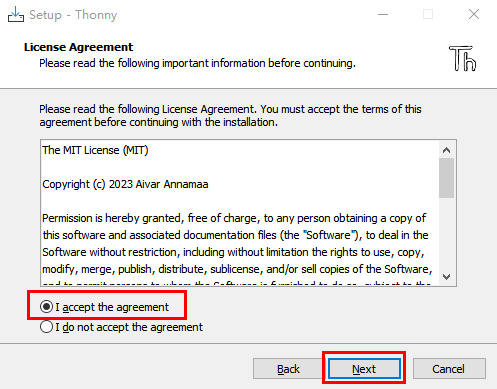
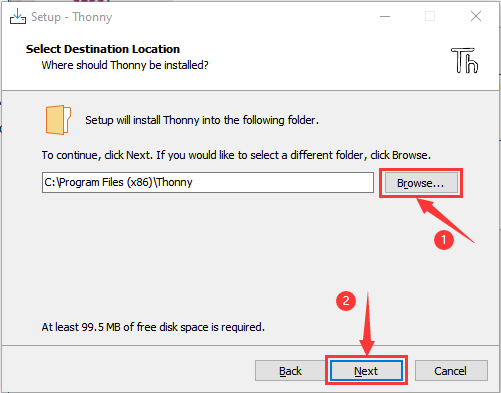
D. If you need to change the installation path of the Thonny software, you can click "Browse..." to modify it. After selecting the installation path, click "OK".
If you do not want to change the installation path, just click "Next"; then continue clicking "Next".
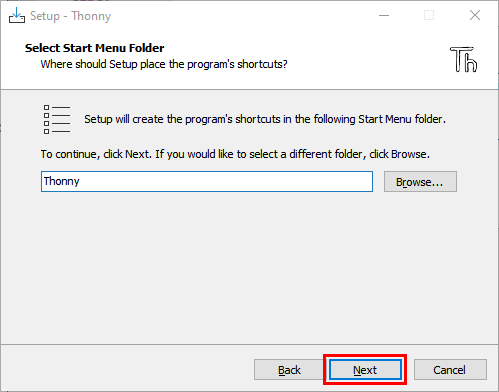
E. Check "Create desktop icon", and the Thonny software will create a shortcut on your desktop, making it convenient for you to open Thonny later.
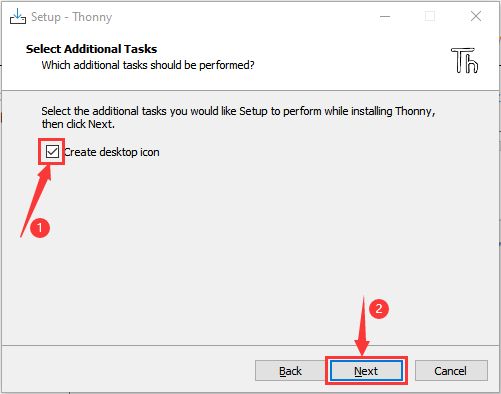
F. Click "Install" to install the software.
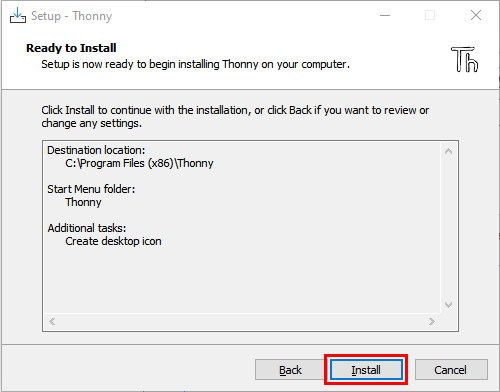
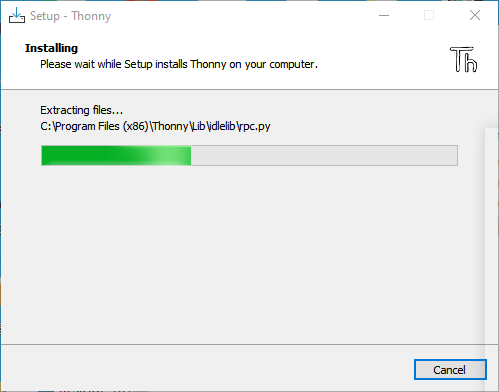
G. During the installation, you only need to wait for it to finish. Never click "Cancel", otherwise the installation will fail.
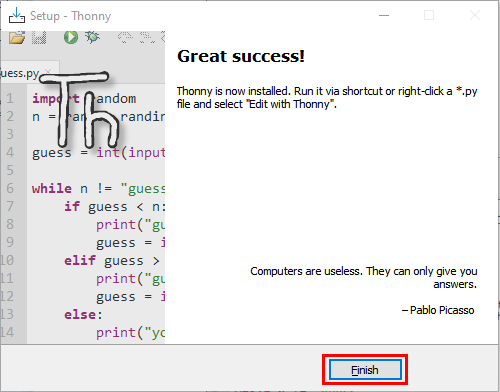
H. Once you see the following interface, it means the Thonny software has been installed successfully. Just click "Finish".
I. If you checked "Create desktop icon" during installation, you can see the following icon on the desktop.

2. Basic Configuration of Thonny
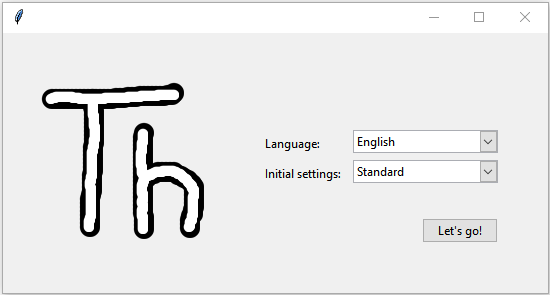
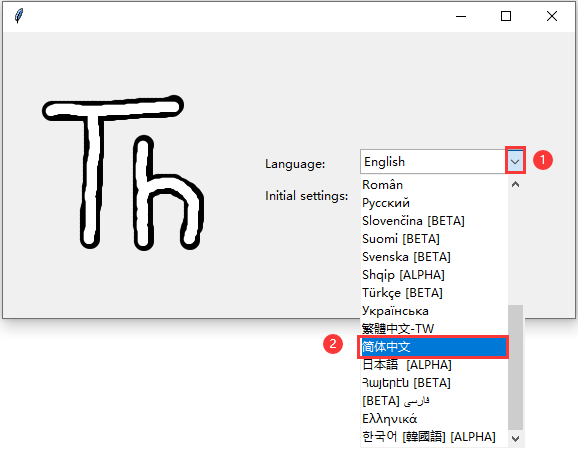
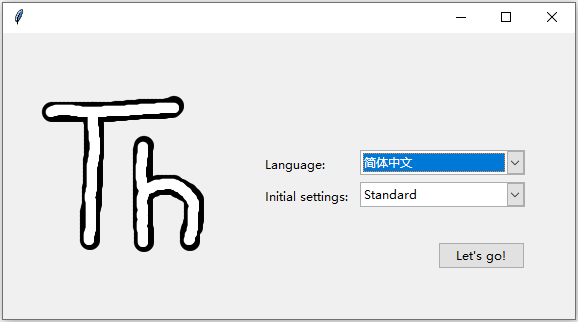
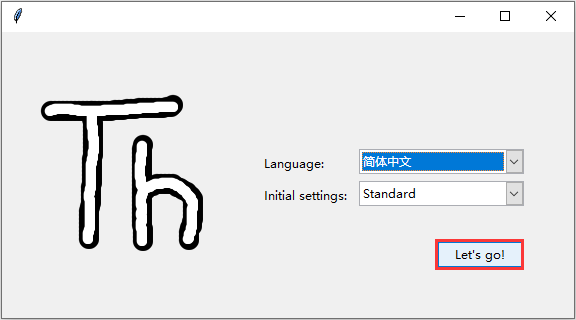
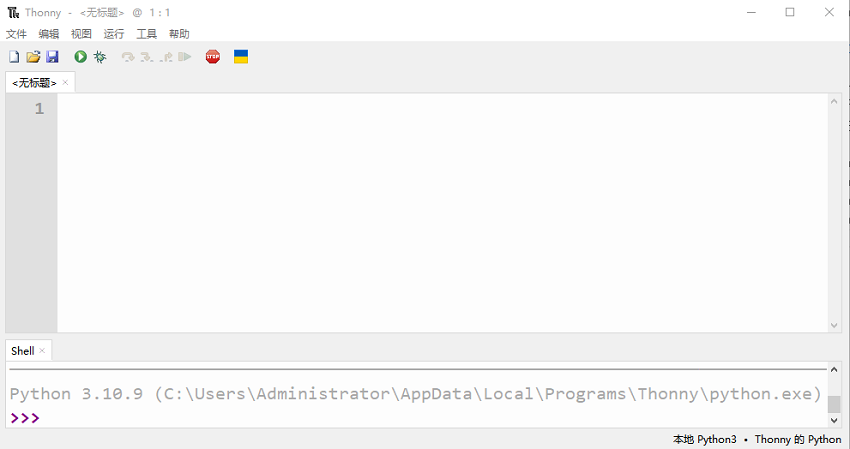
A. Double-click the Thonny desktop icon to see the following interface. You can also select the language (select Simplified Chinese here) and make initial settings. When finished, click "Let’s go!".
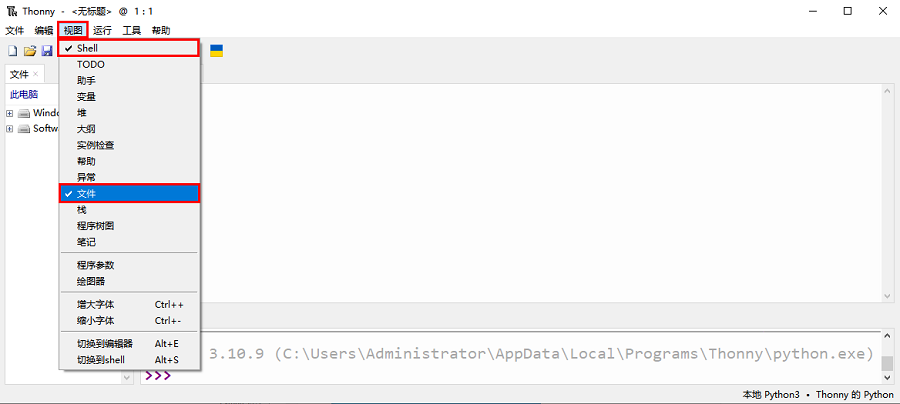
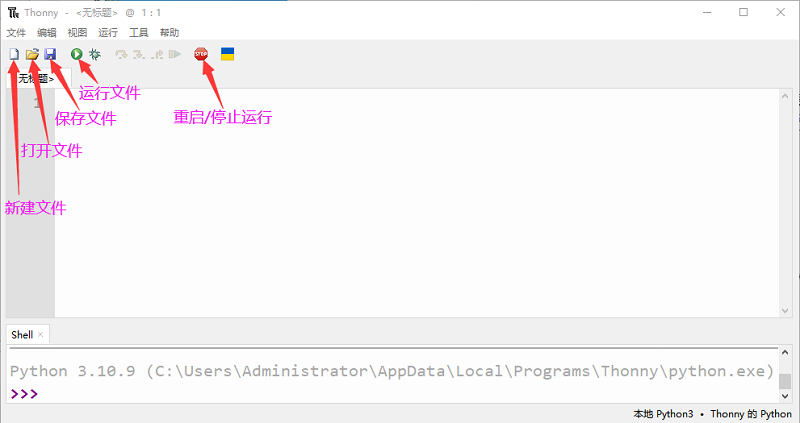
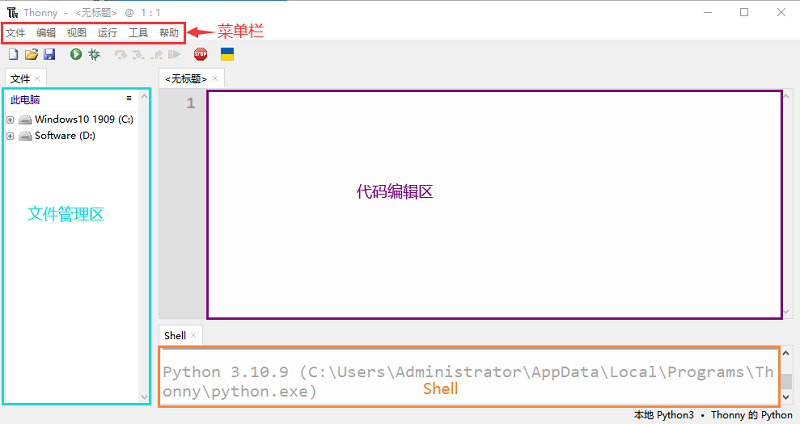
B. Select "View" → "Files" and "Shell".
3. Installing the CP2102 Driver
The ESP32 downloads code through the CP2102 driver. So before using it, we need to install the CP2102 driver on the computer.
Windows System
Check whether the CP2102 driver is already installed.
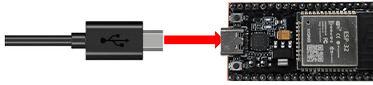
- Connect the computer and the ESP32 with a USB cable.
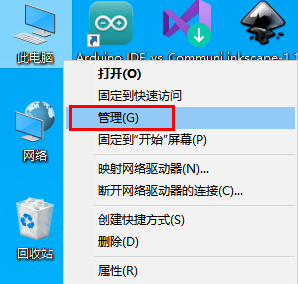
- Enter the computer's main interface, select "This PC", right-click and select "Manage".
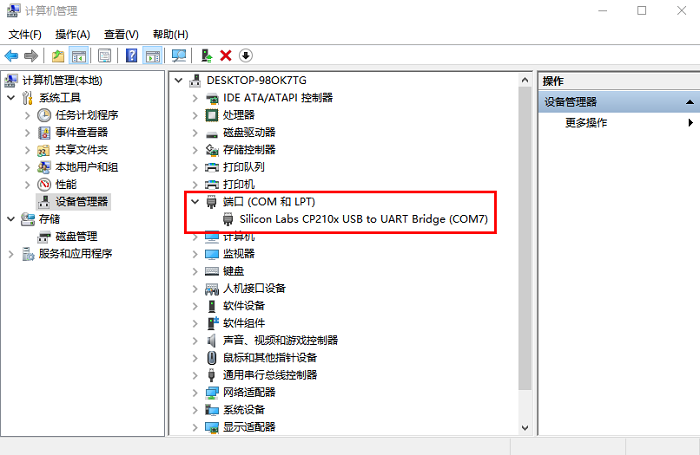
- Click "Device Manager". If your computer already has the CP2102 driver installed, you can see "Silicon Labs CP210x USB to UART Bridge(COMx)".
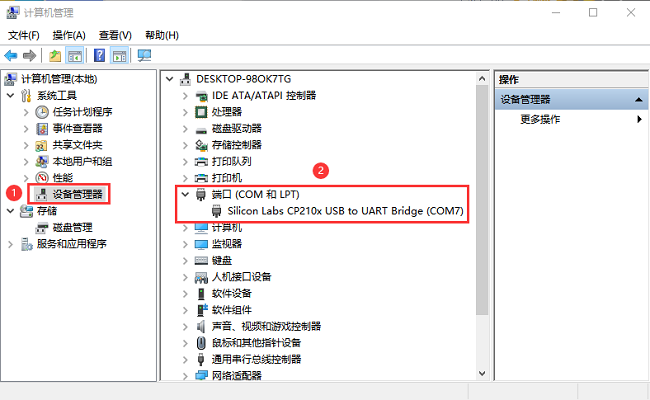
Installing the CP2102 Driver
- If the CP2102 driver is not installed, the interface is displayed as follows.
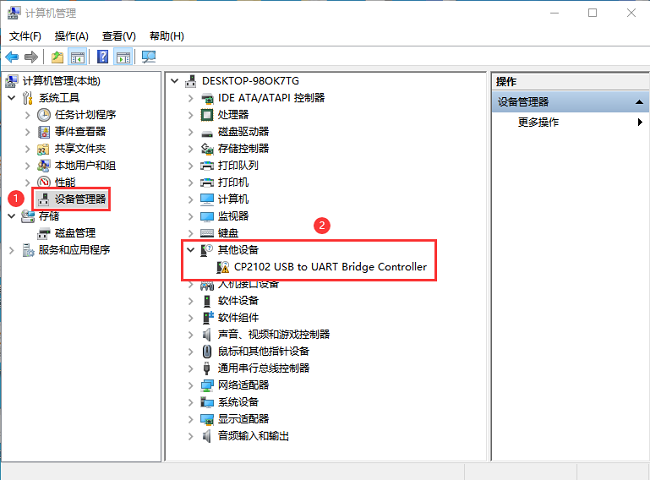
- Click "CP2102 USB to UART Bridge Controller", right-click and select "Update driver (P)".
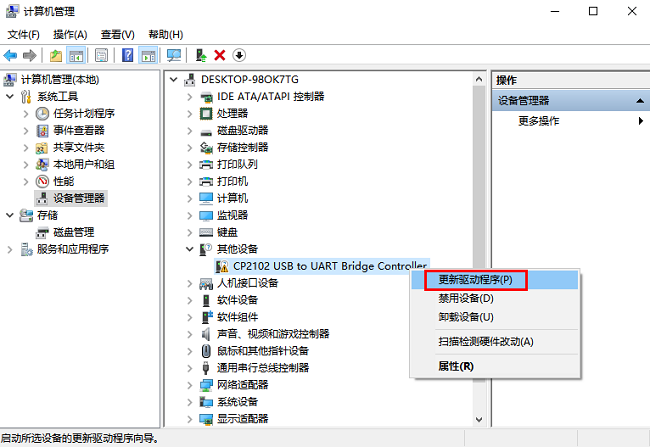
- Click "Browse my computer for driver software (R)".
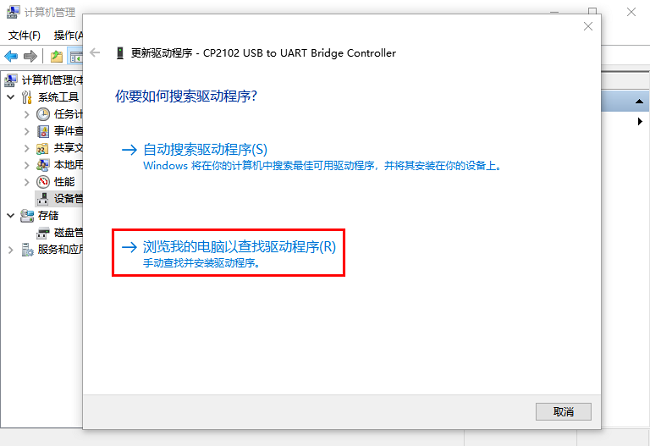
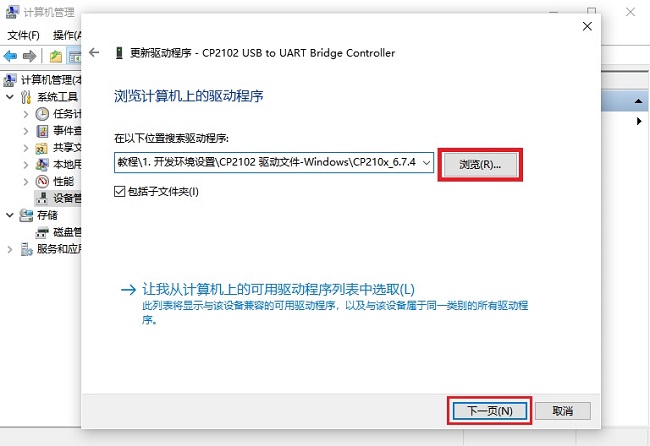
- Click "Browse (R)..." to select CP210x_6.7.4 (driver path: ..\additional-resources\CP2102-driver\CP2102-driver-Windows), then click "Next".
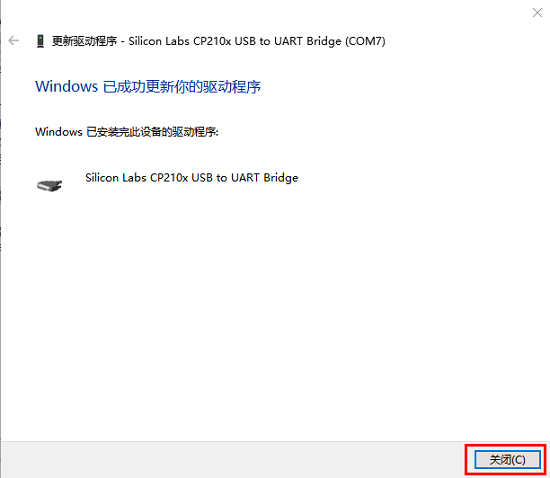
- Wait for the CP2102 driver installation to finish. When the interface displays as follows, it means the CP2102 driver has been installed. You can close this interface.
- When the ESP32 is connected to the computer, the interface displays as follows.
MAC System
For the method of installing the CP2102 driver, please refer to the "Development Environment Setup" section in the "Arduino C Tutorial Windows System" tutorial.
4. Flashing the MicroPython Firmware (Important)
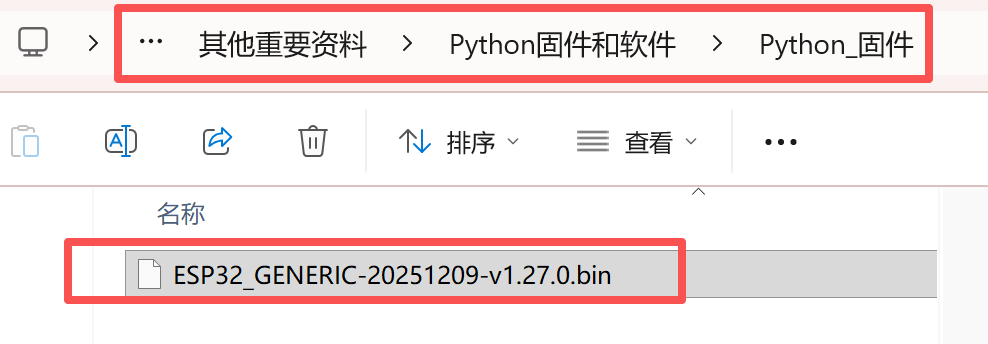
To run Python programs on the ESP32 board, we need to first flash the firmware onto the ESP32 board.
This firmware is provided in our folder. Left navigation: Resource Download - Other Important Resources.
Flashing the MicroPython Firmware
Connect the computer and the ESP32 board with a USB cable.
Make sure the driver has been installed successfully and the COM port can be recognized correctly. Open Device Manager and expand "Ports (COM & LPT)".
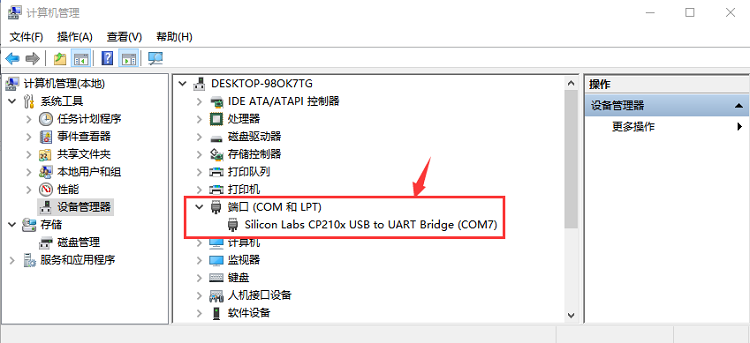
Note: Different computers may have different COM ports, which is normal.
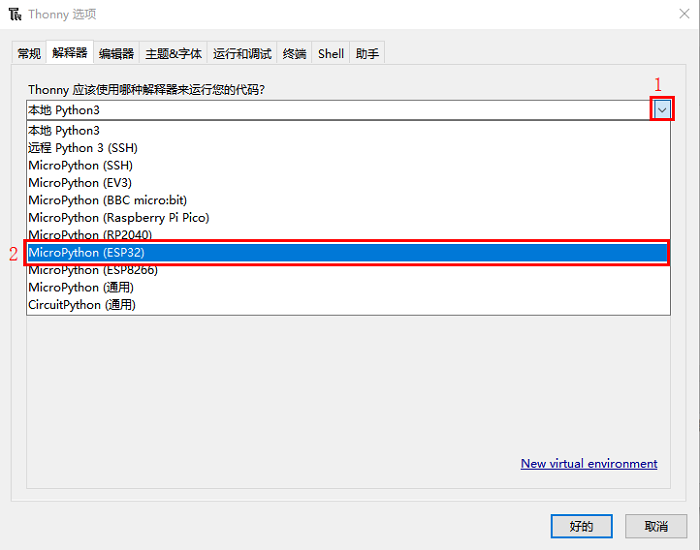
- Open Thonny, click "Run", and select "Configure interpreter".
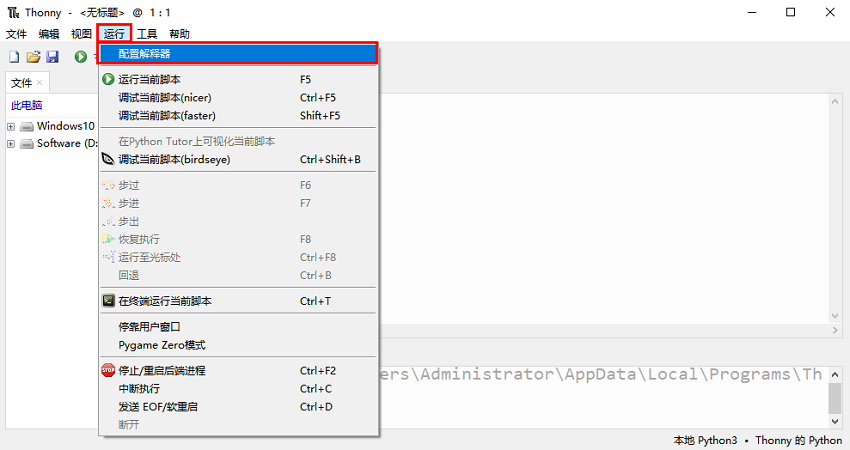
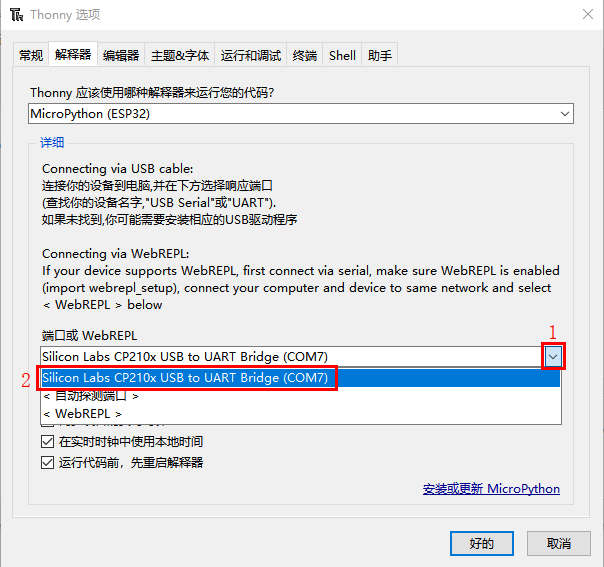
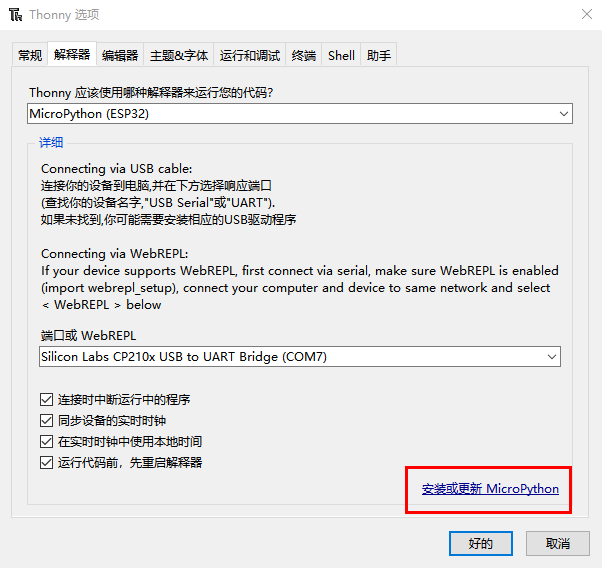
- Select "MicroPython (ESP32)", select "Silicon Labs CP210x USB to UART Bridge(COM7)", and then click "Install or update MicroPython".
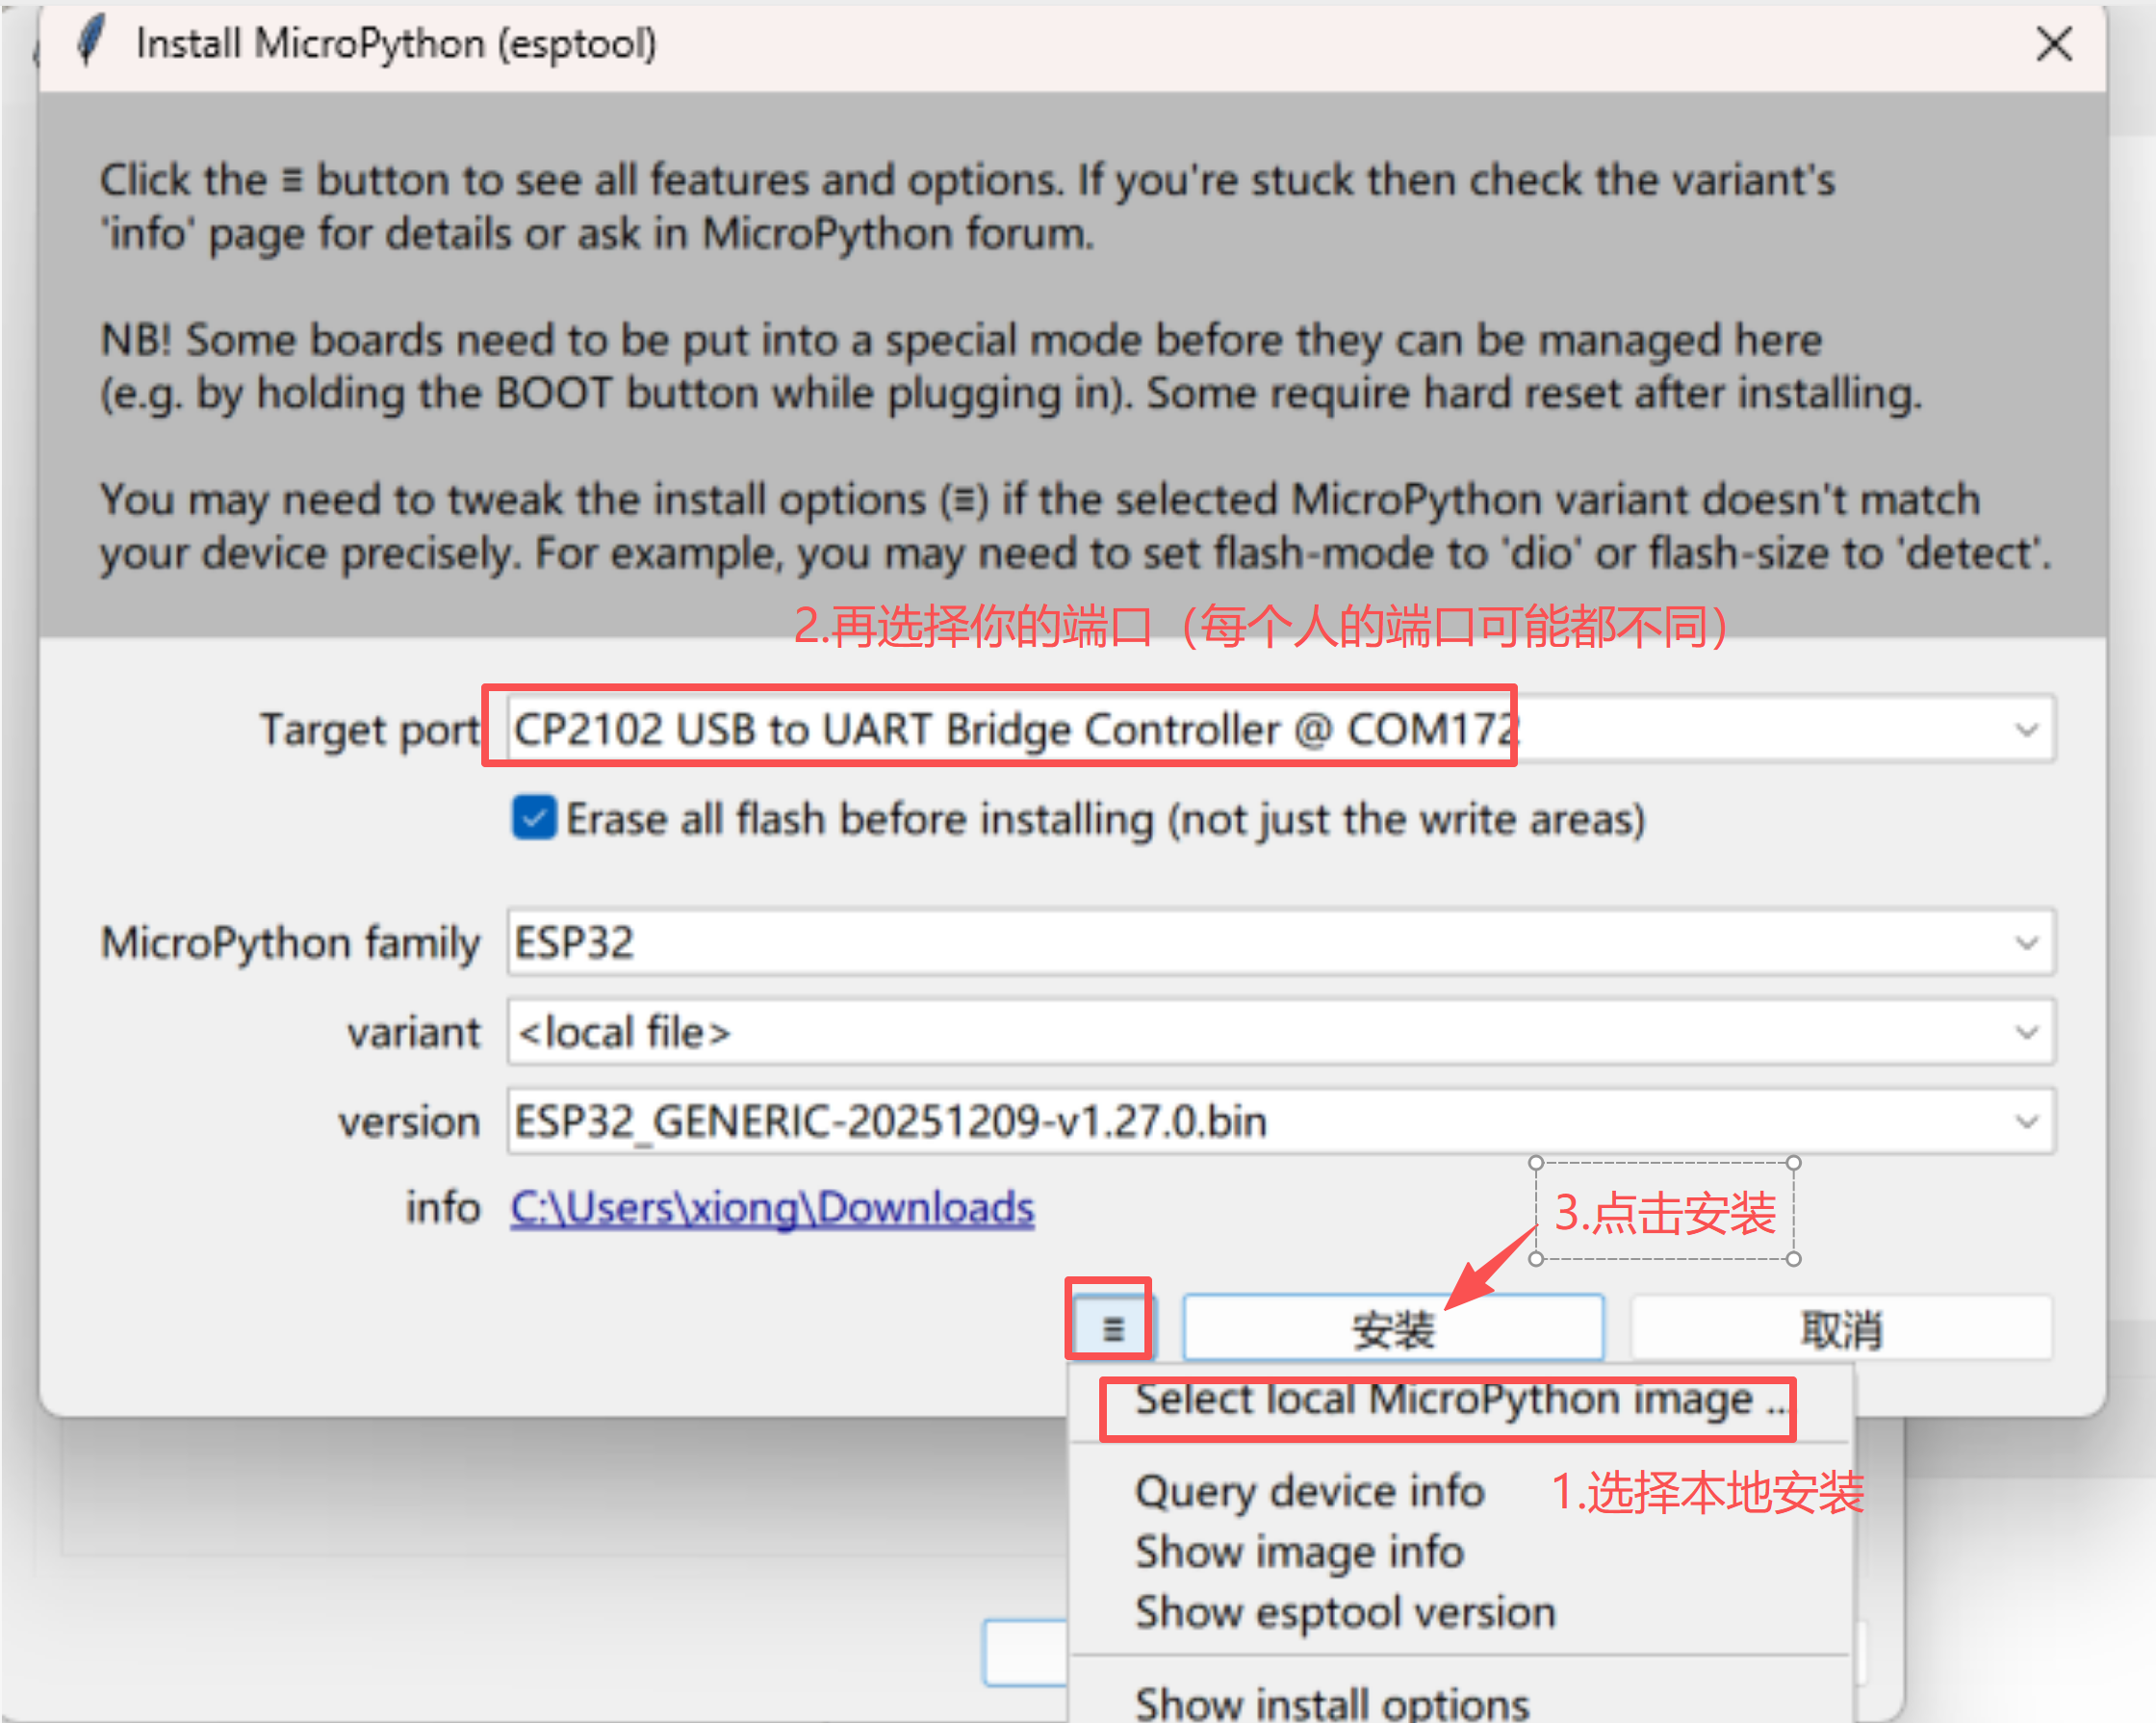
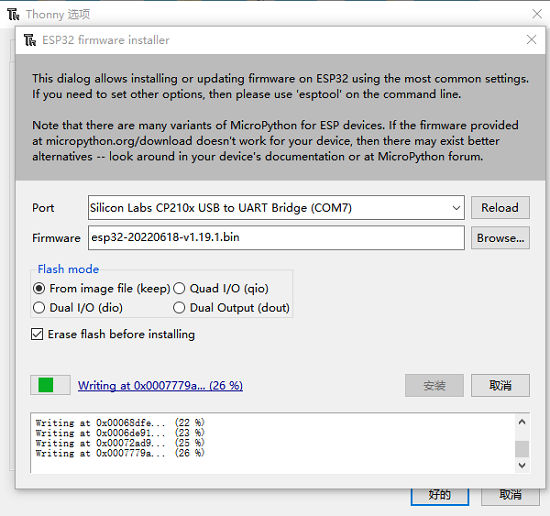
- A dialog box pops up as follows. Please install as shown in the figure below. Note: If the firmware installation fails, click "Install" again, then hold down the Boot button on the ESP32 board
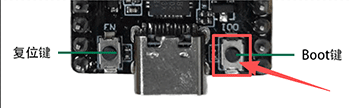 , and release the Boot button once the upload progress percentage appears.)
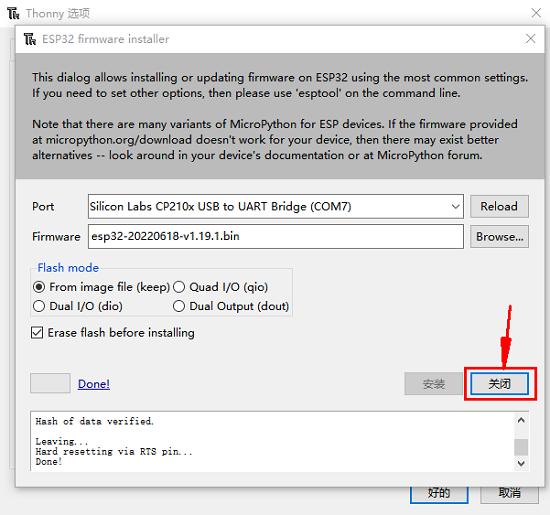
- Wait for the installation to finish. After the installation is complete, click "Close" first, then click "OK".
- Close all dialog boxes, return to the main interface, and click "
 ". As shown below:
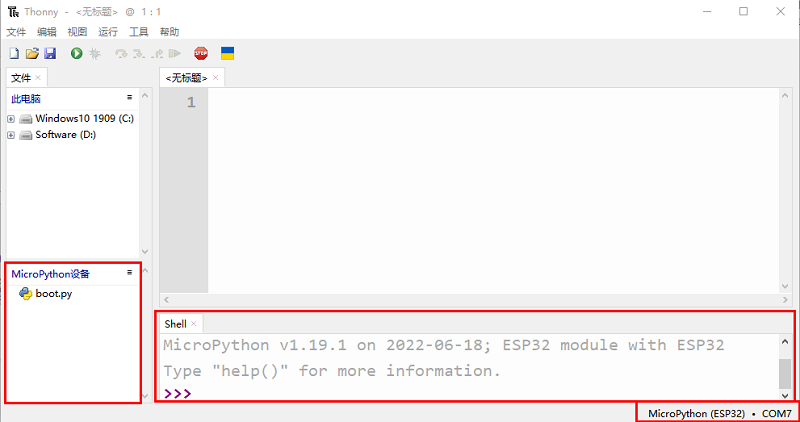
- So far, all preparations are ready.
5. Test Code
Testing Shell Commands
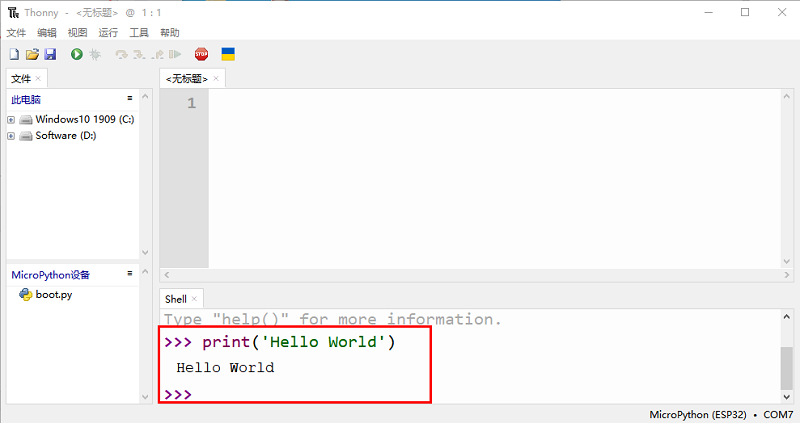
Enter "print('hello world')" in the "Shell" window and press Enter. If the environment is normal, "hello world" will be printed on the next line.
Run Online
The ESP32 runs online when it is connected to the computer. Users can use Thonny to write and debug programs.
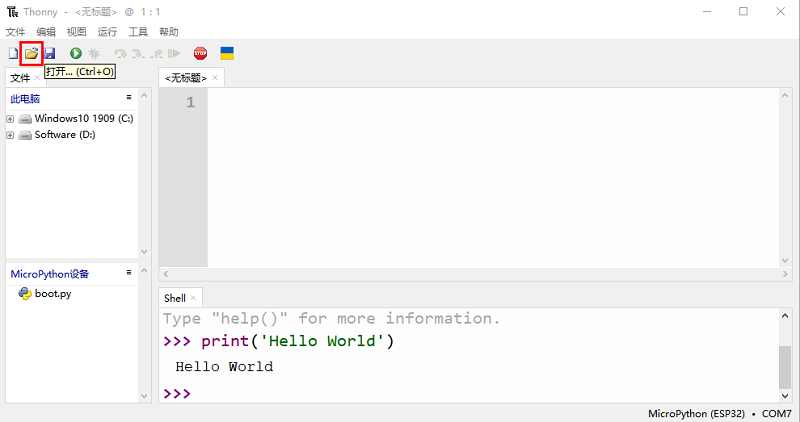
- Open Thonny and click
 "Open".
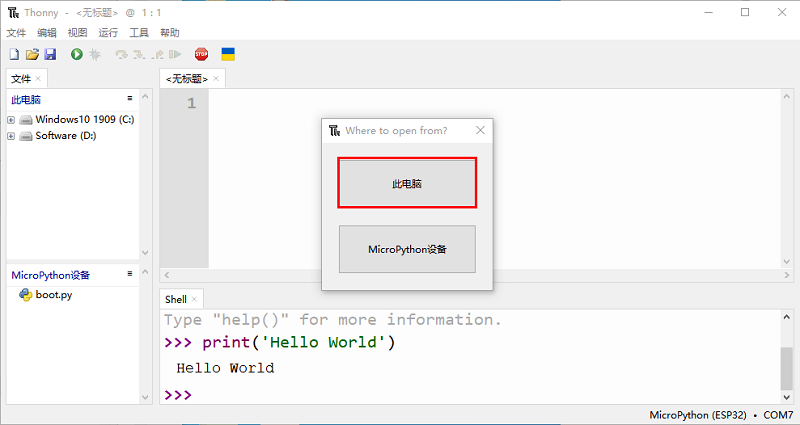
- In the new pop-up window, click "This PC".
In the new dialog box, at the path: "..\program-code\python-code\project-01-Hello World", select "Project_01_HelloWorld.py".
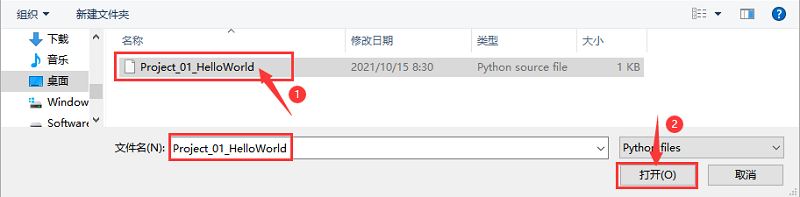
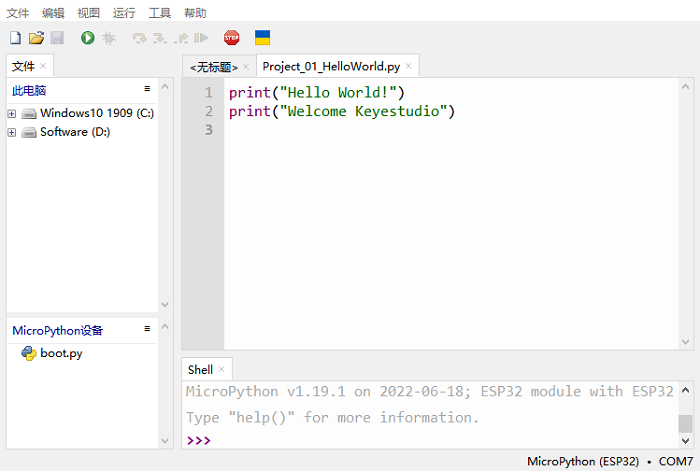
Click  , and "Hello World" will be printed in the "Shell" window.
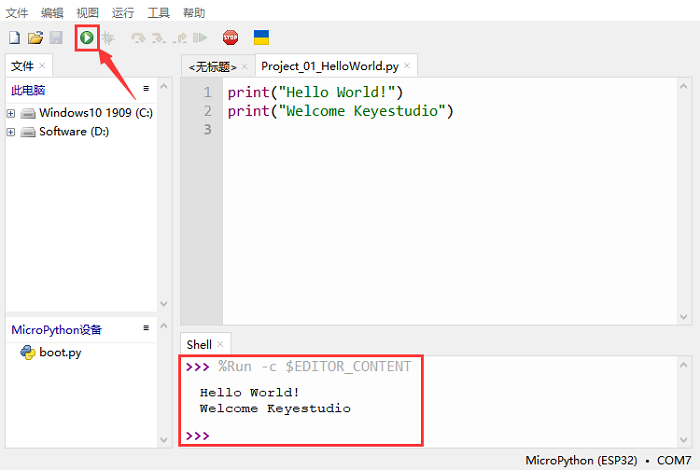
Note: When running online, if you press the ESP32's reset button, the user's code will not be executed again.
6. Common Thonny Operations
The code used in this tutorial is saved at (i.e., the path): "..\program-code\python-code".
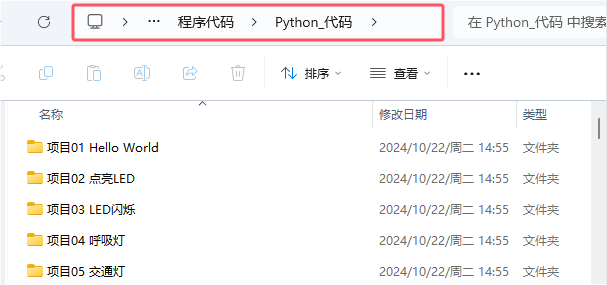
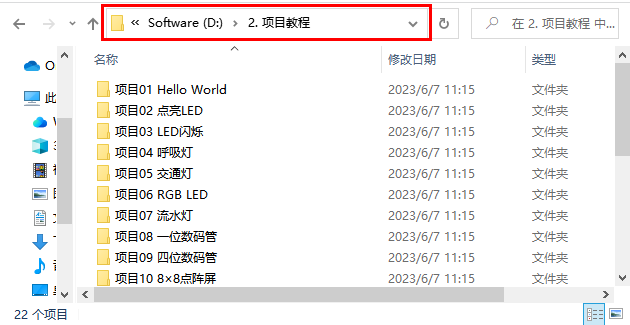
You can move the code anywhere. For example, we save the code on Drive D, at the path D:\2. Project Tutorial.
Uploading Code to the ESP32
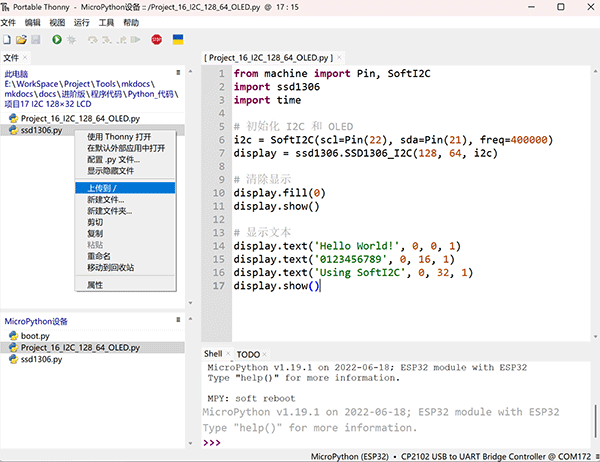
For convenience, we take "Project 16 OLED Display" as an example. In the "Project 16 OLED Display" folder, select "lcd128_32.py", right-click the mouse, and select "Upload to/" to upload the code to the root directory of the ESP32.
Downloading Code to the Computer
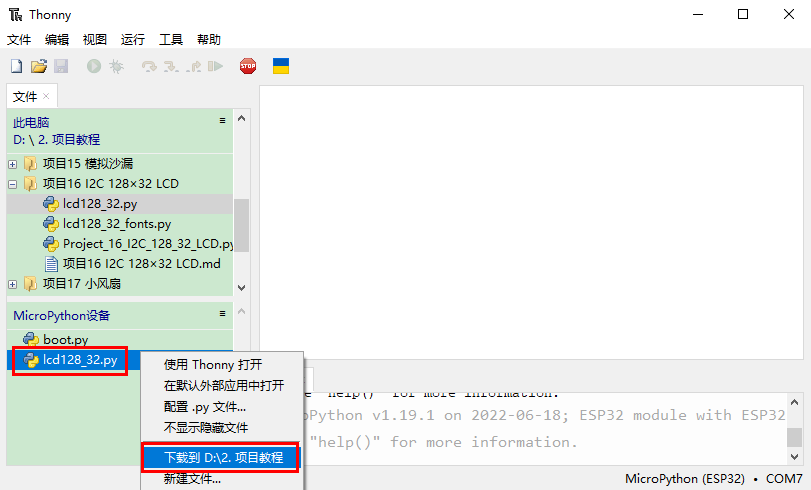
In "MicroPython device", select "boot.py", right-click and select "Download to..." to download the code to your computer.
Deleting Files in the ESP32 Root Directory
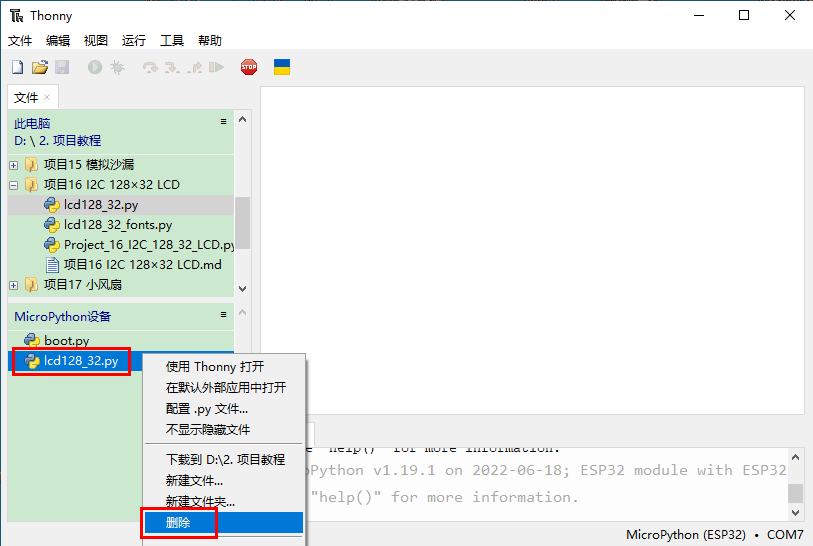
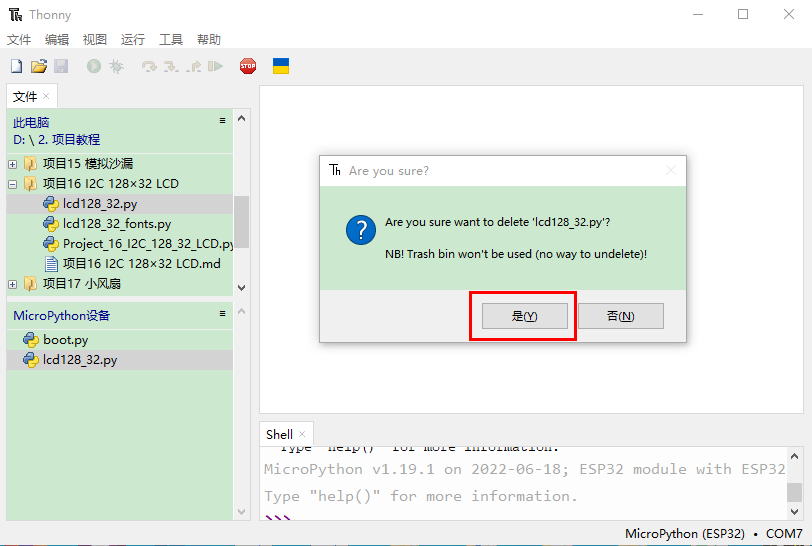
In "MicroPython device", select "lcd128_32.py", right-click it and select "Delete" to delete "lcd128_32.py" from the root directory of the ESP32.